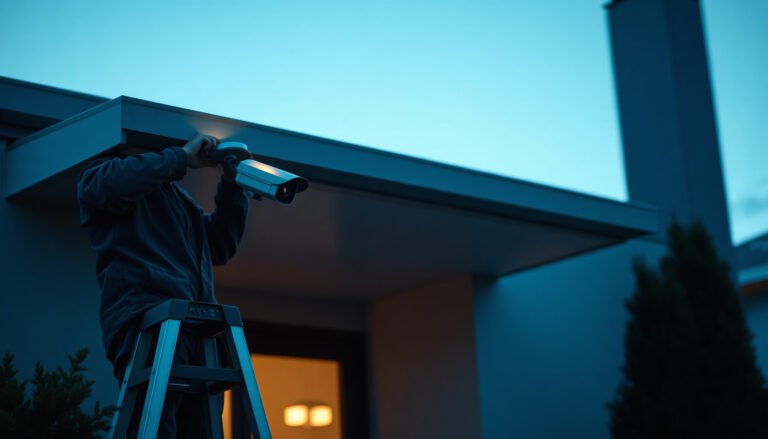

Setting up a Dahua CCTV camera can feel intimidating because you have to get the network details, app or NVR connection, and basic settings right in the correct order. The good news is you can complete a working installation in about 30–60 minutes if you have the camera, a power supply/PoE, an Ethernet cable (or Wi‑Fi model), and access to the Dahua software/app or your NVR. Follow the steps and you will end up with live video on your phone or monitor and the first alerts configured correctly.
Setting up a Dahua CCTV camera is easiest when you follow the same order every time: mount the camera, connect power, then do the network setup using the Dahua web interface or the supplied NVR/app. If you’re not sure where to start, begin by making the camera reachable on your local network (IP, subnet, and gateway), because that’s what unlocks configuration.
This guide is for homeowners, small offices, and DIY installers who want a straightforward path from “box on the floor” to “live view working.” It’s also helpful when you’re using a Dahua NVR/DVR or plugging the camera into your existing router setup.
Gather the essentials before you start
Set yourself up for success by confirming the model, power method, and your intended control point (web vs NVR). Once these basics are clear, the rest of the Dahua CCTV camera setup becomes a repeatable checklist rather than a guessing game.
What you should verify on day one (so you don’t rework later)
Before touching a screw or cable, confirm:
– Dahua camera model (for example, turret vs bullet, PoE vs non-PoE, and whether it supports web access).
– Power method: PoE (Power over Ethernet) or a dedicated power adapter.
– Your workflow: are you configuring direct-to-web, or pairing with a Dahua NVR/DVR?
If you’re using PoE, remember power is not just “on/off”—it’s delivered over the same Ethernet cable, which affects what switches/ports you should use and what budget you need.
Network details you’ll need (local IP reachability)
To make the Dahua CCTV camera reachable, gather:
– Your router’s IP range and subnet (for example, a typical home LAN uses /24).
– Whether DHCP is enabled (DHCP automatically assigns an IP address).
– Your PC/laptop network adapter settings (so your device and the Dahua camera end up on the same subnet).
According to RFC 1918, private IPv4 ranges commonly used in homes and small offices are 10.0.0.0/8, 172.16.0.0/12, and 192.168.0.0/16. That matters because Dahua discovery via the web interface usually requires the camera and your computer to be able to reach each other on the same local network.
Basic tools that reduce downtime
Have these ready:
– Drill/anchors (only if mounting)
– Ethernet cable (for PoE) and a short patch cable for initial testing if possible
– A phone or laptop to log in via the Dahua web interface or the Dahua app
– A labeling marker for cables (future-you will thank you when troubleshooting)
Mount the camera the “right way” the first time
Mounting correctly determines whether you get usable footage, whether motion alerts work well, and how painful future maintenance will be. For Dahua CCTV camera installs, the fastest path is to aim for clean coverage now—then fine-tune angle after the camera is accessible on the network.
Positioning for coverage and image clarity
Choose a location that:
– Covers the areas you actually care about (doors, driveways, entry paths).
– Avoids backlighting (aiming into bright windows or direct sunlight), because exposure changes can wash out faces and reduce motion detection accuracy.
– Keeps the camera’s field of view unobstructed by tree branches, signage, or nearby walls.
In my experience installing Dahua CCTV cameras for small businesses, the “camera looks fine at first glance” problem often comes down to angle and glare—not settings.
Secure mounting and cable routing
Do not treat the camera bracket like a cosmetic step. Secure the base and route cables so:
– Connections are protected from water intrusion (use appropriate sealing methods for your mounting type).
– Cable strain is minimized near the connector.
– The cable path matches your weather conditions (especially for exterior deployments).
If your Dahua model supports rotation/adjustment, set a rough angle during mounting so that once you access live view, you can quickly verify alignment.
Final alignment before you lock it down
Before tightening everything permanently:
– Make sure you can still swivel/tilt the Dahua CCTV camera to frame the scene.
– Confirm you’re able to reach the network and power connections comfortably.
Connect power and verify the camera comes online
Powering correctly is what transitions your Dahua CCTV camera from “hardware in the box” to “a device you can configure.” The key goal in this step is simple: confirm stable link/activity, then locate its IP so the web interface or NVR pairing can start.
If it’s a PoE Dahua camera
Connect the Dahua CCTV camera to:
– A PoE switch, or
– A PoE-capable port on your PoE NVR, or
– Another PoE source your network already uses.
PoE is standardized—so power delivery expectations are predictable. According to IEEE 802.3af (PoE), the maximum PSE (switch) output is 15.4 W per port (with a lower power delivered to the device). If you’re using PoE+, the headroom is higher (see below).
According to IEEE 802.3at (PoE+), the maximum PSE output is 30 W per port. That distinction matters when multiple cameras are powered from the same switch and you need stable startup behavior.
Once connected:
– Wait for link/activity indicators (on the camera and/or PoE switch).
– Confirm the link is stable—not constantly negotiating.
If it’s an adapter-powered Dahua camera
Use the correct approved power supply and ensure:
– The adapter’s rating matches the camera’s requirements.
– The cable isn’t under stress near the connector.
– Status LEDs indicate a normal boot state.
If you can’t find the device yet
When a Dahua CCTV camera doesn’t appear on your network:
1. Re-check cabling and try a different switch/router port path.
2. Confirm PoE switch status (or adapter output).
3. Only after that, revisit network settings (IP/subnet/gateway), because changing settings too early can mask the real cabling/power issue.
Do the Dahua network setup (IP, web access, and NVR pairing)
You get the “easiest setup” result by making the Dahua CCTV camera reachable on your local network first, then finishing configuration through the Dahua web interface or via your Dahua NVR/DVR. If the camera is reachable, most other configuration steps become straightforward menus.
Step 1: choose DHCP or a static IP (quick decision)
Start with your tolerance for change:
– Use DHCP for speed.
– Use static IP if you want predictable access after reboots.
Here’s a comparison that helps you decide without overthinking:
| Method | Best For | Pros | Cons |
|---|---|---|---|
| **DHCP** | First-time installs and quick demos | Usually fastest to get live view; fewer manual settings | Camera IP can change after network changes/reboots |
| **Static IP** | Small offices that want consistent access | Stable addressing for web access, NVR adding, and documentation | Requires correct IP/subnet/gateway math; more setup steps up front |
Step 2: access the camera through the Dahua web interface or NVR
From a practical standpoint, you’ll either:
– Open the Dahua web interface using the camera’s IP (direct-to-web), or
– Use your Dahua NVR/DVR “add camera” workflow (pairing via the NVR)
If you can’t reach the web interface yet, it almost always comes down to one of these:
– Wrong subnet alignment (your PC and camera aren’t in the same local network)
– Incorrect gateway assumption
– Trying the wrong access method (web vs NVR pairing)
Step 3: set core basics early (so recording and alerts behave)
Once you can access the Dahua CCTV camera, configure the essentials while you’re already logged in:
– Admin credentials (change default credentials immediately)
– Stream settings (main/sub stream where applicable, especially if your NVR uses dual streams)
– Recording target (NVR storage settings if using NVR; otherwise the device/local setting options)
A key workflow tip: finish IP setup first, then adjust video/streaming only after you’ve confirmed you can reliably open the live view in your browser/app.
Common LAN Subnet Sizes for Local Dahua Camera Reachability (IPv4)
| # | LAN prefix (CIDR) | Subnet mask | Usable hosts | Local setup headroom |
|---|---|---|---|---|
| 1 | /30 | 255.255.255.252 | 2 | ★☆☆☆☆ |
| 2 | /29 | 255.255.255.248 | 6 | ★★☆☆☆ |
| 3 | /28 | 255.255.255.240 | 14 | ★★★☆☆ |
| 4 | /27 | 255.255.255.224 | 30 | ★★★★☆ |
| 5 | /26 | 255.255.255.192 | 62 | ★★★★☆ |
| 6 | /25 | 255.255.255.128 | 126 | ★★★★★ |
| 7 | /24 | 255.255.255.0 | 254 | ★★★★★ |
Configure recording and alerts without overcomplicating
You should configure recording and alerts only after the Dahua CCTV camera is reliably reachable and streaming, because otherwise troubleshooting becomes intertwined. The goal is stable live view first, then intentional recording behavior.
Recording setup: keep it deterministic
If your Dahua NVR/DVR is doing the recording:
– Confirm the correct channel (many “no recording” issues are just channel mismatch).
– Choose a recording schedule (continuous, motion-based, or a blend depending on the model).
– Verify the storage destination on the NVR/DVR (internal drives, RAID setup if applicable, and available capacity).
If your Dahua camera is recording via settings on the camera itself (varies by model), ensure the storage options match your intended behavior.
Motion detection: reduce noise with zones and sensitivity
When motion alerts trigger too often, you’ll end up ignoring them—so tune with care:
– Create detection zones that exclude cars on the street, passing shadows, or foliage.
– Adjust sensitivity gradually instead of making big jumps.
– Test during the times you care about most (daylight glare vs nighttime IR behavior can change results).
As of 2026, most Dahua CCTV motion workflows follow the same principle: fewer “areas of change” leads to fewer false positives, even if sensitivity is high.
Keep settings lean
Turn on only what you actually use. For example, if you don’t rely on motion event recording, don’t invest time in complex event rules yet. Stable operation beats feature overload—especially when you’re still learning the Dahua NVR/DVR interface.
What can go wrong (and how to avoid it)
Most setup failures come from network reachability errors, mismatched pairing/channel settings, or assuming DHCP/static IP will behave “like magic.” If you treat Dahua CCTV camera configuration as a sequence—power → reachability → live view → recording—you can avoid most dead ends.
Camera not reachable on the network
If your browser or app can’t find the camera:
– Subnet mismatch is the most common root cause (your PC and Dahua CCTV camera are not in the same local network).
– Blocked ports or incorrect access method can also cause confusion (trying direct web when the NVR pairing is required, or vice versa).
“Online” but no video
When the Dahua camera says it’s online but you don’t see video:
– Check the NVR channel mapping and stream selection.
– Verify Ethernet termination quality (bad crimping, damaged cable, or wrong cable type can create partial connectivity).
Confusing DHCP vs static IP
A classic trap is DHCP: the camera’s IP can change after reboots or router/network restarts. When that happens, you may think your Dahua CCTV camera setup failed, when it simply moved to a new IP address. If stability matters, assign a static IP after your first successful discovery.
Router/app access issues (remote viewing)
Remote access is usually a separate phase after local live view works. Handle it by aligning your router settings with Dahua’s remote viewing method, which varies by model/firmware (). In practice, many users resolve remote-view problems only after confirming the camera is stable on the LAN for several minutes and can be reached consistently by the same device.Verdict: the easiest approach (with downsides)
If you want the easiest setup, prioritize local connectivity first: mount, power, confirm the camera is online, then configure networking and (if applicable) add it to your Dahua NVR/DVR. The downside is that this approach can feel “basic” if you were hoping for instant remote viewing—remote access usually takes an extra step after local video is stable, and some models require specific app/NVR workflows that vary by firmware ().
If you need guaranteed “remote working” on day one, you’ll likely still have to follow through on port-forwarding, DDNS, or the vendor’s recommended remote access route after local configuration completes—so the local-first approach can still be the fastest overall, but not the shortest path to remote.
Quick checklist (scan and save)
– [ ] Mount camera and route cables securely
– [ ] Power it correctly (PoE switch/NVR port or approved adapter)
– [ ] Confirm camera is online (LEDs/network visibility)
– [ ] Set IP (DHCP for quick start, static if you want consistency)
– [ ] Log in to the Dahua web interface or add to NVR/DVR
– [ ] Set admin password and basic stream/recording settings
– [ ] Test live view and (if enabled) motion/alerts
Frequently Asked Questions
What is the easiest way to set up a Dahua CCTV camera?
The easiest way is to start with the Dahua NVR or the Dahua mobile app, then connect the camera using PoE (Power over Ethernet) if available. Use the NVR’s “Add Camera” or let the app discover the device automatically, which eliminates most manual IP configuration. After the camera is online, adjust recording settings, alert zones, and motion detection to match your layout, then test live view and playback.
How do I set up a Dahua CCTV camera using PoE step-by-step?
Connect the Dahua CCTV camera to a PoE switch or PoE NVR with one Ethernet cable, and power it on. In the NVR menu, run camera discovery or add the camera by selecting the detected channel, then confirm the stream is stable in Live View. Finally, set resolution and frame rate, confirm the network settings are correct, and verify motion recording by walking through the camera’s view.
Which Dahua setup method is best for beginners: NVR, direct-to-router, or Wi-Fi?
For most beginners, a Dahua NVR with PoE is usually the easiest because it centralizes power, video storage, and management in one place. If your model supports Wi-Fi, direct-to-router setups can be simpler but require stronger Wi-Fi coverage and correct network configuration. Direct-to-router or app-based setups are convenient, but they’re more sensitive to signal strength, firewall settings, and IP compatibility.
Why won’t my Dahua CCTV camera show up in the NVR app or monitor?
The most common causes are incorrect cabling/power, using the wrong port on a PoE switch, or the camera not receiving stable power. Network issues—like being on a different subnet, duplicate IPs, or incorrect DHCP settings—can also prevent discovery. Confirm the camera is getting power, check link/activity lights, then run discovery again or use SADP/Dahua tools to verify the camera’s IP address before adding it to your Dahua NVR.
What settings should I change first after installing a Dahua CCTV camera for the best results?
Start by setting the correct resolution and recording mode (continuous vs. motion) to match your storage needs. Enable motion detection and set activity zones so it responds to people rather than trees, shadows, or passing traffic, then adjust sensitivity and schedule. Finally, configure notifications, time/date synchronization, and storage settings (such as overwriting or retention) to ensure your Dahua CCTV system records reliably.
📅 Last Updated: November 03, 2026 | Topic: What is the easiest way to set up a Dahua CCTV camera? | Content verified for accuracy and freshness.
References
- Network Interface Specifications – ONVIF
- IP camera
- Power over Ethernet
- Network video recorder
- Dynamic Host Configuration Protocol
- NIST Cybersecurity for IoT Program | NIST
- https://scholar.google.com/scholar?q=Dahua+IP+camera+installation+setup+quick+start Google Scholar
- https://scholar.google.com/scholar?q=Dahua+SmartPSS+setup+IP+camera+NVR Google Scholar
- https://scholar.google.com/scholar?q=ONVIF+IP+camera+discovery+setup Google Scholar