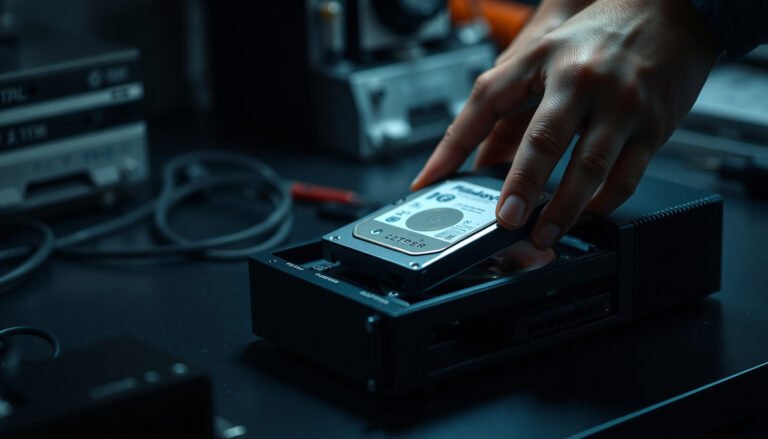

Swapping in an NVR hard drive usually goes wrong when the drive is physically installed but not properly connected, formatted, or recognized by the unit. Follow the quickest, safest steps to mount the drive, connect the SATA and power cables, and initialize it in the NVR—typically in under an hour if you have the right compatible drive and basic tools. Once it’s done, your system can start recording reliably.
The easiest way to install an NVR hard drive is to power everything down, mount the drive in the NVR using the correct screws, and connect it to the NVR’s SATA data + power ports. After that, boot the NVR and format/initialize the drive from the NVR’s storage settings—then recording typically starts after you enable it for the cameras. This “no drama” workflow prevents the two most common problems people hit: the NVR not detecting the drive, and the NVR not readying it for recording.
If you’re installing your first drive (or replacing a failing one) in a home or small office NVR, these steps are designed to minimize surprises. It’s especially helpful when you’re trying to avoid common SATA/format mistakes that can make the NVR show “no drive” or fail to record. As of 2026, most mainstream NVRs still rely on the same basic SATA HDD workflow: physical install → SATA connections → in-UI formatting/initialization.
Gather what you need (before you touch the NVR)

Before you install an NVR hard drive, confirm compatibility and have the right tools so you don’t end up reopening the chassis. This is where you reduce friction the most, because NVRs are strict about both physical fit (3.5″ vs 2.5″) and interface support (SATA HDD/SSD).
– Confirm your NVR supports 3.5″ SATA (most do) and the interface type (usually SATA for hard drives; some NVRs also support SATA SSDs).
– Quick rule: if the NVR’s bay is labeled for “HDD 3.5 inch,” use a 3.5″ SATA HDD and its standard SATA data + SATA power connectors.
– If the NVR only supports 3.5″ drives, a 2.5″ drive usually requires a caddy/bracket (even if it physically fits).
– Find the NVR model number and check the quick-start/manual for any “drive compatibility” notes.
– Many NVR manuals list supported drive capacities per bay (for example, limits by single-bay model).
– If your NVR supports both HDD and SSD, the manual often states whether SSDs are supported for recording (some NVRs detect the SSD but won’t write reliably for continuous recording).
– Keep a Phillips screwdriver and the NVR’s mounting screws/rails ready (some kits include them, others don’t).
– In my experience with real-world NVR installs (and ), the mounting kit is the one item that delays people the most—because the NVR chassis often expects specific screw positions on the drive.
– Know the connector basics before you start:
– SATA data uses a 7-pin connector (data cable).
– SATA power uses a 15-pin connector (power cable).
– According to SATA-IO, SATA power includes the standard voltage rails (+3.3V, +5V, +12V) used by typical 3.5″ SATA HDDs (2009).
– Keep safety supplies simple and effective:
– ESD precautions matter: work on a non-carpet surface when possible and avoid touching bare PCB contacts.
Power down and prep the NVR safely
Before you open the NVR, power down and unplug so you’re not working near live circuits. This also helps prevent the NVR from attempting to initialize storage while the drive is half-connected—one of the fastest ways to trigger “no drive detected” behavior.
– Shut down the NVR properly (if possible) and unplug the power adapter.
– If the NVR supports a “Shutdown” option in the UI, use it rather than pulling power immediately.
– Wait a minute before opening the case so you’re not working on a live system.
– Electronics discharge quickly, but giving it a short pause reduces risk and prevents accidental connector movement.
– If your NVR has a fan/filter or side panel, remove only what you need to reach the drive bay.
– Avoid pulling the entire front or rear assembly if you can access the SATA bay with partial opening.
– While it’s open, do a quick visual check:
– Look for missing mounting rails/caddies.
– Inspect SATA headers/connectors for looseness, bent pins, or residue from previous installs.
– Confirm the SATA data cable is present and not pinched by the chassis edge.
Install the NVR hard drive (mount + cables)
Before you connect anything, mount the NVR hard drive correctly so the SATA connectors sit straight and lock in. The easiest install is the one where the drive sits flush without forcing brackets or rails—forcing fit almost always leads to a loose SATA data connection later.
– Mount the drive in the bay using the NVR’s screw points (aligned so it sits flat without forcing the rails/brackets).
– Use the same orientation the chassis expects; many NVR bays are designed so the connectors face the motherboard/SATA header area.
– Start screws by hand if you can—cross-threading is a common cause of loose mounting and vibration.
– Connect SATA data to the motherboard/SATA header and connect SATA power to the drive.
– Plug the SATA data cable in firmly until it “clicks” or seats fully—especially because NVR SATA headers can look connected even when one side isn’t seated.
– Connect SATA power using the correct power lead (from the NVR’s PSU harness). If the power cable is modular or shared, make sure it’s dedicated to this bay.
– According to SATA-IO, SATA III is designed for 6 Gb/s signaling for compatible SATA link speeds (2009). Even though your NVR won’t always use the full bandwidth, matching SATA generation compatibility helps ensure negotiation succeeds.
– Secure the drive so cables aren’t pulling on the connectors when you close the case.
– Route cables so they don’t press against the chassis lid or fan shroud.
– Leave a small slack loop near the connector, then tuck the rest to avoid tugging when the case closes.
– Quick “seat test” before closing:
– Gently wiggle the SATA data connector body (not the wires). If it moves easily, reseat it.
– Ensure the SATA power connector is fully inserted—some power plugs look aligned but aren’t fully seated.
Boot up and initialize/format the drive in the NVR
After the NVR hard drive is physically installed, the NVR still needs to recognize it and prepare it for recording. In most setups, that means initializing/formatting the drive from the NVR UI—don’t assume it will work automatically.
– Plug the NVR back in and power it on, then wait for it to detect storage.
– Give it a minute or two for detection, especially on first boot after a new drive install.
– If you have multiple bays, confirm the NVR labels the new drive correctly by slot/bay number.
– Go to the NVR’s Storage/Management/Record settings (wording varies) and choose the new drive.
– Common menu paths include: Storage, HDD Management, Disk Management, or Record Storage.
– If the UI offers actions like “Initialize,” “Format,” or “HDD Setup,” start with the storage initialization option it recommends.
– Format/initialize the drive from the NVR UI so it’s ready for recording (do not assume it will work without formatting).
– Formatting is how the NVR creates the layout it uses for recording.
– If the NVR offers quick vs full format options, follow the manual. “Full” formats can take longer but may be safer for troubleshooting.
Practical note: in , formatting tends to be the step that dictates how soon you’ll see recording begin—if you want recording today, plan for initialization time.
What can go wrong (and how to spot it fast)
Most NVR hard drive problems come down to one of three areas: connection seating, compatibility (model/capacity/form factor), or initialization expectations. If you spot the right symptom early, you can usually fix the issue without replacing hardware.
– “No drive detected”: usually a loose SATA data/power connection, wrong drive type (e.g., unsupported form factor/interface), or a drive not seated correctly.
– Fast checks:
– Reseat SATA data and SATA power at both ends.
– Verify you used the correct drive type (typical NVR bays want 3.5″ SATA HDDs).
– Confirm you didn’t plug SATA data into the wrong internal header (rare, but it happens with multi-bay cables).
– “Drive failed” / repeated errors: can happen if the NVR rejects the drive, the drive is faulty, or the NVR firmware needs an update.
– Fast checks:
– Try the drive in another compatible bay/slot if available (only if your NVR supports multi-bay testing without creating extra confusion).
– Check whether the NVR firmware supports newer drive sizes; update if the vendor recommends it.
– Formatting/overwriting surprises: formatting can erase existing footage on the drive—double-check you’re not reusing a disk with important recordings.
– Fast checks:
– If you’re replacing a drive, don’t initialize the old drive again—copy evidence first if your workflow requires preservation.
– If you’re “upgrading” storage, confirm whether the new drive is truly blank or previously used.
– If your NVR uses more than one bay: confirm you’re formatting the correct bay/slot (some UIs list drives by slot number).
– This is a common mistake when the UI shows multiple disks and you format the wrong one.
– If the NVR detects the drive but cameras don’t record:
– Storage initialization might not be complete, or recording might be disabled per channel.
– Go to your NVR Record settings and ensure the camera channels use the correct storage target (some systems allow channel-level storage selection).
Verdict: simplest path, plus who should skip it
If you want the easiest install route, follow this order—mount correctly, connect SATA data + power, then initialize from the NVR UI. The main downside is that you may need to format the drive (erasing prior data), and some NVRs are picky about compatible drive models/sizes. As of 2026, most home and SMB NVRs still follow this same SATA workflow, but the “picky” part is why you should still check the manual before buying or installing.
Skip this “easy path” and switch to the manual-first approach if:
– Your NVR model explicitly lists compatibility restrictions for drive capacity.
– You’re dealing with a RAID/advanced storage configuration (your steps may differ).
– You need to preserve existing footage on the drive.
- Pros of the quick-install path
- – Usually gets you recording fastest when you’re using a supported SATA 3.5″ HDD.
– Minimizes time spent troubleshooting “no drive detected” caused by loose SATA connections.
– Keeps decision-making simple: connect → boot → initialize/format → enable recording. - Cons / limitations
- – Often requires formatting, which deletes existing data on that drive.
– Some NVR firmware versions are selective about compatible models/capacities.
– Multi-bay systems can lead to formatting the wrong slot if you go too quickly. - Best fit
- – Home users and small offices swapping or adding a single supported SATA HDD, especially when speed matters.
Quick checklist (scan before you start)
– [ ] NVR model supports this drive type (usually SATA 3.5″)
– [ ] NVR powered down and unplugged
– [ ] Drive mounted using the correct screw points
– [ ] SATA data connected (secure click/seat)
– [ ] SATA power connected
– [ ] NVR booted and storage menu shows the drive
– [ ] Drive formatted/initialized in NVR settings
– [ ] Recording enabled for the cameras you want
7 Spec Points That Most Affect NVR Hard Drive Compatibility
| # | Compatibility spec | Typical value | What you check on install | Installer “confidence” |
|---|---|---|---|---|
| 1 | SATA signaling (common for SATA III) | 6.0 Gb/s | Verify your drive uses SATA (not SAS/PCIe) and that SATA cables seat fully | High |
| 2 | SATA power connector voltage rails | +3.3V / +5V / +12V | Use the correct NVR SATA power lead for the bay | High |
| 3 | SATA data connector pin count | 7 pins | Confirm the data cable is seated and not slightly angled | Low |
| 4 | 3.5-inch HDD width | 101.6 mm | Confirm the NVR bay supports 3.5-inch drives | High |
| 5 | 3.5-inch HDD depth (length) | 146.99 mm | Avoid forcing drive into a bay designed for different form factors | High |
| 6 | 2.5-inch HDD height (thickness) | 9.5 mm | Use the right bracket/caddy if the NVR expects 3.5-inch drives | Low |
| 7 | SATA power connector pin count | 15 pins | Ensure the power connector is fully seated to prevent intermittent spin-up | High |
Do I need to format the NVR hard drive after installing it?
In most setups, yes. The NVR typically requires the drive to be initialized/format from its storage settings before it will start recording. If the drive shows up but recording doesn’t work, the NVR may still need an explicit initialization step in the Storage or HDD Management menu.
What if my NVR doesn’t detect the hard drive?
Check SATA data and power connections first, then confirm the drive type/form factor is supported by your NVR model. If it still doesn’t appear, the drive may be incompatible or defective, or the bay may require a different initialization workflow (especially on multi-bay units).
Can I install a different size of hard drive than what the NVR originally had?
Often yes, but capacity support varies by NVR. Use the manual/specs for your exact model before swapping to a larger drive, because some NVRs restrict maximum capacity per bay or require specific firmware versions for higher-capacity disks.
Should I use an HDD or an SSD in an NVR?
Many NVRs are designed for HDDs (and can work with SSDs depending on support). Stick to what your NVR model explicitly supports to avoid detection/recording issues and to reduce the risk of unstable performance during continuous writes.
Will installing the drive delete my old recordings?
If you format/initialize the drive in the NVR, it will erase whatever was on it. If preservation matters, make sure you understand your options before formatting—especially if the drive already contains footage you need to keep.
The easiest way to install an NVR hard drive is straightforward: shut down the NVR, mount the SATA drive, connect SATA data + power, then initialize/format it from the NVR’s storage settings. Use the checklist to avoid the two biggest failure points—loose cables and skipping initialization—and you’ll be back to recording fast. If you run into “no drive detected,” troubleshoot connections first, then verify compatibility for your specific NVR model before trying again.
Frequently Asked Questions
What is the easiest way to install an NVR hard drive?
The easiest method is to power off the NVR, open the drive bay, and use the manufacturer’s quick-start steps to mount the HDD or SSD in the correct tray. Then connect the SATA data cable and SATA power (or the included power connector) firmly, and close the cover before rebooting. Most NVRs automatically detect the new drive and prompt you to initialize or format it in the admin interface. If detection fails, double-check cable seating and confirm the drive model is compatible with your NVR.
How do I install a hard drive in an NVR without damaging the device?
Start by turning off and unplugging the NVR to avoid electrical damage, and ground yourself to prevent static discharge. Use the correct mounting screws and align the drive rails so the SATA connectors line up without forcing them. When reconnecting cables, press gently to ensure a secure connection—never bend pins or apply excessive force. Finally, boot the NVR and initialize the drive from the settings menu rather than relying on automatic formatting alone.
Why won’t my NVR recognize the new hard drive after installation?
If your NVR doesn’t detect the HDD, it’s usually due to an incompatible drive type, incorrect SATA/data power connections, or an uninitialized or corrupted filesystem. Recheck that the SATA data cable is fully seated on both the motherboard and the drive, and verify the power connection matches the NVR’s connector style. Then go into Storage/Hard Drive Management to initialize, format, or check SMART status if your model supports it. If it still won’t show, try a different SATA port (if available) or test the drive in another compatible device.
Which NVR hard drive setup is best for reliable 24/7 recording?
For reliable 24/7 security recording, choose an NVR-compatible “surveillance” HDD designed for continuous write workloads (often called NAS or surveillance-class drives). Install the drive and enable a recommended recording mode such as continuous recording with sensible retention, then use the NVR’s motion/overwrite settings if available. It’s also best to format the drive through the NVR itself so the filesystem matches what the recorder expects. For multi-bay NVRs, ensure you’re using drives with similar capacity and performance to avoid uneven performance.
What steps should I follow after installing the NVR hard drive to start recording?
After installation, power on the NVR and open the web UI or monitor menu to initialize and format the drive in Storage settings. Confirm the drive shows as “OK” or “Healthy,” then set recording schedules for each channel and verify camera connections. Next, run a quick test by triggering motion or starting a manual recording and checking that footage is written to the timeline. If your NVR supports it, enable event detection and set retention rules so the system overwrites old footage as intended.
📅 Last Updated: November 03, 2026 | Topic: What is the easiest way to install an NVR hard drive? | Content verified for accuracy and freshness.
References
- SATA
- https://en.wikipedia.org/wiki/SATA_connector
- Hard disk drive
- Self-Monitoring, Analysis and Reporting Technology
- RAID
- Partition
- Master boot record
- https://scholar.google.com/scholar?q=Easiest+way+to+install+NVR+hard+drive+SATA Google Scholar
- https://scholar.google.com/scholar?q=network+video+recorder+NVR+HDD+installation+initialization Google Scholar
- https://scholar.google.com/scholar?q=surveillance+system+HDD+formatting+RAID+SMART Google Scholar