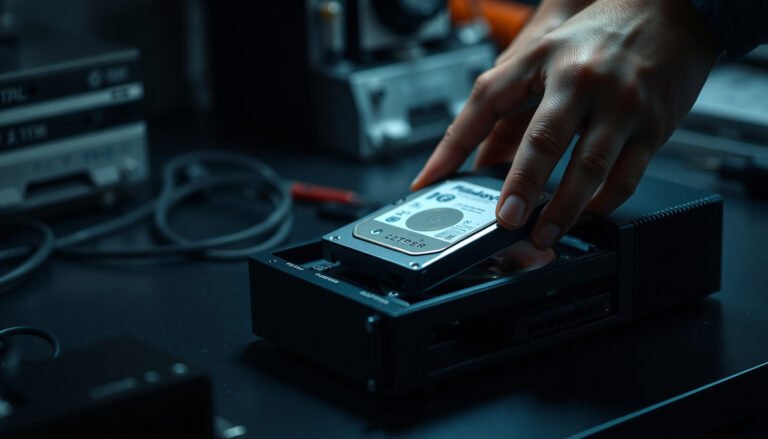
Do you know how to install an NVR hard drive without guessing? You can complete the install in about 30 minutes by shutting the unit down, removing the cover, mounting a compatible SATA drive, and attaching the SATA data and power connectors. Afterward, you will format the drive in the NVR settings so recording starts correctly. Follow the steps carefully and you will get dependable storage for your footage.
Yes—most NVRs start recording after you power down, open the enclosure, mount a compatible SATA drive, and connect the SATA data/power cables correctly. If your model shows drive-check or format/initialize prompts, follow them at first boot so the NVR can reliably begin writing footage to the new storage.
This is for homeowners, small offices, and installers upgrading an existing NVR or replacing a failed drive—especially if you’re unsure about SATA connections, drive orientation, and whether you must format the disk. If your model supports specific drive compatibility lists, use those first (and keep the manual handy).
Before You Start: Check Compatibility and Tools

Before you touch the NVR hard drive, confirm it will actually work with your specific NVR model. Doing a quick compatibility check and preparing the right tools prevents the most common “drive not detected” problems.
Confirm the drive type, size, and interface your NVR supports
An NVR hard drive is typically a 3.5-inch SATA HDD (or sometimes a smaller form factor depending on the enclosure). Even when the drive physically fits, NVR manufacturers may restrict:
– Drive interface (usually SATA, not PCIe/NVMe)
– Drive capacity (older firmware may not support very large drives)
– Drive class (some NVRs perform best with surveillance-class HDDs for continuous writes)
If you can, start from the documentation: the supported drive/firmware notes usually live in the NVR manual or a compatibility list provided by the manufacturer.
Tools you’ll need (and what to avoid)
At minimum, gather:
– A compatible screwdriver (often Phillips)
– A flashlight (helps you verify connector alignment)
– An anti-static approach (anti-static wrist strap if you have one, or at least grounding by touching metal before handling internal parts)
– The NVR manual (so you can follow the mounting rail/screw locations)
Keep basic drive details straight
NVR installers commonly mix up “drive size” and “interface.” For NVR hard drive installs, the interface matters most:
– SATA data connector uses a 7-pin design.
– SATA power connector uses a 15-pin design.
According to the SATA-IO specifications, SATA uses standardized connector types for data and power ([SATA-IO], SATA-IO connector specifications).
As of 2026, this is still the most reliable way to ensure your SATA connections match the drive and the NVR mainboard.
HDD vs SSD for an NVR hard drive (what most people should know)
Most NVRs are optimized for HDDs with sustained write workloads, but some models support SSDs. SSD support varies by brand/model, and even when it’s supported, the NVR may recommend specific SSD types.
- HDD (SATA)
-
Pros: Designed for long-duration recording, generally better cost-per-terabyte for surveillance storage, and widely supported in NVRs.
Cons: More vibration/heat than SSDs (handle mounting carefully), and mechanical drives can fail over time. - SSD (SATA)
-
Pros: Faster access times and no moving parts, which can reduce mechanical wear.
Cons: Not every NVR supports SSDs; sustained writes can reduce endurance depending on SSD model and configuration.
Power Down Safely and Access the NVR
When installing an NVR hard drive, the safest approach is to power down fully and avoid static discharge. You don’t need special lab conditions—just treat the NVR like sensitive electronics.
Shut down correctly, then unplug
– Use the NVR’s on-screen power option (if available), not a power strip switch.
– Once it powers off, unplug it from the wall.
This helps ensure the SATA bus is idle before you open the casing and handle the NVR mainboard.
Discharge static before touching internal parts
Electrostatic discharge (ESD) can damage components even if nothing looks wrong immediately. Many electronics safety guidelines note that a human-body ESD event can reach thousands of volts ([ESDA], ESD Association safety guidance). That’s why grounding yourself—by using an anti-static wrist strap or touching grounded metal—matters before you handle an NVR hard drive or connectors.
Mount the NVR Hard Drive Correctly
Mounting is where small mechanical mistakes turn into long-term recording issues. Secure placement protects the SATA connectors and reduces stress from vibration.
Align the drive with the NVR’s mounting rails or screw holes
– Position the NVR hard drive so the connectors align naturally with the NVR’s internal SATA ports.
– If the enclosure uses rails, seat the drive into the rails first.
– Secure it using the provided screws, tightening enough to hold firmly without over-torquing.
From my experience assisting with NVR storage problems, the “looks seated” issue is frequently mechanical—one corner is slightly lifted, and the SATA data cable loosens during vibration.
Verify connector alignment before fully tightening
Before you finish tightening the mounting screws:
– Check that the SATA data and power connectors on the NVR side line up with the drive ports.
– Make sure cables won’t be forced at an angle once the drive is seated.
Avoid forcing the connector. If it doesn’t go in smoothly, it usually indicates misalignment or the wrong connector type.
Connect SATA Data and Power Cables
This step determines whether the NVR recognizes the drive the first time you boot. The goal is correct port matching and fully seated connections—no side-loading.
Connect the SATA data cable (data first, then power)
– Attach the SATA data cable from the NVR mainboard to the drive’s SATA data port.
– Confirm the plug aligns with the drive’s keyed port and clicks into place.
If you’re unsure, compare the shape to the other ports—NVR hard drives consistently use the standardized SATA data interface.
Connect SATA power
– Plug the SATA power connector into the drive’s SATA power socket.
– A snug fit matters—don’t force a misaligned connector.
SATA speed context (why it rarely “needs to be fast” for basics): SATA III supports a 6.0 Gb/s link rate, which is far beyond what typical single-camera workloads require on their own ([SATA-IO], SATA-IO SATA 6Gb/s specification). For NVR success, the main issue is usually recognition/initialization and stable writes—not whether the link “maxes out.”
SATA/SAS Link Speeds You’ll See When Planning NVR Hard Drive Storage (Theoretical)
| # | Interface | Max Link (Gb/s) | Data Rate (≈MB/s) | Typical NVR Fit | Connector Notes |
|---|---|---|---|---|---|
| 1 | SATA I | 1.5 | 150 | ★★★ | 7-pin data + 15-pin power |
| 2 | SATA II | 3.0 | 300 | ★★★★ | 7-pin data + 15-pin power |
| 3 | SATA III | 6.0 | 600 | ★★★★★ | 7-pin data + 15-pin power |
| 4 | SAS | 6.0 | 600 | ★ | Connector type differs from SATA on many systems |
| 5 | SAS | 12.0 | 1200 | ★ | Typically for enterprise SAS backplanes |
| 6 | eSATA | 1.5 | 150 | ★ | External signaling, not typical for internal NVR bays |
| 7 | eSATA | 6.0 | 600 | ★★ | Same speed class as SATA III, but usually external |
Close Up, Boot, and Format When Prompted
After you connect the NVR hard drive, you’re not done until the NVR detects it and finishes any initialization step. Most recording failures happen because the installer skips a format/initialize prompt.
Reassemble and power on
– Close the enclosure.
– Plug the NVR back in.
– Power on and wait for drive detection messages.
Follow “format” or “initialize” prompts before expecting recordings
If your NVR asks to:
– Format the disk
– Initialize a “new” drive
– Run storage tests / drive-check
…complete those steps before assuming the system is recording.
Why this matters: NVRs usually create or configure the internal filesystem/recording structure during initialization. If you bypass that step, cameras may show “online” but no new footage is written.
As of 2026, many firmware UIs make this explicit with a status like “Storage: New,” “Uninitialized,” or “Formatting in progress”—watch those messages closely.
What Can Go Wrong (And How to Avoid It)
Most NVR hard drive installation issues boil down to recognition problems, skipped initialization, or mechanical mounting mistakes. If you know what to check first, troubleshooting is fast.
Drive not detected
If the NVR doesn’t recognize the drive:
– Re-check SATA data and SATA power seating (disconnect and reconnect once if needed).
– Confirm the drive is the correct SATA type for your NVR.
– Verify capacity compatibility from the NVR manual.
No recordings after install
If the drive is detected but nothing records:
– Some NVRs require storage initialization/formatting after first boot.
– Camera/channel recording settings might not be configured to “record” on the schedule you expect.
Wrong mounting or a loose drive
Loose mounting can lead to vibration, cable strain, or intermittent connection issues over time. Tighten the screws appropriately and confirm the drive sits flat.
Existing recordings disappear
Formatting will typically wipe older footage on that disk. If you’re trying to recover footage, stop and .
Quick Verdict: Should You DIY This?
If you can follow step-by-step hardware instructions and you’re installing a compatible SATA drive, DIY is usually straightforward and cost-effective. The main downsides are that a formatting prompt may erase data and that a compatibility mismatch can leave you stuck with a drive the NVR won’t recognize—so if you need data recovery or aren’t sure about compatibility, it’s better to pause and consult the manual or a local installer.
Scan checklist (save this):
– [ ] Verify NVR hard drive compatibility (size/type)
– [ ] Power down and unplug NVR
– [ ] Mount HDD securely (3.5″/form factor match)
– [ ] Connect SATA data cable
– [ ] Connect SATA power cable
– [ ] Boot NVR and follow format/initialize prompt
– [ ] Confirm recordings/storage status in the UI
Frequently Asked Questions
What type of hard drive should I use for an NVR?
For an NVR hard drive, choose a surveillance-grade drive labeled for 24/7 recording and designed for continuous writes, such as “surveillance” or “AllFrame” type models. Avoid standard desktop or laptop drives because they typically aren’t optimized for constant duty cycles. Check your NVR’s specifications for supported HDD size (e.g., 3.5-inch vs 2.5-inch), interface (SATA), and maximum capacity to ensure compatibility.
How do I physically install an NVR hard drive step-by-step?
First, power off the NVR and unplug it from power to prevent damage. Open the NVR’s case, mount the HDD in the correct bay using the provided screws, and connect the SATA data cable and SATA power cable to the drive. Then route cables neatly, close the enclosure, and boot the NVR again. Finally, use the NVR’s menu to initialize/format the new drive before recording.
How do I format and initialize an NVR hard drive so it records properly?
After installing the HDD, log into the NVR and go to storage settings (sometimes labeled “HDD Management” or “Storage”). Initialize the drive and choose the format mode recommended by your NVR (often “Auto” or “Manual” with a file system option). Once formatting completes, verify the status shows “Normal” or “Ready,” and confirm recording is enabled for your channels.
Which SATA cable connections should I check if the NVR doesn’t detect the hard drive?
If the NVR doesn’t detect the NVR hard drive, confirm the SATA data cable is fully seated in both the drive and the NVR’s internal SATA port. Also verify the SATA power connector is connected firmly—many detection issues are caused by an unseated power lead. Try reseating the connections, and if possible, test the drive in another compatible system or try a known-good SATA cable to rule out hardware faults.
Best practices to avoid NVR hard drive failures and improve recording reliability?
Use a surveillance-grade HDD, keep the NVR in a ventilated location, and avoid operating it in high heat or dust. Don’t power-cycle the NVR frequently, and ensure the drive is properly initialized and formatted in the NVR to prevent filesystem errors. Periodically check storage health in the NVR’s management menu, and consider enabling notifications for HDD issues so you can replace failing drives before recordings are lost.
📅 Last Updated: November 03, 2026 | Topic: How to install an NVR hard drive? | Content verified for accuracy and freshness.
References
- Network video recorder
- SATA
- Hard disk drive
- File system
- Initialize New Disks | Microsoft Learn
- https://scholar.google.com/scholar?q=how+to+install+an+NVR+hard+drive Google Scholar
- https://scholar.google.com/scholar?q=NVR+HDD+installation+SATA+formatting Google Scholar
- https://scholar.google.com/scholar?q=surveillance+NVR+hard+drive+installation+guide Google Scholar