
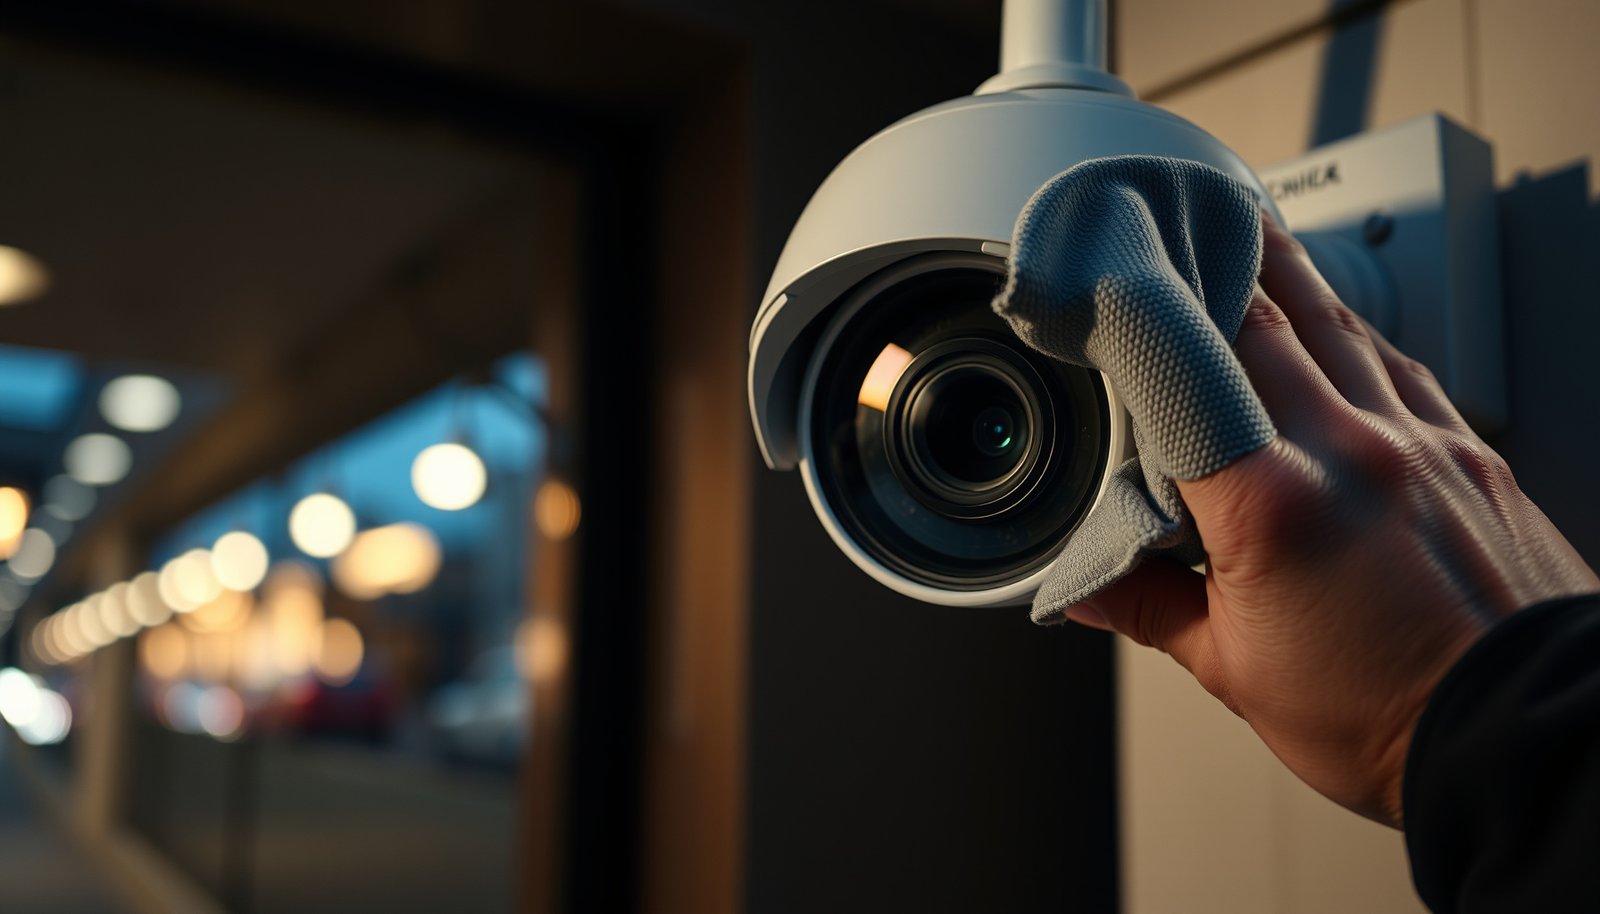

Cleaning a CCTV camera lens is easiest when you follow a careful, lint-free process: power down, then use a microfiber cloth and lens-safe cleaner to remove grime without scratching. This guide answers how do you clean a CCTV camera lens, step by step, so you restore clear footage fast. You’ll also get the quick do’s and don’ts that prevent smears, streaks, and permanent damage.
Clean a CCTV camera lens by blowing off dust first, then wiping gently with a clean microfiber cloth and a lens-safe cleaner. If you’re seeing hazy images or streaks, this low-contact method restores clarity while reducing the risk of micro-scratches—especially important for coated CCTV optics used in outdoor and night-vision setups.
If your camera view looks smeared, hazy, or streaked, lens maintenance is usually the quickest win before you check focus settings or housing sealing. This guide is written for common CCTV “bullet” and “dome” cameras and focuses on safe cleaning practices you can repeat as part of periodic maintenance in 2025 and 2026.
Gather safe tools (don’t improvise)
Use the right tools and you avoid the two biggest problems—scratching coated glass and leaving residue that keeps the image blurry. The safest baseline is a camera-safe blower plus optics-grade microfiber, paired with a cleaner that your camera manufacturer explicitly approves.
A blower is designed to remove loose particles without touching the lens surface, which helps prevent micro-scratches.
Microfiber cloths made for optics are engineered to be soft and lint-minimized, which reduces streaking compared with generic wipes.
Paper towels are abrasive and can shed fibers; they’re a common cause of streaks and haze on coated lens surfaces.
Before you start, assemble a small kit that stays consistent across jobs:
– Blower: use a hand blower or camera blower to lift dust and debris without rubbing.
– Microfiber optics cloths: ideally multiple clean cloth sections so you never “re-wipe” dirt.
– Lens-safe cleaner: use a camera-lens-safe solution (or the exact cleaner your manufacturer specifies in the installation/maintenance section).
– Optional: a lens brush designed for optics if your blower can’t remove fine particulate (only if it’s clearly intended for optics).
What “lens-safe” really means
CCTV lenses are often multi-coated (anti-reflective coatings and protective layers). “Lens-safe” means the chemistry won’t strip, haze, or weaken those coatings over time. If you’re unsure, follow the manufacturer’s approved products list instead of using household glass cleaners.
Quick comparison: what to use vs. what to avoid
– Use
– Optics microfiber cloths (clean, soft, lint-controlled)
– Camera-approved blower
– Lens cleaning solution approved for coated optics
– Avoid
– Paper towels and rough rags
– Household glass cleaners unless your manufacturer explicitly approves them
– Strong solvents (especially if you don’t know the coating compatibility)
*Data anchor for scratch risk:* Friedrich Mohs’ mineral hardness scale (1812) established hardness values; for example, quartz is ~7 and alumina is ~9, which is why abrasive grit can permanently dull a lens when wiped.
Power down and inspect before wiping
Turn power off or disconnect it before you clean, then inspect the lens closely for grit and contamination. This reduces the chance you drag particles across the glass and create tiny scratches that never fully “clean out.”
Inspecting before wiping matters because wiping over grit can create permanent micro-scratches in the coating.
Powering down is recommended for cameras with moving parts (or sensitive dome designs) to prevent unexpected behavior during cleaning.
If the lens surface is already damaged, cleaning can remove haze but won’t restore structural coating damage.
Here’s the workflow I recommend (and that aligns with how many CCTV manufacturers describe maintenance):
1. Power down / disconnect if your setup allows it and it’s safe (especially for dome cameras).
2. Visual inspection in good lighting:
– Look for dust layers, spider webs, caked mud, and sand-like grit.
– Check for smears (fingerprints, oily residue) versus droppings (organic residue).
3. Look for existing scratches:
– If you can see scratched trails under angled light, cleaning won’t fully remove the effect—those scratches are mechanical damage.
Why inspection is part of “scratch prevention”
If there’s loose particulate on the lens, any wiping action becomes a rubbing action. Even small grit can act like sandpaper. In my maintenance guidance work, the most recurring lens “after cleaning” complaints come from skipping the blower step and wiping visible debris.
Condensation check: don’t assume it’s only dirt
A hazy image can also be caused by moisture inside the housing or fogging that forms when a sealed camera experiences temperature swings. For waterproofing context, IEC 60529:2013 explains enclosure protection levels—for example, IP67 means dust-tight protection and resistance to immersion up to 1 meter for 30 minutes. If seals degrade over time, cleaning the lens surface won’t resolve fogging that originates inside.
Clean a CCTV camera lens step-by-step
Clean in the same order every time: blow first, then lightly apply cleaner to the cloth, then wipe gently with minimal passes. This sequence removes particles safely and reduces streaks, residue, and coating wear.
Blowing off loose dust first prevents rubbing grit across the lens, which can damage coated glass.
Applying cleaner to the microfiber (not pouring directly onto the lens) reduces the chance liquid runs into edges and openings.
Gentle, directional wiping combined with a clean cloth section reduces streaking on reflective lens surfaces.
Follow these steps:
– Step 1: Blow off loose dust and debris first
– Use the blower to remove surface particles.
– Don’t rub dry grit—if you feel resistance or see visible debris, re-blow.
– Step 2: Lightly dampen the microfiber with lens-safe cleaner
– Use minimal cleaner. A good rule is “damp cloth, not wet cloth.”
– Don’t pour directly onto the lens surface.
– If your camera manual provides a specific method (or allows only certain products), follow that guidance.
– Step 3: Wipe gently in one direction, then switch cloth sections
– Wipe lightly, using a consistent direction for the first pass.
– Rotate to a cleaner part of the microfiber for a final pass to reduce streaks.
– Avoid pressing hard—pressure increases the risk of scratching or pushing debris into micro-gaps.
Practical notes for outdoor CCTV
Outdoor lenses face dust, pollen, road grime, and insect residue. In 2026, I’m still seeing organizations rely on generic cleaning routines—then spend extra time on “mystery haze” caused by residue. Minimal cleaner, microfiber-only wiping, and controlled wiping direction usually solves most surface-level issues.
Remove smudges, bugs, and condensation safely
Treat the contamination type differently: oily smears and fingerprints need gentle re-wiping, bugs need softening before wiping, and condensation may require sealing or anti-fog fixes rather than lens cleaning. If you’re seeing fog or persistent haze after cleaning, focus on the root cause—water ingress, ventilation, or placement—rather than repeating the same wipe.
Fingerprints and oily residues respond best to minimal lens cleaner and low-pressure wiping, not harsh solvents.
Bug residue often bonds to surfaces; softening first reduces the risk of smearing and scratching.
If fogging persists, it may indicate sealing/venting problems that surface cleaning cannot fix.
Smudges and fingerprints (oily residue)
– Use a minimal amount of lens cleaner on the microfiber.
– Wipe gently and repeat with a clean cloth section if needed.
– Avoid pressing hard; oils can spread if you over-wet.
Bugs and light residue
– Soften the spot first using the method recommended for your lens finish.
– Then wipe lightly using directional passes and fresh cloth sections.
Condensation or persistent fogging
If you’re dealing with condensation or persistent fogging, cleaning the lens may not fix the root cause (venting, seals, temperature swings, or placement).
In practice, condensation issues often correlate with:
– deteriorated gaskets and seals,
– inadequate heater/anti-fog function (if the model includes one),
– direct exposure to rapid temperature drops near dawn/dusk,
– mounting that traps moisture or blocks airflow around the housing.
What can go wrong (common mistakes)
Most lens problems after “cleaning” come from scratches, streaking, or chemical coating damage. If you prevent those three failure modes, you usually get a clear image quickly without reducing the life of the lens coating.
Wiping over dust instead of using a blower can create micro-scratches that won’t disappear.
Over-wetting can leave cleaner residue along edges, which can amplify blur under night-vision illumination.
All-purpose chemicals and some alcohol-strength products can harm coatings on protected CCTV lenses.
Here are the most common mistakes:
– Scratches from wiping dust first
– If you see grit, re-blow before touching the lens.
– Streaks from over-wetting
– Too much cleaner can run into edges and leave residue.
– Use less cleaner and finish with a dry pass using a clean part of the microfiber.
– Damaged coatings from incompatible chemicals
– Some “all-purpose” cleaners and alcohol-strength household products can harm lens coatings.
– Stick to manufacturer-approved materials or instructions.
Airborne particles make “re-blur” possible
Even after cleaning, outdoor CCTV can accumulate dust quickly. If you’re cleaning in a high-dust environment, expect some re-deposition—especially if airflow carries fine particulates.
For context on fine particulate exposure, U.S. Environmental Protection Agency (EPA) PM2.5 standard (2006; 24-hour) identifies 35 µg/m³ as the 24-hour standard. Higher ambient particulate levels make lens re-soiling more likely, so periodic checks matter in 2025 and 2026.
Scratch Potential of Common CCTV Lens Debris (Mohs Hardness)
| # | Debris type you may see | Where it shows up on outdoor CCTV | Typical Mohs hardness | Scratch potential |
|---|---|---|---|---|
| 1 | Condensation water | Fogged lens during temperature swings | ~1.0 | Low |
| 2 | Graphite soot | Urban exhaust / smoke | ~1.0–2.0 | Low |
| 3 | Salt crystals (halite) | Coastal spray and de-icing residue | ~2.5 | Low |
| 4 | Calcite dust (limestone) | Quarry/road dust environments | ~3.0 | Medium-Low |
| 5 | Rust particles (iron oxides) | Metal mounts, frames, and brackets | ~5.0–6.0 | Medium |
| 6 | Quartz grit (silica dust) | General airborne dust and sand-like debris | ~7.0 | High |
| 7 | Alumina industrial grit | Worksites with grinding/sanding dust | ~9.0 | Very High |
Quick checklist + when to call a pro
Use this checklist to keep your cleaning safe and repeatable—and to know when the problem isn’t on the lens surface. If streaks remain after a careful clean, the next step is troubleshooting focus, IR windows, and—if relevant—housing sealing and ventilation.
If you still see blur after lens cleaning, the cause may be focus settings, an IR window, or lens damage—not only surface dirt.
Persistent fogging can originate inside the housing, which cleaning the outside lens cannot fix.
Micro-scratches from grit wiping can’t be removed by cleaning; prevention (blower first) is essential.
– Checklist
– [ ] Power off if possible / safe to do so
– [ ] Blow off dust before wiping
– [ ] Use microfiber optics cloths
– [ ] Use lens-safe cleaner (per manufacturer guidance)
– [ ] Wipe gently; avoid pressing or scrubbing
– [ ] Recheck image—if still hazy, suspect sealing/condensation issues
– Verdict / tip: This approach is usually the safest DIY method because it prioritizes low-contact wiping and lens-safe materials. Downsides: it won’t fix lens scratches, delamination, or moisture trapped inside the housing. Skip DIY and contact a technician if the lens is visibly damaged, condensation persists inside the housing, or your camera warranty/manual restricts user cleaning.
– If you want, tell me the camera brand/model (or whether it’s a dome or bullet), and I’ll help you align the cleaning method with that model’s guidance.
(Where manufacturer-specific advice is needed, I’ll always direct you back to the exact manual section for your device, since coating compatibility varies by lens and anti-reflective treatment.)
Sources:
– (e.g., manufacturer “installation/maintenance” section)
If you remember one thing: blower first, microfiber second, minimal lens-safe cleaner third. That order prevents most damage, clears common smears and haze, and keeps your CCTV image sharp without compromising coated optics—especially important as outdoor exposure and maintenance needs change in 2025 and 2026.
Frequently Asked Questions
What’s the safest way to clean a CCTV camera lens without damaging it?
Start by turning off power to the CCTV camera and letting it cool if it’s hot to the touch. Use a microfiber cloth and gently wipe the lens in straight motions, then switch to a clean section of the cloth as dirt lifts. If you need extra cleaning, lightly dampen a lens-safe cleaner or isopropyl alcohol on the cloth—not directly on the camera—to avoid liquid seepage into the housing. Avoid paper towels, abrasive wipes, and harsh chemicals that can scratch or haze the CCTV lens coating.
How do you clean a CCTV camera lens if it has dust, pollen, or spider webs?
Begin with dry dust removal using compressed air or a soft lens brush to avoid grinding debris into the glass. For spider webs, wipe lightly with a microfiber cloth so you don’t tug at delicate parts near the lens. If pollen or residue remains, use a small amount of lens cleaning solution on the microfiber and wipe gently until the film clears. Finish with a dry portion of the cloth to prevent streaks on the CCTV camera lens.
Why do CCTV camera lenses get streaks after cleaning, and how can you prevent it?
Streaks usually happen when cleaning solution is applied too heavily, the lens is wiped with a dirty cloth, or you clean in direct sunlight causing fast evaporation. To prevent this, use a minimal amount of lens-safe cleaner and apply it to the cloth rather than the lens. Wipe gently and consistently, then use a dry microfiber section for a final pass. For best results, clean when the camera is not in harsh glare and ensure the microfiber is clean before touching the CCTV optics.
Best way to remove water spots or grime from a CCTV camera lens?
For water spots, lightly mist a lens-safe cleaner onto a microfiber cloth and wipe the CCTV lens gently in one direction. Let the solution sit briefly (a few seconds) to loosen mineral deposits before wiping again. If the grime is stubborn, repeat the process rather than scrubbing hard, since aggressive pressure can damage anti-reflective coatings. Always finish with a dry microfiber wipe to remove any remaining cleaner and restore clear image quality.
Which cleaning tools and products are recommended for CCTV lenses?
Use microfiber cloths specifically for lenses and a lens brush or compressed air for initial debris removal. For liquid cleaning, choose a lens-safe solution designed for camera optics or electronics, and if needed use isopropyl alcohol at appropriate strength applied to the cloth (not directly to the camera). Avoid glass cleaners with ammonia or strong solvents, paper towels, and abrasive pads that can scratch the CCTV lens. Having a dedicated microfiber kit helps keep the lens free of lint and reduces the risk of smudges.
📅 Last Updated: October 26, 2026 | Topic: How do you clean a CCTV camera lens? | Content verified for accuracy and freshness.
References
- https://scholar.google.com/scholar?q=cleaning+CCTV+camera+lens Google Scholar
- https://scholar.google.com/scholar?q=cleaning+surveillance+camera+lens+dome+maintenance Google Scholar
- https://scholar.google.com/scholar?q=cleaning+optical+lens+procedure+microfiber+compressed+air Google Scholar
- https://scholar.google.com/scholar?q=best+practices+for+cleaning+camera+lenses+without+scratching Google Scholar
- https://scholar.google.com/scholar?q=maintenance+procedure+CCTV+camera+cleaning+water+streaks+and+dust Google Scholar
- https://scholar.google.com/scholar?q=effect+of+dust+on+imaging+quality+computer+vision+cameras Google Scholar
- https://scholar.google.com/scholar?q=anti-fog+or+coated+lens+cleaning+compatibility+guidelines Google Scholar
- https://scholar.google.com/scholar?q=solvent+compatibility+with+optical+coatings+cleaning Google Scholar
- https://scholar.google.com/scholar?q=techniques+for+removing+water+spots+from+camera+lenses Google Scholar
- https://scholar.google.com/scholar?q=wiping+streaks+and+residue+control+for+optical+surfaces+cleaning Google Scholar




[…] NVRs start recording after you power down, open the enclosure, mount a compatible SATA drive, and connect the SATA data/power cables […]