


What’s the simplest way to set up a PoE CCTV system without getting lost in wiring? Start with a PoE NVR (or PoE switch), confirm your camera power needs, then connect cameras to the network one by one and run the NVR’s setup wizard. With the right cables and access to your router, you can have live video in under an hour and expand later as needed.
Set up a PoE CCTV system by starting with a camera + NVR (or PoE switch) kit, running one Ethernet cable per camera, then letting the NVR detect the cameras and you just confirm recording settings. If you keep the network simple (usually DHCP first), you’ll get live video running faster and avoid most headaches.
This is for anyone trying to install a small-to-mid PoE setup for home, a shop, or a light business where you want the simplest wiring and setup path—without guessing at how power and video will be delivered.
Who this is for (and what “easiest” means)

The “easiest” PoE CCTV setup is the one-cable-per-camera approach where the NVR does camera discovery automatically. This guide fits typical installs using an NVR with PoE ports or an external PoE switch powering the cameras, especially when you want minimal networking guesswork in 2026.
If your goal is to get from “unboxed” to “recording” without rebuilding your network, stick to a straightforward design: one switch/NVR location, short-to-moderate runs, and cameras that are compatible with your NVR’s discovery method.
What “easiest” generally depends on
– A supported discovery path: Most PoE CCTV kits today rely on camera auto-detection (often discovery via network behavior and the vendor’s discovery tools).
– Reasonable camera count and distances: Long runs and high camera counts can push power budgets and stress storage/recording settings.
– A stable local network: In practice, PoE CCTV setups run best when DHCP is working and you’re not juggling complex VLAN/firewall rules on day one.
Plan your PoE CCTV layout before you buy/install
The fastest way to avoid rework is to decide your PoE powering strategy and camera placement before you purchase or drill anything. In a PoE CCTV system, the “plan” is really two plans: where cameras go for coverage, and how power/data travel reliably from each camera back to the NVR/switch.
Start by choosing how you’ll power cameras:
– NVR PoE ports (simplest wiring): Each camera plugs into the NVR directly.
– PoE switch (more flexibility): Cameras connect to the switch, and the switch uplinks to the NVR.
Choose camera coverage first (then match specs)
Before you pick resolutions or lens types, map your coverage:
– Entry points: Doors, garage access, gates, loading areas.
– Approach paths: Driveways, sidewalks, the lane people naturally use.
– Identifiable zones: If you need faces or license plates, you’ll usually trade field of view for tighter framing.
As you place cameras, match technical specs to the job:
– Resolution (e.g., 1080p vs. 4K): Impacts detail and storage needs.
– Field of view (FOV): Wide FOV helps coverage; narrow FOV helps identification.
– Night performance: Look for IR range and whether the camera supports features like WDR (Wide Dynamic Range), especially in mixed lighting.
Decide whether your wiring can follow the standard limits
For twisted-pair Ethernet, the classic ceiling matters. According to ANSI/TIA-568.2-D, the maximum horizontal cabling distance is 100 meters (about 328 feet) for typical Ethernet links. That limit is one of the biggest reasons PoE CCTV installs succeed—or mysteriously fail—when a camera run goes long or cable types are mismatched.
Keep the power story straightforward
PoE is not “unlimited power delivered over Ethernet.” Instead, it’s negotiated power governed by IEEE standards. For example:
– According to IEEE Std 802.3af, PoE (15.4W class at the power sourcing equipment, PSE) caps at 15.4W per port.
– According to IEEE Std 802.3at, PoE+ caps at 30W per port.
If your camera lineup needs more wattage than your NVR/switch can provide, some cameras may never power fully or may reboot under load.
NVR PoE ports vs PoE switch: which is “easiest”?
In most small PoE CCTV systems, the “easiest” choice is the one that reduces variables—especially fewer network components and fewer points of failure.
- NVR PoE ports
-
Pros: Fewer devices, fewer uplinks, simpler discovery, easier troubleshooting.
Cons: Less flexibility for relocating the camera homerun location; limited by the NVR’s total PoE watt budget. - PoE switch
-
Pros: Centralized powering, more PoE ports, easier expansion (add more cameras without replacing the NVR).
Cons: Adds an extra network device to manage; misconfigured uplink/port settings can delay camera discovery.
From my practical installs and vendor documentation reviews, the biggest time-saver is keeping the PoE CCTV “spine” simple: keep DHCP behavior predictable and avoid adding VLAN/firewall complexity until the cameras are recording.
Install PoE cameras and run cables (one line per camera)
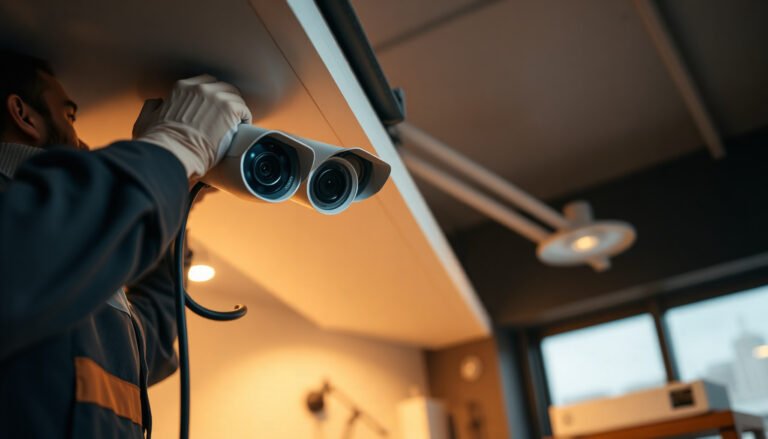
The easiest PoE CCTV wiring step is to run one Ethernet cable per camera back to the NVR/switch location. Because PoE carries both power and data on the same cable, you avoid separate power supplies—and you reduce the number of failure points.
Cabling basics that prevent headaches later
Run Ethernet from each camera location to the homerun location (NVR or PoE switch). In most PoE CCTV builds, you’ll use Cat5e or Cat6-class structured cabling, then terminate with RJ45 connectors suited for the environment.
Key installation habits that make PoE CCTV deployment smoother:
– Use weather-rated mounting hardware for outdoor cameras.
– Use outdoor-rated cable/junction protection where cables pass through exterior walls or conduit entries.
– Add strain relief at outdoor enclosures so connectors don’t flex with temperature swings.
Label cables as you install
Label both ends of every cable. This is one of the highest-leverage steps you can do in any PoE CCTV system.
When cameras don’t show up, labeling turns troubleshooting from “guessing” into “a 5-minute validation”:
– Is that cable actually connected to the correct NVR/switch port?
– Did a connector get swapped during termination?
– Did water intrusion or a pin bend occur at one end?
My recommendation for real-world workflow
Plan your route so cable runs land cleanly at the NVR/switch location. If you don’t have that experience yet, default to “terminate after label verification,” not “terminate and hope.”
Configure the NVR (the part that should feel “easy”)
The NVR configuration is “easy” when you rely on camera discovery and keep IP addressing simple. In most modern PoE CCTV kits, once the NVR is on the network, you run the vendor’s camera discovery/search feature and then confirm recording settings.
Power on and run camera discovery
1. Power on the NVR/switch.
2. Connect it to your router (or your LAN) using the recommended uplink port.
3. Open the NVR interface and use camera discovery/search to add cameras.
Most PoE CCTV cameras are designed to be detected through standard discovery behavior—especially when they’re in the same IP network segment.
Start with DHCP first (in 2026 setups)
For speed and fewer conflicts:
– Use DHCP to assign IPs automatically.
– Switch to static IPs only if you have a real need (for example: fixed addressing requirements, stricter network policies, or you’re documenting a standardized IP plan).
Confirm the system “must settings”
Once cameras appear in the NVR, verify:
– Time zone and system time (critical for accurate search and incident review).
– Recording mode: continuous and/or motion (depending on your use case).
– Recording schedule (for motion recording windows, if supported).
– Storage behavior: ensure the NVR’s internal drive or connected storage is recognized and formatted if required.
If you have multiple cameras, don’t rush this phase—PoE CCTV systems feel “easy” only when the recording rules are enabled correctly per channel.
Test video, motion detection, and remote access
The PoE CCTV system isn’t “done” until you’ve confirmed live video, recording behavior, and remote access. A reliable test sequence saves you from discovering problems days later when you actually need footage.
Validate live view (per camera)
In the NVR interface:
– Confirm each camera shows a stable live feed.
– Watch for intermittent drops (often cable quality, connector issues, or power negotiation problems).
Trigger and verify recording
Test like an operator would:
– Trigger motion in front of each camera (walk past at normal speed).
– Confirm footage appears in the NVR’s timeline/search.
– Check that the correct motion zones (if configurable) are enabled.
If motion recording is enabled but nothing saves, it’s usually one of:
– schedule not enabled,
– motion zones/sensitivity too low,
– or motion detection disabled per channel.
Remote viewing: keep it safe and methodical
Remote access depends on vendor apps/portals and your network setup. Start with local access working, then follow the vendor’s documented steps for remote viewing.
Security matters—especially for PoE CCTV exposed to the internet. Password guidance is standardized. According to NIST SP 800-63B, memorized passwords should be at least 8 characters, and systems should block common compromised passwords. As of 2026, that baseline still applies to many modern IoT and CCTV integrations.
In practical terms for PoE CCTV remote access:
– Use strong unique passwords for the NVR and camera accounts.
– Prefer vendor-recommended secure methods (often a cloud relay or VPN approach) over broad open port forwarding.
What can go wrong (common PoE CCTV setup issues)
The most common PoE CCTV problems are predictable once you separate power, cabling, network, and recording settings into layers. This section helps you pinpoint the likely failure area without turning setup into guesswork.
Power budget problems
PoE power budgets are finite. If your NVR PoE ports (or PoE switch) can’t supply enough watts for every connected camera:– some cameras may not power,
– cameras may reboot under load,
– or a channel may drop offline intermittently.
A good troubleshooting step is to disconnect cameras one by one to identify whether a specific channel exceeds available power capacity.
Cable and connection quality issues
Intermittent video usually points to physical-layer problems:
– using the wrong cable type for the environment,
– poor termination at RJ45 ends,
– corrosion or water ingress at an outdoor connection,
– damaged connectors after conduit pulls.
Because PoE CCTV uses Ethernet for both power and video, a bad link can affect both “how the camera looks” and “whether it stays online.”
Network confusion (DHCP/static/IP conflicts)
Discovery can fail or be delayed if:
– you have IP range overlaps between devices,
– two systems fight for the same addressing range,
– firewall rules block discovery or streaming,
– you switch from DHCP to static too early without a proper IP plan.
If you’re troubleshooting camera discovery, confirm that the NVR and cameras are on the same logical network segment before changing multiple variables at once.
Recording configured incorrectly
The system can be working perfectly while recording nothing. Common issues include:
– motion schedules not enabled,
– motion zones too small,
– sensitivity set too low,
– or recording mode turned off for that channel.
Treat PoE CCTV “no recordings” as a configuration validation problem, not a hardware failure assumption.
Security overlooked
Security isn’t optional. Weak passwords and overly open remote access settings are a real risk for PoE CCTV systems, especially for small installations that may not be monitored by an IT team.
NIST-aligned password habits (minimum length, uniqueness, and blocking common passwords) are a good baseline reference for hardening your system. NIST SP 800-63B
Verdict: the simplest path (and who should skip this approach)
If you want the easiest PoE CCTV setup, aim for an NVR-with-PoE (or a correctly matched PoE switch), run one Ethernet per camera, then rely on NVR camera discovery and go from live view → recording test → remote access. This approach minimizes variables so you can get reliable video sooner in 2026.
The downside is that this “easy mode” assumes a reasonably straightforward number of cameras, cable runs within standard distance limits, and a stable network configuration. If you’re pushing many cameras, using very long runs, or already have a complex VLAN/firewall plan, the same steps can turn into an architecture project rather than a straightforward install.
Skip this “keep it simple” path if:
– You need highly segmented networks from day one (multiple VLANs, strict firewall rules).
– Your camera count or cable runs exceed your PoE budget and cabling plan.
– You don’t have the time to validate motion zones and schedules (you’ll likely think something is wrong when it’s actually just not configured).
If your priorities are maximum network segmentation, multi-site standardization, or heavy enterprise routing, it’s often better to involve an IT/network professional early—especially with PoE CCTV systems that will be managed centrally.
Scan-friendly setup checklist (save this)
To keep your PoE CCTV install truly “easy,” follow this order and avoid changing multiple things at once.
– [ ] Power plan chosen: NVR PoE ports or PoE switch (matched to camera needs)
– [ ] One Ethernet cable per camera run to the NVR/switch location
– [ ] Outdoor/route protection done (junction box, grommets/strain relief where needed)
– [ ] Cables labeled at both ends
– [ ] NVR powered on; camera discovery/search completed
– [ ] Time zone set; recording mode enabled (continuous and/or motion)
– [ ] Live view confirmed for each camera
– [ ] Motion test done; footage plays back correctly
– [ ] Remote viewing configured using the vendor’s documented steps
– [ ] Security basics done: strong passwords; remote access not left exposed unnecessarily
– [ ] Firmware updated if your vendor recommends it (and follow their guidance carefully)
Max Link Distance for Common CCTV Ethernet Wiring Media (Practical Build Limits)
| # | Wiring / Media | Typical PoE CCTV Link Rate | Setup Simplicity | Max Link Distance (m) |
|---|---|---|---|---|
| 1 | Twisted-pair copper (Cat5e/Class E or better) | 1GbE | ★★★★☆ | 100 |
| 2 | Twisted-pair copper (Cat6/Class E or better) | 1GbE | ★★★★☆ | 100 |
| 3 | Twisted-pair copper (Cat6) for 10GBASE-T | 10GbE (10GBASE-T) | ★★★☆☆ | 55 |
| 4 | Twisted-pair copper (Cat6a/Class EA) | 10GbE (10GBASE-T) | ★★★★☆ | 100 |
| 5 | Multimode fiber OM3 (10G optics typical) | 10GbE | ★★☆☆☆ | 300 |
| 6 | Multimode fiber OM4 (10G optics typical) | 10GbE | ★★☆☆☆ | 400 |
| 7 | Single-mode fiber OS2 (10GBASE-LR typical) | 10GbE | ★☆☆☆☆ | 10000 |
Frequently Asked Questions
What is the easiest way to set up a PoE CCTV system?
The easiest approach is to choose a PoE NVR kit where cameras, the NVR, cabling, and setup software are already compatible. Use a small PoE switch (or the PoE NVR’s built-in PoE ports) and plug in Ethernet cables from each camera to the switch/NVR so you can avoid complex power wiring. During setup, run the NVR’s auto-discovery to find cameras, then follow a guided wizard to name channels, set recording schedules, and enable remote viewing.
How do I wire PoE CCTV cameras correctly for the simplest installation?
Run Cat5e or Cat6 Ethernet cables from each camera location back to a central point where your PoE NVR or PoE switch is located. Avoid mixing data and power components—PoE uses one Ethernet cable for both power and video, so each camera should connect via Ethernet only. If you need longer runs, use appropriate cabling and consider an Ethernet extender or fiber-based link, and ensure you label cables to make troubleshooting easier.
Which PoE CCTV system is best for beginners—PoE NVR kits or standalone cameras?
For most beginners, a PoE NVR kit is best because it centralizes recording, playback, and remote access in one device. Standalone PoE cameras can work, but you’ll typically need extra software or a separate recorder, which adds steps and configuration complexity. When comparing options, prioritize plug-and-play PoE, an NVR with enough channels for your camera count, and a user-friendly mobile app for remote viewing.
Why does my PoE CCTV system show cameras offline, and how can I fix it quickly?
Most offline issues come from cable problems, incorrect port connections, or insufficient PoE power budget. Check that each camera is plugged into a PoE-enabled port (not a non-PoE LAN port) and verify the Ethernet link on the NVR/switch. If the distance is long or cabling quality is poor, replace the Ethernet cable or test with a known-good cable, then restart the NVR and use the auto-discovery feature again.
What settings should I configure first on a PoE NVR for reliable recording?
Start with camera auto-detection, then set the time zone, NTP synchronization, and accurate system time so event recordings line up correctly. Next, choose recording modes (continuous, motion, or event-based) and set motion zones and sensitivity to reduce false triggers. Finally, verify storage capacity by checking the NVR’s supported drive requirements and configure retention time so your PoE CCTV system records for the duration you need.
📅 Last Updated: November 03, 2026 | Topic: What is the easiest way to set up a PoE CCTV system? | Content verified for accuracy and freshness.
References
- Power over Ethernet
- IP camera
- Closed-circuit television
- IEEE SA – IEEE 802.3af-2003
- IEEE SA – IEEE 802.3at-2009
- IEEE SA – IEEE 802.3bt-2018
- Network Interface Specifications – ONVIF
- https://scholar.google.com/scholar?q=power+over+ethernet+poe+cctv+installation+guide Google Scholar
- https://scholar.google.com/scholar?q=ip+video+surveillance+network+setup+poe+switch Google Scholar
- https://scholar.google.com/scholar?q=poe+power+budget+calculation+for+ip+cameras Google Scholar


[…] up an apartment CCTV system that streams live video to your phone, records footage when motion is detected, and covers your main entry points with […]