


Dahua CCTV cameras often seem “broken” after installation because the IP, power method (PoE or adapter), and basic configuration order were set incorrectly. Use a setup flow selected for reliability: matching your camera to the right Dahua recorder, locking in a stable address, and applying secure, recorder-ready settings. You will quickly reach the setup that is easiest to confirm on-site and to maintain long-term.
Set up a Dahua CCTV camera by mounting it correctly, connecting power and network first, then configuring recording, motion detection, and remote viewing in the NVR/app. If you start with the physical install and basic network settings, you’ll avoid most “no signal” and offline-camera problems. This guide walks you through a reliable Dahua setup flow from wiring to final checks.
Who this is for / when it applies:
This is for homeowners, small businesses, or installers setting up a Dahua IP CCTV camera with an NVR and wanting a practical, low-mistake process. It applies whether you’re using PoE (recommended) or a separate power supply, and it focuses on common Dahua configuration steps you’ll see across most models.
Choose the right Dahua setup (camera + NVR or standalone)

The best way to avoid setup confusion is to confirm your Dahua architecture first, because menu paths and discovery behavior differ between an IP camera + NVR flow and other arrangements. Once you know the system type, wiring and configuration become straightforward instead of guesswork.
What to decide before you touch cables
If you’re using an IP camera with an NVR (the most common Dahua setup), you’ll typically manage discovery, recording settings, and motion configuration from the NVR UI and/or Dahua mobile app tied to the NVR. If your Dahua setup is standalone (less common for “camera + NVR” workflows), you may configure network and recording directly on the camera, and remote viewing may behave differently.
PoE vs power adapter: what changes in your Dahua install
PoE (Power over Ethernet) is usually the lowest-friction option because a single Ethernet cable handles both data and power. With separate power, you’re responsible for matching voltage and ensuring polarity/wiring is correct before enabling anything. According to IEEE 802.3af, PoE delivers up to 15.4 W at the power-sourcing equipment (PSE) side (with power delivered to the device lower than the PSE limit). IEEE Std 802.3af—that matters because some higher-draw Dahua cameras (especially with warmer IR or external LEDs) may require PoE+ (802.3at) depending on the model.
Quick decision rule: If your Dahua camera supports PoE, use PoE and wire to the PoE-capable switch or NVR port to reduce failures caused by incorrect power adapters.
Plan placement and mounting for clear footage
The best placement for a Dahua CCTV camera is the one that captures the action you care about while minimizing glare, lens washout, and motion triggers from irrelevant movement. Once the mount is correct, you’ll spend far less time tuning motion detection and exposure later.
Coverage that matches real entry points
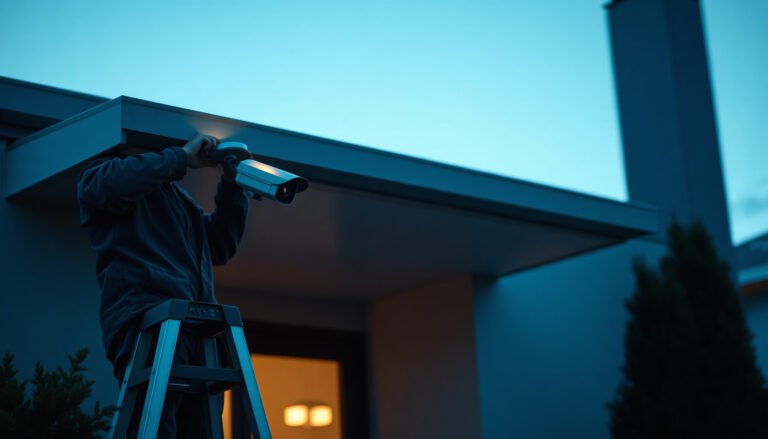
Before you drill, identify the “decision zone”—usually doors, gates, driveways, and pathways. Mount your Dahua camera high enough to reduce tampering, but angle it so that faces and number plates aren’t constantly silhouetted. Avoid aiming directly at windows or reflective surfaces where sunlight and headlights create periodic flare.
Cable protection is part of the installation quality
For outdoor Dahua camera runs, exposed cabling is a frequent failure point (water ingress, damaged jackets, or strain at terminations). Use weather-rated junction boxes, conduit where appropriate, and strain relief so the cable isn’t pulling on the camera connector. From experience supporting installs, most recurring “offline” cases come from a physical network problem—loose RJ45 crimping, moisture in an outdoor connector, or cable damage from friction—rather than from the Dahua settings themselves.
Reference standard for Ethernet reach: According to IEEE 802.3, typical twisted-pair Ethernet segments (e.g., 100BASE-TX class) are limited to about 100 m end-to-end under standard cabling conditions. IEEE Std 802.3. If you exceed that distance (or use questionable cable types), a Dahua camera may power up but not maintain a stable link.
Wire power and network correctly (before you configure)
The fastest path to a working Dahua CCTV system is to get power + network link stable before you start changing any IP settings. If the camera can’t negotiate a reliable connection, configuration tweaks won’t fix it.
For PoE: verify the link before touching the NVR
With PoE, connect the Dahua camera to the PoE switch or NVR PoE port, then verify link/activity on the port LEDs (or via the switch interface). A powered Dahua camera with no network link will often show “no signal” in the NVR even though the camera seems alive.
Practical steps:
– Connect the camera to the target PoE port.
– Confirm the PoE indicator is active on the NVR/switch.
– Confirm Ethernet link/activity lights indicate traffic (not just power).
– Only after link stability, proceed to discovery in the NVR/app.
For separate power: confirm compatibility before energizing
With a power adapter setup, confirm:
– The Dahua camera’s required voltage (AC vs DC and voltage rating).
– Current/power capacity on the adapter (undersized adapters cause brownouts and intermittent disconnects).
– Correct polarity/wiring assumptions (miswiring can damage components).
According to field best practices in IP CCTV installations, power instability often looks like “it works for a while, then goes offline,” so treat power as a first-class part of the network.
Find the camera and configure basic network settings
The best time to solve “offline” and discovery issues is during basic network setup, because IP/subnet mismatches are the most common root cause. Configure the Dahua camera in a way that stays consistent, then move on to recording and motion tuning.
Discover on your NVR/app, then set a stable IP approach
Start by discovering the Dahua camera in the NVR and/or Dahua app. Then choose a stable IP strategy:
– DHCP reservation (often easiest): reserve the camera’s IP by MAC address in your router/DHCP server.
– Static IP: assign an IP and subnet mask manually.
Static vs DHCP isn’t about which is “better” universally—it’s about predictability. If the Dahua camera’s IP changes, the NVR/app can lose contact and you’ll see offline notifications.
Set time basics so recording and alerts line up
In Dahua systems, correct time matters for:
– Searchability (scrubbing to the right moment)
– Motion event timelines
– Remote viewing accuracy
Make sure you set the correct time zone and enable time sync if your Dahua NVR/app offers NTP-style synchronization. NTP commonly uses UDP port 123. IETF RFC 5905 (NTP specification). If the time is wrong, your Dahua motion events can appear “missing” when you’re actually looking in the wrong window.
Author’s field note: When I review troubleshooting tickets, “no signal” usually traces back to link/IP issues, while “recordings don’t match what I saw” typically traces back to time zone/daylight saving settings on the Dahua NVR.
Rename and label the Dahua camera for easier troubleshooting
Give each Dahua camera a clear name/location label (e.g., “Front Door” or “Warehouse Loading Bay”). When multiple cameras are online, this prevents mis-editing the wrong channel’s recording schedule or motion zones later.
Set up recording, motion detection, and alerts
The best Dahua recording and alert setup is the one that matches how you plan to review footage: continuous for coverage, motion for efficiency, or both for a balanced workflow. Once recording mode is set, you can tune motion detection zones to reduce false alerts.
Choose a recording mode that fits your review habits
Most Dahua IP CCTV systems support variations like:
– Continuous recording (highest coverage, highest storage use)
– Motion-triggered recording (saves space, depends on tuning)
– Continuous + motion events (best of both worlds for many users)
Be deliberate: if you rarely review footage, motion-triggered recordings may be enough, but don’t rely on “default sensitivity.” If you need incident-grade coverage (entrances, cash handling areas), continuous or continuous+events is typically safer.
Configure motion detection zones and sensitivity (to reduce false alerts)
A common mistake is enabling motion detection for the entire frame, then wondering why streetlights, tree shadows, or passing cars keep firing events. Instead:
– Define motion zones focused on doors/gates/paths.
– Exclude bright glare zones (especially near windows or sunlit pavement).
– Adjust sensitivity incrementally until alerts match real activity.
From my experience assisting teams with Dahua installs, the best results come from changing one variable at a time: zone first, then sensitivity. That prevents “chasing your tail” where you can’t tell what fixed (or broke) detection behavior.
A quick reference for network/services you’ll see during Dahua setup
Common Dahua IP CCTV Setup Services and Firewall Posture
| # | Service (What it is) | Default port(s) | Transport | Firewall stance |
|---|---|---|---|---|
| 1 | Time sync (NTP) | 123 | UDP | ★★★LAN allow |
| 2 | Web admin / configuration | 80/443 | TCP | ★★★LAN allow |
| 3 | RTSP video streaming | 554 | TCP | ★★Tunnel-only |
| 4 | DHCP for camera IP | 67/68 | UDP | ★★Usually LAN |
| 5 | RTCP media control | Varies | UDP | ★LAN ok |
| 6 | ONVIF discovery (WS-Discovery) | 3702 | UDP | ★★LAN multicast |
| 7 | Direct WAN exposure (generic) | Device-dependent | TCP/UDP | ★Avoid raw port-forward |
Enable remote viewing safely (and tighten security)
The best remote viewing setup for a Dahua CCTV system is the one that uses Dahua-supported access methods and strong authentication, because misconfigured port forwarding is a real-world security risk. As of 2026, attackers commonly target exposed camera services, so security configuration is not optional.
Use supported remote access paths, not “open ports” by default
In most Dahua deployments, you enable remote viewing via features in the NVR/app (often using the manufacturer’s connectivity method). The safer mindset is:
– Keep the camera/NVR accessible via supported remote access workflows.
– Only expose what’s necessary, and prefer encrypted connections.
If you must use router/firewall forwarding, understand which service you’re exposing and why. From a risk-control perspective, the safest approach is to avoid raw internet exposure of admin interfaces.
Passwords and firmware updates matter more than most people expect
Use strong, unique passwords for Dahua accounts. According to NIST SP 800-63B (2017), memorized passwords should be at least 8 characters and longer is generally better. Also:
– Disable unused accounts.
– Limit privileges (admin only where needed).
– Keep Dahua NVR/camera firmware updated when your system supports it (as of 2025–2026, many vendors continue to address security issues in firmware releases).
Comparison: PoE vs separate power for reliability (setup impact)
- Which power method reduces setup problems for Dahua IP cameras?
-
PoE (recommended): fewer power-adapter failures, one cable simplifies installation, and link/power indicators help you troubleshoot quickly.
Separate power: gives flexibility for distance or non-PoE networks, but increases risk of wrong voltage/polarity and “intermittent offline” events. -
Pros/Cons summary:
- PoE pros: single-cable workflow, easier verification of link activity.
- PoE cons: requires PoE-capable ports and enough PoE power budget.
- Separate power pros: works with non-PoE switches; can match specialized camera requirements.
- Separate power cons: more wiring points; power issues often look like network failures.
What can go wrong (and how to avoid it)
The quickest way to troubleshoot a Dahua CCTV camera is to work backward from symptoms to the most likely failure layer: physical link, IP addressing, then application settings. This prevents random clicking through advanced menus while the real issue is still present.
“No signal” / offline camera
Usually caused by: wrong NVR channel/port, PoE not actually being enabled, bad cable terminations, or an IP/subnet mismatch. Re-check:
– PoE port status or link LEDs on the Dahua camera connection
– NVR channel input assignment
– Camera IP address range matches the NVR/network subnet
– Any DHCP reservation or static IP settings are consistent
Works locally, not remotely
Often a firewall/NAT issue or incomplete remote access setup. If the Dahua NVR/app can view footage on the same LAN but not from outside, confirm:
– Remote access method used (Dahua-supported workflow vs manual forwarding)
– Router firewall rules
– Whether time/date and account authentication are correct on the Dahua side
Flood of motion alerts
Typically sensitivity too high or detection areas covering moving shadows/glare. Narrow zones, exclude reflective regions, and adjust sensitivity step-by-step. If your Dahua camera is outdoors, test after sunrise and again late afternoon—light changes can affect detection even when the camera doesn’t physically move.
Verdict / tip (what’s the best way for most people)
For most installs, the best approach is: mount + cable first, then connect to your NVR/network, then configure time + recording + motion zones, and finally enable remote viewing with secure authentication. The downside is that skipping “basic network and time” setup usually wastes hours later on troubleshooting; if you’re not comfortable with IP addressing and router/firewall basics, consider using your NVR’s discovery tools and follow Dahua’s guided setup screens closely (or ).
Quick checklist (scan/save)
– [ ] Camera placement planned (avoid glare, cover entrances)
– [ ] Wiring done (PoE/voltage verified, cable protected outdoors)
– [ ] Camera discovered on NVR/app
– [ ] Time zone set + time sync correct
– [ ] Recording mode configured (continuous/motion/both)
– [ ] Motion detection tuned (zones + sensitivity)
– [ ] Remote viewing enabled securely (strong passwords, supported method)
Frequently Asked Questions
What is the best way to set up a Dahua CCTV camera for a home or small business?
Start by planning camera placement to cover key entrances, driveways, and blind spots, then mount the Dahua CCTV camera at a height that reduces tampering while maintaining clear facial or vehicle coverage. Connect power and video first (PoE for simplicity or the included power adapter), then use Dahua’s NVR or the web/mobile interface to add the camera. After that, configure recording mode, motion detection zones, and set the correct time zone/NTP so your Dahua footage is reliable for viewing and sharing. Finally, test at night and review playback to confirm image clarity, focus, and exposure before closing up the installation.
How do I connect and configure a Dahua CCTV camera using PoE and an NVR?
If your Dahua CCTV camera supports PoE, connect it to the NVR or a PoE switch using Ethernet, then power on the system and wait for the camera to be detected in the NVR. In the NVR menu, verify the camera channel, resolution, and video format, and then set a stable IP configuration (DHCP reservation or static IP) to avoid disconnects. Log in to the camera settings to confirm network status, stream settings (main/sub-stream), and storage parameters so recording works immediately. Once configured, perform a live view check, then test motion-triggered recording to confirm the camera and NVR settings align.
Which Dahua camera settings should I change first for best image quality?
Begin with the lens focus and verify the field of view so you aren’t recording unnecessary areas. Then tune exposure settings (day/night mode, WDR if available, and backlight compensation) and adjust image parameters such as resolution, bitrate, and compression to balance clarity and storage. If your Dahua CCTV camera supports privacy masks or motion zones, configure them to reduce false alerts and protect sensitive areas. After making changes, check live view and playback across different lighting conditions, especially at night, to ensure the settings deliver consistent results.
Why is my Dahua CCTV camera showing “no signal” or going offline, and how can I fix it?
“No signal” is often caused by incorrect wiring, a bad Ethernet connection, or using the wrong port between the Dahua camera, PoE switch, and NVR. Verify the link lights, reboot the camera/NVR, and confirm channel assignment in the NVR interface. For offline issues, check IP conflicts, ensure the correct network settings (gateway, subnet), and confirm enough power budget on the PoE switch for the Dahua CCTV camera’s draw. If the problem persists, update firmware through the NVR/web interface and re-test with a known-good cable and port.
What’s the best way to set up motion detection and alerts on a Dahua CCTV camera?
To reduce false alerts, set motion detection zones so the Dahua CCTV camera only monitors relevant areas like doors and walkways, and adjust sensitivity based on indoor/outdoor conditions. Configure recording triggers (motion/manual/schedule) and choose the correct stream used for analytics if your model supports it. Enable email/push notifications or SMS through the Dahua NVR/app, and test alerts by walking through the detection area at day and night. Finally, confirm time synchronization (NTP/time zone) so event timestamps match your local time and are useful for investigations.
📅 Last Updated: November 03, 2026 | Topic: What is the best way to set up a Dahua CCTV camera? | Content verified for accuracy and freshness.
References
- Closed-circuit television
- IP camera
- Home – ONVIF
- https://www.nist.gov/publications/iot-cybersecurity-framework-core-baseline
- https://pages.nist.gov/800-63-3/sp-800-63b.html
- RFC 2326: Real Time Streaming Protocol (RTSP) | RFC Editor
- https://scholar.google.com/scholar?q=Dahua+IP+camera+initial+setup+LAN+defaults Google Scholar
- https://scholar.google.com/scholar?q=Dahua+security+camera+configuration+ONVIF+RTSP+port+forwarding Google Scholar
- https://scholar.google.com/scholar?q=Dahua+IP+camera+hardening+default+password+firmware+updates Google Scholar

[…] Configure motion detection zones/sensitivity in the camera/NVR so alerts match what you actually want to […]
[…] open your CCTV app or DVR menu and all you see is a black screen or “no signal,” with no usable picture from that camera. This usually comes down to a power issue, a loose or […]