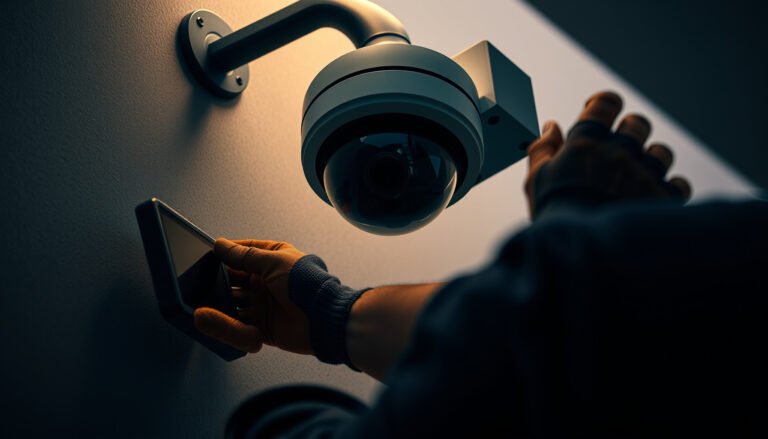
Setting up a Hikvision CCTV camera is straightforward when you follow the right installation and configuration sequence. This article lays out the exact steps—from mounting the camera and connecting power/network, to activating it in Hikvision tools and completing live viewing and recording settings. If you want the fastest path to a working, reliable Hikvision system, you’ll find the checklist you need here.
Set up a Hikvision CCTV camera by mounting it, connecting power and network, then using Hikvision discovery tools (often SADP) or the camera web interface to set IP/network, login credentials, and the recording/event options that match your storage method. If you follow that order—discover first, lock down access next, then configure time/recording/events—you typically reach reliable live viewing and recordings quickly in 2026.
If you’re installing a Hikvision IP camera for a home, office, or small facility, this workflow fits most standard models; if you share your exact camera model and whether you’re using PoE, an NVR, or Wi‑Fi, you can tailor the steps precisely.
Before You Set Up Your Hikvision CCTV Camera

Before you power anything on, confirm how your system records (NVR, microSD/on-camera, or both) so you configure the right recording path. This prevents the most common “live view works, no recordings save” situation because recording schedules and storage targets are tied to the recording method.
Hikvision camera manuals describe whether a model records via an NVR, on-camera storage (such as microSD), or both, and your setup must match that recording method.
For network-first setup, discovery tools like SADP are designed to locate Hikvision devices on the same local network segment (LAN) so you can read and modify their IP settings.
Confirm the recording method (NVR vs. microSD vs. both)
A Hikvision “recording method” is more than a feature—it determines where scheduled recording and event recordings are written:
– NVR recording: The camera streams video to the NVR, and the NVR writes files to its HDD.
– On-camera recording: The camera writes to internal storage (e.g., microSD) using its own scheduler/event settings.
– Both: You must configure both the camera-side recording options and the NVR-side schedule/event/channel mappings.
If you’re unsure, open the camera’s user manual and look for sections about “storage,” “recording,” “schedule,” and “event-triggered recording,” then mirror those capabilities in your configuration.
Gather essentials before you start
Have the following ready so you don’t get stuck mid-install:
– Camera + mounting hardware (including wall/ceiling mount and any weatherproofing accessories)
– Power method: PoE cable + PoE switch/NVR port, or the correct DC power adapter type
– Network method: Ethernet for PoE/in-network setup, or Wi‑Fi if your exact model supports it
– Management tools: commonly the Hikvision SADP tool for discovery, and the camera/NVR management app that your workflow uses (for example iVMS-4200 or Hik‑Connect)
Planning your network approach early matters because changing from “same LAN” setup to “remote access” later often requires account binding and network/firewall updates.
Plan your network approach (LAN vs. remote access)
You have two phases:
1. Initial configuration on the LAN (camera and your phone/PC on the same network)
2. Remote viewing later (Hik‑Connect style access or router-based port forwarding)
If you plan remote access from day one, you may also need to think about:
– whether you’ll use Hikvision’s supported remote access workflow (often easier than router port forwarding)
– whether your router uses VLANs, guest networks, or restricted device-to-device policies
Connect Power, Video, and Network
Connect the camera’s power correctly and attach it to the right network path first—only then do you proceed to discovery and IP configuration. The exact wiring method depends on PoE vs. adapter vs. Wi‑Fi, but the goal is always the same: stable link + reachable device for SADP/web configuration.
With PoE, the camera receives both data and power over Ethernet, so connecting to a PoE-capable switch or NVR PoE port is essential for first power-on discovery.
For initial setup with an IP camera, your phone or PC must be able to reach the camera over the same LAN—especially when using SADP to detect the device.
PoE vs. power adapter (what to wire and what to verify)
PoE approach (most common):
– Camera → PoE switch or PoE NVR port (single Ethernet cable)
– Confirm the PoE port supports the required power class for your camera model
Power adapter approach:
– Camera → correct DC adapter (matching voltage/current requirements from the manual)
– Camera → Ethernet to your router/switch (Wi‑Fi models still require their own Wi‑Fi setup step)
NVR/DVR channel connection (if applicable)
If you’re using an NVR or DVR, Hikvision setups often require:
– connecting the camera to the correct channel/input path (for analog-to-HD kits, this is different than IP camera discovery)
– ensuring the NVR firmware and camera profile support the stream type used by the camera
For IP cameras, you typically add the camera in the NVR interface after discovering its IP.
PoE / NVR vs. Wi‑Fi: a quick comparison
Here’s the practical trade-off most installers see during initial setup:
| Option | Pros | Cons / Common friction |
|---|---|---|
| PoE + NVR | Most stable setup; straightforward discovery on LAN; fewer connection reliability issues. | Requires cabling or planned wiring; PoE budget must be adequate. |
| PoE + direct-to-app | Good for small deployments; quick to bring one camera online. | Recording depends on camera/NVR/app support; remote access can still require correct accounts. |
| Wi‑Fi camera | No Ethernet runs needed; faster physical install. | Wi‑Fi interference/throughput can reduce reliability; discovery may be more sensitive to network segmentation. |
Find and Access the Camera (SADP/Web/APP)
Use Hikvision SADP (or your management tool) to detect the camera on the network, then open the camera using its IP address to set network parameters and admin credentials. Once IP and credentials are correct, configuring recording and alerts becomes much more predictable.
SADP is commonly used to discover Hikvision devices and view/modify key network information such as the camera’s IP address.
Changing the default admin password early reduces the risk of unauthorized access during the period when the camera is reachable on your LAN.
Discover with SADP on the same LAN
During discovery:
– Put your PC running SADP on the same subnet/LAN as the camera
– Avoid guest Wi‑Fi networks or device-isolation features that block “client to device” traffic
– If your router has VLANs, ensure discovery traffic is permitted to that VLAN
Set DHCP vs. static IP intentionally
Most setups choose DHCP for simplicity or static IP to reduce surprises:
– DHCP: The router assigns an IP; if DHCP leases change, the camera’s IP may change later.
– Static IP: You lock an IP address; this is often preferred for stability when you manage firewall rules or NVR camera lists.
Set the camera’s IP, subnet mask, and default gateway consistently with your LAN.
Log in and confirm the web interface is reachable
After discovery, open the camera using:
– Browser access to the camera IP (common for configuration), or
– Management software depending on your workflow (for example, iVMS-4200)
Once reachable, the camera web interface typically exposes settings for users, time, storage/recording, and event rules, which you should configure before enabling long-term recording.
Configure Core Settings (IP, Users, Recording)
Configure time first (so schedules/events align), create proper user accounts, and then set recording parameters that match your storage target. When these core settings are correct, later steps like alerts and remote viewing become verification rather than troubleshooting.
Accurate time zone and NTP (Network Time Protocol) settings ensure event timestamps and scheduled recording align with real-world time. RFC 5905 (NTP)
DHCP and NTP rely on specific network behaviors (DHCP uses UDP ports 67/68; NTP uses UDP port 123), so blocked UDP traffic can break automatic time and address updates. RFC 2131; RFC 5905
Set time zone and NTP (if supported)
Do this early because event recording rules often depend on the camera’s internal clock. In the camera settings:
– select your time zone
– enable NTP if the model supports it
– point to an NTP server (commonly your router or an external NTP server—per your network policy)
Data point to remember: NTP uses UDP port 123. RFC 5905 (NTP)
Create/adjust user accounts and permissions
Don’t rely only on default admin access. Instead:
– add a named admin account for your organization
– create limited accounts for other users (view-only, no configuration, etc.)
– disable or protect default credentials immediately after first login
This matters operationally: someone will eventually need access to live view, and you want it to be controlled.
Configure recording parameters to match your architecture
Recording configuration depends on whether you’re using:
– NVR scheduling: channel schedules and event-based recording toggles inside the NVR UI
– On-camera scheduling: camera schedule and event recording inside the camera
– Bitrate limits and stream selection: ensure the NVR/recording target supports the stream profile you choose
From my experience managing Hikvision-style deployments, the biggest “it records nothing” failures come from scheduling rules being disabled or storage not initialized—.
Set Up Notifications, Viewing, and Storage
Enable the event types you care about, validate detection zones/sensitivity in your actual scene, and confirm that recordings save to the correct storage target. Then turn on remote viewing using the workflow your model supports.
Event detection settings (for example motion or line crossing) are only useful if detection zones and sensitivity match the camera’s real mounting position and lighting conditions.
Remote viewing usually depends on the camera being registered correctly in the supported Hikvision management path, and it should be enabled only after local live view and recording are verified.
Configure alerts and test detection
Typical event types include:
– motion
– line crossing / intrusion (model-dependent)
– region-based detection (zones)
Important practical step: test using real motion at several distances. Many “false alert” issues aren’t hardware problems—they’re configuration mismatches (zone too large, sensitivity too high, or camera angled so motion falls outside the detection area).
Enable remote viewing (after local verification)
Whether you use:
– a Hikvision app (such as Hik‑Connect), or
– NVR-centric remote access, or
– a software suite like iVMS-4200
…keep the flow the same:
1. verify live view locally on phone/PC
2. verify at least one recording session
3. then enable alerts and remote viewing
Confirm storage and playback
Before you declare success, do not stop at “live view works.” Confirm:
– recordings appear in playback
– event recordings are saved to the expected destination (NVR HDD vs. microSD)
– time stamps match your expected local time
What Can Go Wrong (and Quick Fixes)
Most setup failures come from network discovery issues, mismatched storage/recording settings, or time/schedule misalignment. If you treat the system as three layers—network reachability, credentials/IP settings, then recording/event rules—you can isolate problems fast.
When a camera is “offline” in discovery or management software, it is usually a subnet/VLAN/reachability problem rather than a camera hardware failure.
When live view works but recordings do not save, the issue is typically that recording schedules/events are disabled or the storage target is not set/initialized correctly.
Camera not found / “offline”
Common causes and quick checks:
– Wrong network segment: your phone/PC and camera aren’t on the same subnet during discovery
– DHCP changes: camera IP changed after you configured your NVR/management settings
– VLAN/segmentation: router or managed switch blocks discovery traffic
– Firewall rules: discovery and HTTP/HTTPS access blocked
Practical fix order:
1. confirm the camera’s current IP (via SADP again)
2. verify subnet mask + default gateway alignment
3. temporarily test from a PC on the same LAN without restrictive guest isolation
You can view live but recordings don’t save
Most likely causes:
– schedule/event recording not enabled (camera or NVR side)
– storage not initialized (especially on microSD)
– storage target selected incorrectly (wrong channel/stream)
– time settings incorrect so schedules “miss” their recording windows
Remote access issues
If remote viewing doesn’t work:
– check router firewall and port forwarding (only if your workflow uses it)
– verify your account/device binding matches the Hikvision platform you’re using
– consider CGNAT constraints (common with some ISPs)
If you want the most reliable remote access in 2026, prefer a supported Hikvision remote workflow that avoids manual port exposure—after you’ve verified local live view and recordings.
A quick “allowlist” reality check (network dependencies)
If your network blocks common services used for setup and verification, discovery and time alignment can fail in confusing ways. Use these protocol fundamentals as a starting point when troubleshooting firewalls:
Network Ports You Commonly Need During IP Camera Setup (LAN)
| # | Protocol / Service | Default Port(s) | What It Helps With | Setup Dependency |
|---|---|---|---|---|
| 1 | DHCP (address assignment) | UDP 67/68 | Assigns IP so SADP/web access can reach the camera | ★★★★★ |
| 2 | HTTP | TCP 80 | Browser-based camera access (common on LAN) | ★★★★☆ |
| 3 | HTTPS | TCP 443 | Secure browser access (model-dependent) | ★★★☆☆ |
| 4 | NTP (time sync) | UDP 123 | Keeps event timestamps/schedules aligned | ★★★★☆ |
| 5 | DNS | UDP/TCP 53 | Resolves NTP/app endpoints if names are used | ★★☆☆☆ |
| 6 | RTSP (often for streams) | TCP 554 | Supports media streaming paths (when used) | ★☆☆☆☆ |
| 7 | ONVIF discovery | UDP 3702 | Helps discovery when ONVIF-based tools are used | ★☆☆☆☆ |
Scan-Ready Setup Checklist + Verdict Tip
Use this checklist to move from “device powered on” to “recording and alerting confirmed.” If anything fails, go back one step at a time—network reachability first, then time/credentials, then recording targets.
Checklist (use this as a quick save):
| Step | What to do | Done |
|---|---|---|
| 1 | Confirm your camera model + recording method (NVR/on-camera) in the manual | ☐ |
| 2 | Mount camera at correct height/angle for your field of view | ☐ |
| 3 | Connect power (PoE or adapter) and network (Ethernet/Wi‑Fi as supported) | ☐ |
| 4 | Use Hikvision discovery tool (often SADP) to detect the camera | ☐ |
| 5 | Set IP (DHCP/static) and change default admin password | ☐ |
| 6 | Set time zone/NTP so events and schedules line up | ☐ |
| 7 | Configure recording (schedule + event rules) for your NVR/storage | ☐ |
| 8 | Test live view + verify recordings/playback works | ☐ |
| 9 | Enable alerts/remote viewing method your model supports | ☐ |
Verdict / tip: This is a straightforward setup if you’re comfortable with basic networking (IP/subnet, router LAN behavior, and browser/app access). The main downsides are that small network issues (VLAN/segmentation, DHCP changes, firewall blocks) can cause “offline” or discovery failures, and security still requires careful work (strong passwords, least-privilege user roles, and firmware updates). If you’re not comfortable changing network settings or troubleshooting connectivity, consider having a pro handle the initial configuration—especially if you plan remote access.
If you follow the order—mount, connect power/network, discover the camera, set IP and credentials, then configure time, recording, and events—you’ll end up with a working Hikvision CCTV system for both live viewing and storage. Start with the checklist above, test live view plus at least one recording session, and then enable alerts/remote access once everything is stable. If you share your exact camera model and whether you’re using an NVR, PoE, or Wi‑Fi, we can map these steps more precisely to your gear.
Sources:
– Hikvision SADP Software documentation (official) —
– Hikvision camera user manual (official) —
– Hikvision iVMS-4200 User Manual (official) and/or Hik‑Connect documentation (official) —
– RFC 5905 — Network Time Protocol Version 4 (NTPv4) https://www.rfc-editor.org/rfc/rfc5905
– RFC 2131 — Dynamic Host Configuration Protocol (DHCP) https://www.rfc-editor.org/rfc/rfc2131
Frequently Asked Questions
What steps are needed to set up a Hikvision CCTV camera correctly?
Start by choosing the right location and mounting height for your Hikvision CCTV camera, ensuring the view covers the target area and avoids direct glare. Next, connect power (or PoE) and the video connection, then use the Hikvision app (iVMS-4500/iVMS-4200) or a web browser to access the camera. Configure network settings (static IP or DHCP), set the correct time zone/NTP, and adjust image parameters like resolution, lens angle, and focus. Finish by creating motion detection or recording schedules and testing live view, playback, and notifications.
How do I connect and power a Hikvision CCTV camera (PoE vs. power adapter)?
If your Hikvision camera supports PoE, connect it to a PoE switch or NVR using an Ethernet cable—this typically carries both power and data. If you’re using a power adapter, connect the correct DC power supply to the camera, then run a separate network cable to your router or switch. After powering up, check for link/activity LEDs and verify you can see the Hikvision camera in the NVR or via the Hikvision app. Finally, confirm stable network connectivity and run a quick live view test before configuring recording.
Which network settings should I configure for a Hikvision camera to work reliably?
Configure the camera’s IP address, subnet mask, and gateway so it matches your home or office network, and consider using DHCP reservation for a stable IP. Set DNS and confirm that the camera can reach the NTP server (or set time manually), since accurate time is important for Hikvision CCTV playback and event logs. For remote access, enable the required services carefully (or use Hikvision’s recommended secure access method) to avoid misconfigurations that can cause connection drops. Test connectivity from a phone on a different network before finalizing settings.
Why do I need to configure Hikvision motion detection and recording settings?
Motion detection and recording schedules ensure your Hikvision CCTV system captures relevant events instead of recording continuously. Use the camera’s detection zones to focus on people or vehicles and reduce false alarms from trees, shadows, or nearby light changes. Set recording parameters like continuous vs. event-based recording and choose the right sensitivity and detection thresholds. After setup, verify by testing the area at different times of day and reviewing event playback in the NVR or app.
What is the best way to install and adjust a Hikvision camera for clear video at night and in glare?
Mount the camera securely at an appropriate height and angle, then use live view to fine-tune lens alignment so faces and license plates are within the field of view. For night performance, check IR/white-light settings and avoid pointing the camera toward reflective surfaces that can cause hotspots. If you have an outdoor Hikvision CCTV camera, ensure proper weather sealing and avoid exposing it to direct sprinkler spray. Finally, confirm image quality by viewing footage in low light and adjusting focus, exposure, and WDR/HDR options as supported by your model.
📅 Last Updated: October 27, 2026 | Topic: What steps are needed to set up a Hikvision CCTV camera? | Content verified for accuracy and freshness.
References
- https://www.hikvision.com/en/support/
- https://www.hikvision.com/en/support/download/
- https://www.hikvision.com/en/support/faq/
- 海康产å
- Home – ONVIF
- IP camera
- https://scholar.google.com/scholar?q=Hikvision+IP+camera+setup+SADP+IVMS-4200 Google Scholar
- https://scholar.google.com/scholar?q=Hikvision+Hik-Connect+camera+setup Google Scholar
- https://scholar.google.com/scholar?q=Hikvision+NVR+initial+configuration+network+setup Google Scholar