


If you want CCTV in an apartment, the quickest win is to plan coverage first (entry points and key paths), then install a small camera set with the right power/recording method, and finish by configuring motion zones and privacy masking. Do that in order, and your system is far more likely to produce useful evidence instead of constant false alerts or overly intrusive footage.
If you rent or live in a building with an HOA/management rules, you’ll also want to confirm what’s allowed before mounting anything. This approach is designed for homeowners and renters who want a practical setup plan rather than a complicated security project.
Plan coverage and apartment layout

You’ll get the best results by starting with coverage planning—because camera placement mistakes are hard to fix later without re-mounting. In practice, you’re trying to capture identification (faces/plates) at the moment someone approaches your apartment’s key entry routes, while keeping indoor recording and neighbor sightlines to a minimum.
– Start with “must-cover” areas: main door, balcony/patio door, parking/entry corridor (if applicable), and any internal hallway that leads to bedrooms.
– Map camera sightlines to avoid blind spots and glare (screens, windows, and reflective surfaces can cause poor images).
– Check apartment/landlord/HOA rules for cameras near shared spaces and for recording audio (if your system supports it).
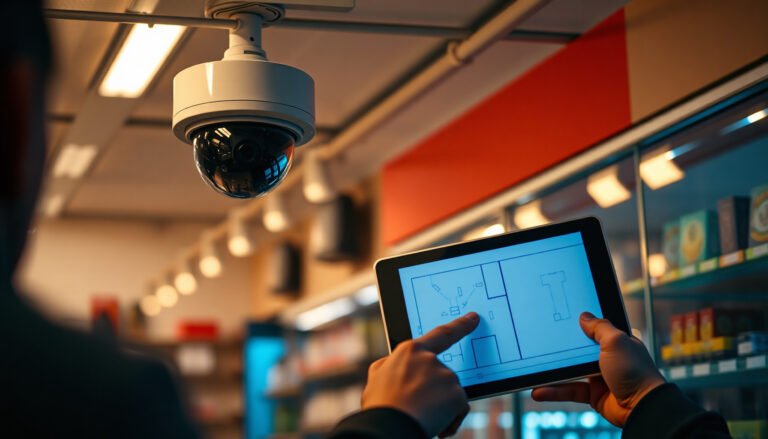
To plan effectively, sketch your apartment as a simple diagram (even on your phone notes app) and mark the “approach lanes” an intruder would naturally take: the hallway from the stairwell/elevator, the path to your door peephole, and any balcony door that can be reached from outside. For each lane, decide what you want the camera to do: verify presence (movement), identify the person (face), or document the event (time-stamped context).
Two practical coverage tips I recommend to nearly everyone:
1) Cover the route, not just the door. A camera pointed only at the door can miss the moment someone pauses before trying the handle.
2) Don’t rely on “wide-angle = better.” A wider view is useful for situational awareness, but narrower framing is often what you need for facial detail.
Also, confirm how shared areas are treated. Some buildings allow cameras facing only your interior (or your unit door), while others restrict recording in common hallways. If the camera can see beyond your boundary (for example, down a shared corridor), plan for privacy masking.
What to measure before you buy
– Distances: Measure from the mounting spot to the door/balcony so you can match the camera’s field of view and detection claims to your real geometry.
– Lighting: Note where bright indoor lights or outdoor lamps aim at reflective surfaces (glass frames, polished floors, TV screens).
– Mounting surfaces: If you can’t drill, plan for a surface-mount bracket compatible with renters’ constraints.
Choose the right equipment for an apartment
You’ll get a calmer, more manageable CCTV system by choosing the simplest recording and power approach that fits your apartment’s constraints. In 2026, most apartment-friendly kits fall into two buckets—wireless cams with local recording, or wired (often PoE) cams with centralized recording—both can work, but they fail differently if you pick the wrong one for your layout.
– Decide between wireless cameras and wired (often PoE) based on your outlet access and how much you can drill/mount.
– Pick a storage approach: local microSD per camera, or an NVR/DVR that centralizes recording (NVR setups are often easier to manage).
– Match features to your needs: person/vehicle detection (if available), night visibility (IR vs color), and “privacy mask” settings.
Wired vs wireless (what to choose in an apartment)
If you want the decision to be fast, use this comparison as your filter: wired setups reduce network dropouts, while wireless setups reduce installation friction.
| Option | Pros in an apartment | Cons to plan for |
|---|---|---|
| Wireless (battery/Wi‑Fi) | No new cabling, flexible placement, easier to remove if you move | Battery maintenance, Wi‑Fi dead spots, and occasional stream interruptions |
| Wired (PoE + NVR) | Stable power/data, centralized management, usually smoother motion/event recording | More upfront planning, typically more drilling/route work, NVR adds a central device |
Power reality check: PoE power classes that matter
If you’re considering PoE in an apartment, the PoE standard determines how much power the camera can actually draw for IR LEDs, color night illumination, or built-in analytics. For example, per powered-device limits: IEEE 802.3af (2003) allows up to 15.4W at the powered device (PD), IEEE 802.3at (2009) supports up to 25.5W at the PD, and IEEE 802.3bt (2018) can go up to 71W at the PD. These ceilings are why PoE is often the “it just works” choice for multi-sensor cameras.
PoE Power Classes for Apartment CCTV (Max Power at the Camera)
| # | PoE standard / type | Use-case fit | Max PD power | Best for |
|---|---|---|---|---|
| 1 | IEEE 802.3af (PoE “Type 1”) | Basic IR cameras | 15.4 W | Doorbell cams & indoor cams |
| 2 | IEEE 802.3at (PoE+ “Type 1”) | Mixed indoor analytics | 12.95 W | Entry cams without heavy lighting |
| 3 | IEEE 802.3at (PoE+ “Type 2”) | Brighter night vision | 25.5 W | Exterior cams on short runs |
| 4 | IEEE 802.3bt (PoE++ “Type 1”) | Enhanced illumination | 30 W | Night color or wide FOV cams |
| 5 | IEEE 802.3bt (PoE++ “Type 2”) | High-demand analytics | 36 W | Better low-light detail |
| 6 | IEEE 802.3bt (PoE++ “Type 3”) | Exterior-heavy setups | 51 W | Multi-sensor domes |
| 7 | IEEE 802.3bt (PoE++ “Type 4”) | Maximum lighting/processing | 71 W | Advanced exterior systems |
Storage: local SD vs NVR (central recording)
In an apartment, storage choice is less about “best technology” and more about how you want to manage access and retention. Local microSD (one card per camera) can be simpler if you’re adding one or two entry cameras. An NVR (Network Video Recorder) centralizes streams and usually makes it easier to review events, back up clips, and manage user permissions.
If your building network is shared or crowded, NVR systems can also be easier to tune because recording is managed centrally rather than by each device independently.
Placement, mounting, and power (without creating new problems)
You’ll avoid 80% of CCTV frustration by placing cameras to capture faces at entry points and by powering them in a way that matches your apartment’s physical limits. This is also where you prevent “new problems” like poor image quality from glare, damaged surfaces from drilling, or unreliable power delivery.
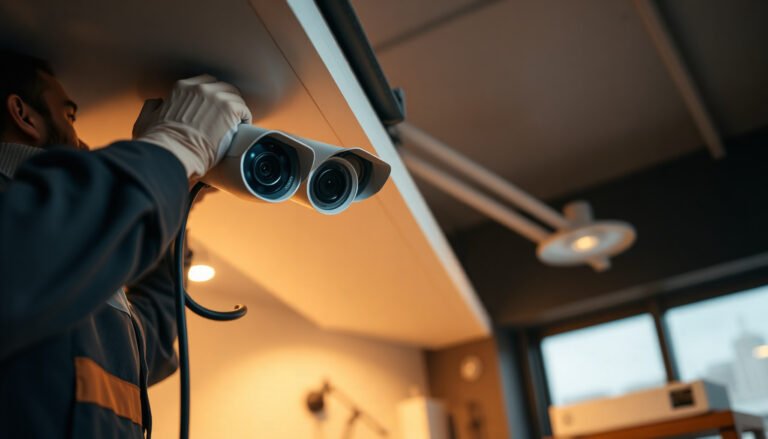
– Mount cameras at a height that reduces tampering while still capturing faces at entry points (follow the camera’s recommended height/angle in the manual).
– Avoid aiming directly at windows or bright lights; use the widest view where it’s useful and tighter framing where identification matters.
– For power: plan your route early—battery/solar has tradeoffs, while plug-in setups can be limited by outlet locations, and hardwired options require more install effort.
Height and angle: capture the moment someone pauses
Most entry attempts slow down at the door handle or balcony lock. That’s where you should capture a recognizable face. If you mount too high, you’ll get “top-of-head” footage; too low and it’s easier to obstruct.
A practical approach:
– Start with the camera’s recommended installation height from the manual.
– Use the live view in the app to check what you see when you stand in the entry lane (not just when the camera is aimed at the door from the other side of the room).
– Lock the mount only after you’re satisfied that door hardware, faces, and key motion are all visible.
Power route planning (apartment-friendly)
Power planning is mostly about avoiding visible, trip-prone cabling and avoiding “works now, fails later” choices. If you’re using plug-in power, map outlet locations before you commit to placement. If you’re using PoE, plan the cable path from the camera to the switch/NVR area and make sure you can route Ethernet cleanly.
If you’re renting and drilling is not allowed, consider surface-mount conduits or adhesive/renter brackets that match your camera base. Confirm removal requirements with management before you install.
Configure recording, privacy, and access
You’ll get usable evidence (and fewer complaints) when you configure recording zones and privacy masking before you rely on alerts. Once the cameras are physically mounted, the “real work” becomes tuning motion detection, event types, and who can view footage.
– Set motion detection zones so you don’t record constant alerts from curtains, pets, ceiling fans, or passing traffic.
– Enable privacy masking/recording boundaries for windows, neighbors’ property, and indoor spaces where recording may be inappropriate—use the feature if your camera supports it.
– Secure access: use a strong unique password, enable two-factor authentication if offered, and set up who can view recordings (avoid sharing broadly).
Motion zones: aim for “signal,” not “noise”
Motion detection is rarely smart enough to know your curtains won’t move or that a ceiling fan is harmless. Define motion zones around the entry lane and exclude areas that generate constant movement (window reflections, hanging plants, or frequently moving household items). Many apps offer:
– Person detection (instead of generic motion)
– Activity schedules (record only at night or while you’re away)
– Sensitivity sliders (lower sensitivity when false alerts spike)
In 2026, most mainstream platforms support some version of these controls, but the exact menus vary by vendor.
Privacy masking: treat neighbors like stakeholders
Privacy masking (often labeled “privacy zones” or “recording masks”) blocks parts of the live view and/or recording from being captured. Use it for:
– windows where neighboring properties are visible,
– areas that include shared hallways,
– portions of indoor space you don’t want recorded continuously.
Even if your camera supports privacy masking, verify it after installation. A slight change in angle can reveal a neighbor’s window that wasn’t visible in the first positioning test.
Secure access with a real security framework
To avoid account takeover risk, treat camera access like any other sensitive system. A simple mapping to the NIST Cybersecurity Framework (Identify, Protect, Detect, Respond, Recover) helps:
– Protect: strong unique passwords + two-factor authentication (2FA)
– Detect: alerts for login attempts and unusual events
– Respond/Recover: know how to revoke access and reset credentials if needed
Also, limit who can view clips. In apartments, “everyone in the family group chat” is exactly how sensitive footage leaks.
What can go wrong (and how to prevent it)
You’ll keep your CCTV system trustworthy by testing it for image quality, alert accuracy, and privacy compliance before you assume it will work in an emergency. Most failures are predictable: wrong angles, overly sensitive motion rules, and misunderstood recording scope.
– Cameras pointing too high or too wide can make IDs impossible—test the view from where you’ll actually stand or enter.
– Over-triggering alerts can make the system “feel broken,” causing you to miss real events—tune sensitivity and zones before you rely on it.
– Poor night performance is common if you mount in the wrong spot (reflections/glare) or rely on outdated IR settings—check the camera’s night coverage notes.
– Privacy/legal issues can arise if you record places you shouldn’t (shared hallways, neighbors’ windows, or regulated areas)—verify rules before permanent mounting.
– If you choose local SD storage, plan for reliability (some systems need periodic management of cards and firmware updates).
A quick troubleshooting sequence
If alerts spike or clips look unusable, follow this order:
1) Re-check the live view at night from the entry lane.
2) Reduce sensitivity and tighten motion zones.
3) Enable person detection (if available) and disable irrelevant triggers.
4) Confirm privacy masks still cover the neighbor-adjacent parts after final mounting.
SD card reliability note
Local microSD can work well, but you should treat it as a managed component: update firmware, ensure the card is compatible with your camera model, and periodically check health/status in the app.
Verdict / tip + quick checklist
Overall, a simple apartment CCTV setup works best when you keep the camera count reasonable, cover the real entry paths, and spend time tuning motion zones and privacy settings. Skip complicated “fully automated everywhere” plans if you’re not prepared to maintain updates and review events regularly.
Who should skip this approach: If you know you can’t configure motion settings, can’t manage storage, or aren’t willing to test overnight video quality after installation, you’ll likely end up with footage you can’t use when it matters.
Quick checklist (scan/save):
| Step | Do this |
|---|---|
| Coverage | Cover main door + key access points first |
| Mounting | Follow manual guidance for angle/height |
| Power/storage | Choose wireless vs PoE/corded, then pick NVR vs SD |
| Alerts | Set motion zones to reduce false notifications |
| Privacy | Use masking for windows/shared areas where needed |
| Security | Strong password + 2FA (if available) |
| Maintenance | Check firmware updates and test viewing access |
When you set it up this way—plan coverage, choose compatible equipment, place cameras thoughtfully, then tune recording and privacy—you’ll end up with CCTV that’s actually useful when something happens. Next step: decide which access points you’re covering, then build your setup around those areas and confirm mounting/privacy rules before drilling or finalizing installation.
Frequently Asked Questions
How should I choose the right CCTV cameras for an apartment?
For an apartment, focus on cameras that cover key entry points like your front door and any accessible windows or balconies. Use IP (network) cameras for easier setup and remote viewing, and consider at least one camera with night vision and a wide field of view (or an appropriate lens for tight spaces). If you want clearer faces, choose models with good resolution (e.g., 4MP/8MP) and features like person detection to reduce false alerts.
What is the best way to position CCTV cameras inside an apartment?
Place indoor cameras to capture faces and activity at likely approach paths—such as the hallway leading to bedrooms and the main living area—not directly where people can block the view. Mount them high enough to reduce tampering (commonly around 2.2–2.5 meters), but angle them to avoid glare from lights or windows. Ensure your indoor setup includes coverage of common routes and aligns with your apartment layout so you don’t rely on one camera for everything.
How do I set up CCTV wiring or choose a wireless setup for my apartment?
If you want a simple, clean install, wireless CCTV is often the easiest option, but it still needs reliable Wi‑Fi strength at each camera location. For the most stable performance, consider running Ethernet from a central point or using PoE cameras to reduce dropouts and improve video quality. Plan your power method first (power adapter vs. PoE) and place cameras within strong network range to avoid buffering or delayed notifications.
Which NVR, storage size, and subscription do I need for apartment CCTV?
If you use an NVR (network video recorder), choose one that supports your camera count and the video resolution you plan to record. For storage, estimate required days based on your camera’s frame rate and compression; many people use a dedicated surveillance-grade HDD and record 24/7 or motion-only depending on budget. If you prefer cloud CCTV, confirm how long the footage is retained, whether notifications include clips, and how costs scale over time.
Why is proper placement and compliance important when installing apartment CCTV?
Proper camera placement prevents blind spots and improves evidence quality by capturing usable angles and identification details. You also need to consider legal and privacy requirements—such as avoiding views into neighbors’ property or indoor areas where surveillance may be restricted—since laws vary by location. Before installation, check your building rules or landlord permissions, and configure motion zones and privacy masks so your apartment CCTV records what it should without unnecessary coverage.
📅 Last Updated: November 03, 2026 | Topic: How should I set up CCTV for an apartment? | Content verified for accuracy and freshness.
References
- https://ico.org.uk/for-organisations/guide-to-data-protection/cctv/
- [Withdrawn] Surveillance camera code of practice – GOV.UK
- SP 800-213, IoT Device Cybersecurity Guidance for the Federal Government: Establishing IoT Device…
- Privacy Framework | NIST
- Closed-circuit television
- https://scholar.google.com/scholar?q=apartment+CCTV+installation+camera+placement+guidelines Google Scholar
- https://scholar.google.com/scholar?q=CCTV+video+surveillance+privacy+legal+requirements+video+devices+personal+data Google Scholar
- https://scholar.google.com/scholar?q=security+cameras+cybersecurity+IoT+default+passwords+network+segmentation Google Scholar

[…] you want the easiest way to wire multiple CCTV cameras, choose a single network video recorder (NVR) setup with one reliable cable run per camera—using PoE (Power over Ethernet) when possible. […]