


Most people assume the best way to add an NVR hard drive is to buy any spare SATA drive and plug it in, but that often leads to dropouts and premature failure. We’ll judge options by NVR compatibility, surveillance workload/MTBF, interface and capacity, and the steps that prevent wrong formatting or overheating. Follow a step-by-step setup that starts with choosing a surveillance-rated HDD, mounting it securely, and letting the NVR initialize and test the new storage.
If you want the best way to install an NVR hard drive, start by matching the drive to your NVR’s supported capacity/type, then power down fully and follow the manufacturer’s bay and SATA/connector instructions. After that, format the drive in the NVR (not on a PC) and confirm the recording status. This guide walks you through those steps and what to check when things don’t show up.
This is for anyone installing a new internal HDD for an NVR—especially if you’ve never opened the NVR case, are worried about compatibility, or want to avoid the common “drive not detected” problem.
Check Compatibility Before You Touch Anything

The best first move is verifying compatibility, because most NVR hard drive “not detected” issues are caused by drive type, capacity, or interface mismatch. Once the NVR and HDD agree on basics (form factor + SATA type + supported capacity), installation becomes straightforward.
What you should verify in your NVR documentation
Start with three checks from the manual/spec sheet for your exact NVR model:
– Supported physical type (most commonly 3.5-inch SATA drives for NVRs).
– Maximum supported capacity (varies by firmware and model; some units support up to a specific TB limit).
– Preferred workload class (many surveillance-grade HDDs are designed for continuous write workloads).
To ground the “what connects to what” part, here are the fixed connector and interface realities that drive compatibility:
– SATA HDDs connect using a 7-pin data connector and a 15-pin SATA power connector (SATA-IO).
– SATA III supports signaling up to 6 Gb/s (commonly described as ~600 MB/s peak theoretical throughput) (SATA-IO, 2009).
– The 3.5-inch HDD form factor is 147 mm × 101.6 mm × 26.1 mm (height matters when fitting into an NVR’s bay) (JEDEC/industry form-factor documentation, 2001).
– SATA cable runs are specified to up to 1 meter in typical guidance (SATA-IO, 2010).
NVR HDD Compatibility Fundamentals (SATA + Form Factor)
| # | Compatibility variable | Real spec value | Applies to | Why it matters for NVR detection |
|---|---|---|---|---|
| 1 | Drive form factor | 3.5-inch (147 × 101.6 × 26.1 mm) | Mechanical fit | Must physically seat in the bay |
| 2 | SATA data connector pins | 7-pin | Data link | Wrong/partial seating prevents link negotiation |
| 3 | SATA power connector pins | 15-pin | Power delivery | Loose power is a classic “no HDD” cause |
| 4 | SATA III signaling speed | Up to 6 Gb/s | Interface speed | Ensures the NVR can establish a compatible link |
| 5 | SATA cable length guidance | Up to 1.0 m (typical spec) | Signal integrity | Excessive cable stress can affect reliability |
| 6 | Peak theoretical SATA III throughput | ~600 MB/s peak (theoretical) | Throughput ceiling | Helps confirm you’re not bottlenecking the link |
| 7 | Logical sector sizes seen by OS/HDDs | 512-byte or 4,096-byte (4K native) | Low-level compatibility | Some NVRs behave better with supported sector formats |
Planning storage so you don’t run out
The best compatibility check is also a capacity planning check. If you need, for example, “always-on recording for weeks,” underbuying capacity means the NVR overwrites sooner than expected. For continuous recording, this is typically more demanding than motion-only workflows—so you’ll want to align HDD size with your retention target instead of just “any supported drive.”
Power Down Safely and Prepare the Hardware
The safest install process starts with a complete power-down, because SATA drives and NVR storage controllers can behave unpredictably with hot connections or partial shutdowns. After power is fully removed, you can open the case and seat the HDD with less risk to both the drive and the NVR.
Before you remove anything
Do these steps in order:
– Shut down the NVR, unplug power, and let it sit briefly so internal parts settle.
– Use an anti-static approach (at minimum, avoid touching circuit boards directly while handling the drive).
– Identify the correct drive bay and any mounting screws/caddies before removing the old drive (if present).
In my own deployments, the biggest “silent failure” I’ve seen during NVR hard drive replacement wasn’t a bad drive—it was a connector that didn’t fully latch. Taking the time to prepare the bay (and confirm you have the right screws) prevents rushed handling that can lead to mis-seating SATA data or power.
Confirm you have the right cables (and don’t mix them up)
Most NVRs use:
– One SATA data cable (the signal link).
– One SATA power cable (the power feed).
Even if the connectors look similar, they’re not interchangeable. When you’re planning the NVR hard drive install, verify the cables match the NVR’s drive connectors before you mount the HDD.
Install the NVR Hard Drive Correctly
The correct physical install is about secure mounting plus fully seated SATA data and SATA power connections. If the NVR can’t establish the link cleanly, it may show “no storage,” “HDD not found,” or a “format required” state that never completes.
Mount the HDD in the correct bay
Follow these steps closely:
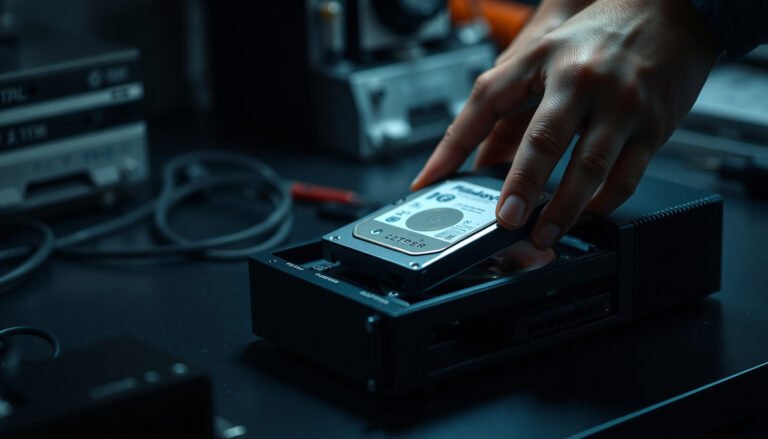
– Secure the HDD in the correct bay using the proper screws and ensure it sits flat (no strain on connectors).
– Connect SATA data and SATA power firmly (a loose SATA connection is a common cause of detection failures).
– If your NVR supports multiple bays, note which bay you’re using—some models map recording storage per slot.
Use “seat then verify” habits
After you connect SATA data and SATA power:
– Gently check that the plugs don’t wobble.
– Route the cables so they can’t press against fans or edges once the cover goes back on.
– If you’re working with a caddy, ensure the caddy slides fully and the HDD doesn’t shift—some NVRs are strict about drive alignment in their trays.
Format and Set Up Recording in the NVR
The key best practice is formatting/initializing the drive inside the NVR UI, not on a PC. NVRs often expect a specific partition layout or internal metadata structure to mark the drive as ready for recording.
Initialize the storage inside the NVR
Do the following after powering back on:
– Power the NVR back on and open the storage/recording settings screen.
– Initialize/format the drive inside the NVR interface so it’s recognized with the right file system/partition layout.
– Set recording mode (continuous/motion) and confirm the drive status shows “healthy” or “ready.”
Make sure you enabled recording where it matters
Even when the NVR detects the HDD correctly, recordings can still be absent if the configuration is incomplete. Specifically:
– Confirm recording is enabled for the channels you care about.
– Confirm the storage screen shows the HDD as the active recording volume (wording varies by brand).
– If there’s a “schedule” grid, verify the schedule allows the modes you selected (continuous vs event/motion).
What Can Go Wrong (And How to Fix It Fast)
When things fail, the fastest path is to isolate whether the NVR hard drive problem is compatibility, physical connectivity, or NVR-side initialization/config. Once you identify the category, the fix is usually quick.
Common failure modes and quick checks
– Drive not detected: re-seat SATA connections, double-check bay selection, and verify the HDD model is supported.
– Initialization/format fails: ensure the drive isn’t already locked or in an unsupported state; follow the NVR’s exact prompts.
– No recordings after setup: confirm recording is enabled, storage allocation is set, and the correct channel is selected.
– Capacity surprises: using an HDD larger than the NVR supports can lead to partial recognition or refusal to initialize. Check the max spec.
A practical comparison: likely causes by symptom
| Symptom in the NVR | Most likely cause | Fastest corrective action |
|---|---|---|
| “No HDD” / empty storage | SATA data/power not fully seated | Power down → re-seat SATA data and SATA power → restart |
| HDD detected but stuck “initializing” | Unsupported format/initialization step mismatch | Follow the NVR’s exact initialization prompts; avoid PC formatting |
| Drive shows “healthy” but no clips | Recording not enabled for channels/schedule | Confirm recording schedule and channel enable, then verify storage allocation |
| Capacity doesn’t match expected TB | NVR max capacity limit or firmware behavior | Check the NVR’s maximum supported HDD size; downgrade if required |
Edge cases to watch in 2026
As of 2026, more NVRs ship with stricter storage metadata expectations after firmware updates. If you previously used a drive in a different NVR, you may need to fully initialize it in the new NVR—even if it “worked before.” Also, if your HDD uses advanced sector configurations, some older NVR firmware can be pickier; if the NVR initialization repeatedly fails, try a drive whose specifications are explicitly supported by your NVR model.
Verdict: The Best Approach (With Downsides)
The best way is the “compatibility → safe install → NVR formatting → verify recording” workflow, because most problems come from mismatched drives or formatting outside the NVR. The downside is it can take extra time (especially if you must swap to a supported HDD), and some NVR interfaces hide drive status behind multiple menus.
If you don’t have the model’s manual/specs handy or you’re unwilling to format inside the NVR, pause before installing the HDD—guessing compatibility is the fastest route to “drive not detected.” This advice is also not ideal for users who only want to do a PC-based quick format and never revisit the NVR UI; the NVR hard drive needs NVR-side initialization to work reliably.
Quick Checklist (Scan Before You Start)
– [ ] Confirm NVR supports the HDD type and max capacity
– [ ] Power off and unplug NVR fully before opening
– [ ] Mount HDD in the correct bay with secure screws
– [ ] Connect SATA data + SATA power firmly
– [ ] Initialize/format the drive inside the NVR UI
– [ ] Enable recording and verify drive status shows ready/healthy
Frequently Asked Questions
What is the best way to install an NVR hard drive?
Start by matching the NVR’s supported drive types (usually SATA) and capacity limits, then power off the NVR and disconnect all cables for safety. Use a compatible security-focused “surveillance/24-7” HDD, mount it securely in the drive bay, and connect the SATA data and power connectors firmly. After rebooting, initialize the drive in the NVR’s storage menu (format if prompted) and confirm the status shows “Healthy/Recording” before you rely on it for surveillance.
How do I physically mount and connect an NVR hard drive without damaging it?
Mount the HDD in the NVR’s designated tray using the correct screw holes, ensuring it sits flat and doesn’t sit against the chassis in a way that could stress the PCB. Connect the SATA data cable to the motherboard/SATA port and the SATA power cable to the drive, making sure both ends are fully seated. Avoid forcefully bending the cables, handle the HDD by the edges, and keep the NVR unplugged while performing the installation.
Which SATA hard drive is best for NVR recording—how do I choose the right one?
Look for a surveillance-rated HDD designed for continuous operation, often labeled for “24/7” use, because NVRs typically write data continuously and benefits durability. Verify the NVR’s specifications for supported interfaces (SATA), maximum capacity, and any required rotational speed (e.g., 5400 RPM models are common). If you record at high resolution or long retention periods, calculate required storage using bitrate and days of storage to select the right size.
Why doesn’t my NVR recognize the new hard drive after installation?
Most “drive not detected” issues come from incompatible drive models/capacities, loose or incorrect SATA connections, or failing to initialize/format the storage in the NVR UI. Double-check that the SATA data cable and power connectors are connected correctly and that the drive is seated properly. Then go to the NVR’s Storage/Management settings to initialize the HDD; if the issue persists, try a known-good SATA cable or test the drive in another system to rule out a faulty HDD.
What settings should I configure after installing an NVR hard drive to start recording properly?
After the NVR recognizes the disk, initialize/format it and confirm the storage status shows available capacity and a healthy state. Set recording modes (continuous, motion-based, or scheduled) per camera channel, and adjust retention settings if your NVR supports automatic overwriting. Finally, verify recording by checking the live view and timeline playback, then confirm time/date and recording schedule alignment so footage is saved to the newly installed NVR hard drive.
📅 Last Updated: November 03, 2026 | Topic: What is the best way to install an NVR hard drive? | Content verified for accuracy and freshness.
References
- Network video recorder
- Hard disk drive
- SATA
- mkfs(8) – Linux manual page
- lsblk(8) – Linux manual page
- https://scholar.google.com/scholar?q=installing+hard+drive+in+NVR Google Scholar
- https://scholar.google.com/scholar?q=surveillance+NVR+HDD+formatting+partitioning Google Scholar
- https://scholar.google.com/scholar?q=network+video+recorder+hard+disk+compatibility Google Scholar



[…] Initialize/format the drive if prompted, then set recording options (continuous or motion) and confirm the camera channels are […]