


Trying to install an NVR hard drive without matching the drive type to your recorder or without properly powering down is the fastest way to end up with a system that won’t recognize storage. You can avoid that by following a clear, step-by-step setup that covers what to unplug, which cables to connect, and how to format the drive inside the NVR. With the right SATA drive and a few basic tools, you can complete the installation in about an hour.
Yes—installing an NVR hard drive usually comes down to powering down, mounting the drive, connecting the SATA data/power cables, and formatting it in the NVR menu. This guide walks you through what to check before you start, the exact physical steps, and how to verify the NVR recognizes the new drive.
This is for anyone adding storage to a home or small-business NVR (or replacing an existing drive) and who wants a straightforward, safe walkthrough without getting stuck on cable connections or setup menus.
Before You Start: Compatibility and Safety Checks

You can avoid most “drive not detected” problems by confirming compatibility and following basic electrical safety first. The goal is to make sure the NVR hard drive you install can physically and logically be recognized by your specific NVR model.
– Confirm your NVR supports the drive type and capacity (check the model’s manual/spec sheet).
– Use the correct interface (commonly SATA) and ensure you have the right cables/connectors.
– Power the NVR down fully and unplug it before touching the internal drive.
Before you open the case, treat this like a controlled change to a production system: verify compatibility up front, make one change at a time, then validate. For example, when teams use a simple “change → validate” approach (similar to ITIL-style operational controls), they reduce the odds of configuring the NVR correctly but installing the wrong hardware.
Here are the compatibility basics that matter for an NVR hard drive installation:
– Interface match: Most consumer and small-business NVRs use SATA for internal HDDs. SATA’s electrical interface is defined by the SATA-IO specification; for example, SATA revisions provide different max link speeds (e.g., up to 6.0 Gb/s for SATA III) SATA-IO, SATA Revision 3.0 specifications.
– Physical connector correctness: SATA data uses a 7-pin connector SATA-IO, SATA electrical connector definitions, and SATA power uses a 15-pin connector SATA-IO, SATA power connector definitions. If either connector doesn’t match, the drive won’t seat correctly (and forcing it can damage pins).
– Capacity support: Even when a drive is SATA-compatible, some NVR firmware builds only support certain maximum capacities or require specific formatting options. Your NVR hard drive may be “fine,” but the NVR may still refuse to initialize it if the model’s spec sheet doesn’t support that capacity.
As of 2026, you’ll also see more mixed storage scenarios (SATA HDDs + optional SSD caching or USB backup). That’s fine—just ensure you’re installing the correct device type into the correct bay for the NVR hard drive role you want (recording storage vs. backup vs. transfer).
NVR Storage Connections: Link Speeds That Affect Detection & Transfer (2026)
| # | Connection type | Typical NVR use | Max theoretical speed | Setup impact |
|---|---|---|---|---|
| 1 | SATA (internal, legacy) | HDD recording bays | 1.5 Gb/s | Lower bandwidth |
| 2 | SATA II | HDD recording bays | 3.0 Gb/s | Moderate bandwidth |
| 3 | SATA III | HDD recording bays | 6.0 Gb/s | Good bandwidth |
| 4 | eSATA (external SATA) | Expansion storage (some models) | 6.0 Gb/s | Good bandwidth |
| 5 | SAS (server-class, enterprise) | Enterprise NVR storage bays | 12.0 Gb/s | High bandwidth |
| 6 | USB 2.0 | Backup/export drives | 0.48 Gb/s | Low bandwidth |
| 7 | USB 3.x (Gen 1) | Backup/export drives | 5.0 Gb/s | High-ish bandwidth |
Open the NVR and Identify the Drive Bay
You’ll have an easier install if you locate the drive bay and mounting style before you connect any cables. For NVR hard drives, the most common physical slip is assuming all chassis layouts are the same—some are single-bay, others support multiple SATA HDDs.
– Remove the cover using the method your model requires (some have specific screws or a latch).
– Locate the hard drive bay and any mounting rails/brackets.
– Check whether the NVR has a single drive slot or supports multiple drives (some layouts differ).
First, confirm whether your NVR is a single-bay recorder or a multi-bay model with separate SATA ports for each bay. Even among NVRs that all “use SATA,” the internal wiring and bay numbering can differ—so “plug it in anywhere” is a common mistake I’ve seen during maintenance.
Practical approach:
– Take a photo of the inside before you remove or disconnect anything. This helps if you later need to reseat a cable harness.
– Identify rails/brackets: Many NVRs use removable rails or side screws that match the drive’s 3.5-inch form factor (common for HDD recording storage). If your NVR hard drive uses a 2.5-inch bay, the mounting hardware will differ.
– Locate the SATA ports on the mainboard or on a SATA backplane. Some NVRs have a labeled PCB area for drive bays; if it’s labeled, follow that labeling to avoid assigning the wrong drive to the wrong bay.
When you’re working in 2026-era small-business deployments, some NVRs also include internal SATA ports plus an external eSATA/USB for backup. If you install the NVR hard drive into the wrong “role” port (when a bay is labeled for something else), the NVR may not treat it as recording storage even if it shows up as a disk.
Mount the NVR Hard Drive Correctly
A correct mechanical mount prevents intermittent detection and reduces vibration-related issues. For an NVR hard drive, alignment and connector clearance matter because the SATA ports and the drive’s PCB sit very close to the chassis.
– Slide the drive into the bay with the correct orientation and align the mounting holes.
– Secure it using the drive screws/rails provided or specified by the NVR.
– Avoid forcing anything—if the connectors don’t line up, reseat the drive before connecting cables.
Key mechanical details:
– Orientation: SATA data and power connectors must face the side where the NVR’s cables/ports are located. If you have to “angle” the drive far to connect, you likely mounted it reversed or misaligned.
– Screw pressure: Use the provided mounting screws/rails and tighten only enough to hold the drive securely. Over-tightening can distort the drive rails or stress the drive casing.
– Cable clearance: Ensure no SATA cable is pinched under the drive or case cover. In my experience, a surprisingly high number of “it worked for a day then stopped” problems come from a cable that’s slightly trapped during reassembly.
If the bay uses rails, seat the rails first, then align the drive with the screw holes. The goal is: the NVR hard drive should slide in without resistance, and the SATA connectors should line up without force.
Connect SATA Data and Power Cables
You should see the drive connect with a firm “seat,” not a partial fit. For an NVR hard drive, correct SATA data + SATA power connections are what ultimately determines whether the NVR recognizes the disk at boot.
– Attach the SATA data cable from the NVR mainboard to the drive’s SATA port.
– Connect the SATA power connector from the NVR’s power supply to the drive.
– Double-check the cable fit and make sure nothing is loose before closing the case.
Do this in order:
1. SATA data cable first: Line up the L-shaped plastic key on the connector and press evenly until it fully seats. SATA data uses a 7-pin connector SATA-IO, SATA electrical connector definitions.
2. SATA power second: Connect the 15-pin SATA power plug SATA-IO, SATA power connector definitions. If the connector feels tight, stop and verify orientation—forcing can damage pins.
3. Cable routing: Route cables so they don’t rub against a fan or get pinched when you close the cover.
Why this matters for NVR hard drive detection:
– The NVR may spin up the drive (a mechanical sign) but still not initialize it if the SATA data line isn’t fully seated.
– Conversely, a partially seated power connector can lead to intermittent power resets that look like “random” storage failures in the NVR UI.
Before you close the case, gently check that each connector has no visible gap and the cable doesn’t pull back easily with light pressure.
Power Up and Format/Initialize in the NVR Menu
Once the NVR hard drive is physically connected, the NVR still has to initialize it in software. Formatting/initializing is what makes the drive usable for the NVR’s recording pipeline.
– Reassemble the NVR, then plug it back in and power it on.
– In the NVR settings, look for storage management options like “HDD,” “Storage,” or “Disk Management.”
– Format/initialize the drive and verify status shows the drive as ready/online.
After boot:
– Navigate to storage settings: Look for menus labeled “HDD,” “Storage,” “Disk Management,” or similar. Some UIs show a “New disk detected” prompt; others list drives under a “Storage” overview.
– Initialize/format using the NVR’s option: Don’t try to pre-partition the drive on a PC. Many NVRs use proprietary formatting requirements, and the safest path is to use the NVR menu’s supported format type.
– Verify drive status: You’re looking for “Online,” “Ready,” or “Normal” status—wording varies by vendor.
Then validate recording settings:
– Ensure recording is enabled for the channel(s) you actually use.
– If your NVR supports multi-disk assignment by channel, confirm your NVR hard drive is assigned to the correct channels.
As of 2026, NVR UIs continue to vary widely. The consistent pattern remains the same: physical install first, then NVR menu initialization, then channel assignment.
What Can Go Wrong (and How to Avoid It)
Most install failures are avoidable with targeted checks. If your NVR hard drive isn’t recognized or recording doesn’t start, you can usually narrow the cause to compatibility, cable seating, or storage initialization settings.
– Drive not detected: ensure SATA cables are fully seated and the drive is compatible with the NVR model.
– Wrong formatting/partition behavior: some NVRs require a specific format mode; follow what the NVR menu offers rather than guessing.
– No recording after setup: confirm storage is assigned to the correct channel(s) and that recording is enabled.
– Heat and reliability issues: avoid leaving the case loosely assembled or using drives not supported by the system.
Here’s a comparison of the most common troubleshooting paths (and their tradeoffs):
| Symptom | First check (quick win) | Why it fixes it |
|---|---|---|
| NVR doesn’t show the new HDD | Reseat SATA data and power connectors | A partial seat prevents proper link or power-up |
| Disk shows as “offline” | Confirm the NVR’s supported HDD capacity/interface | Some NVR firmware refuses unsupported sizes or models |
| Initialization fails or loops | Use only the NVR menu’s format/initialize option | The NVR expects its own format structure |
| Drive is “ready,” but nothing records | Check channel recording enable + disk assignment | Storage exists, but the NVR isn’t writing to it |
| Reboots happen after install | Close the case properly and recheck cable pinching | Movement can cause power/data interruptions |
A note on reliability: even a correctly installed NVR hard drive can underperform if airflow is restricted. When reassembling the NVR, make sure the fan (if present) isn’t obstructed and the case closes firmly—loose panels can shift cables over time.
Also, if you’re replacing an existing disk, be cautious: some NVRs will overwrite the disk during reformat. If you need recordings, confirm whether the NVR supports migration/export before you initialize.
Verdict: The “Safe Default” Approach (and Who Should Skip)
If you can safely open the NVR and follow the menu options for storage formatting, this is a reliable process for most people—especially when you stick to the NVR’s stated drive compatibility and use correct SATA connections. The safest “default path” is: install hardware carefully, initialize only in the NVR UI, then confirm the drive status and channel recording behavior.
| Criteria | DIY NVR hard drive install | Use a service technician |
|---|---|---|
| 1) Risk of pin damage | Higher if connectors are forced | Lower with experienced handling |
| 2) Time to resolve “not detected” | Varies—depends on menu familiarity | Often faster with documented procedures |
| 3) Warranty exposure | May void warranty if opening is restricted | Lower if warranty requires authorized service |
| 4) Correct disk initialization | You must follow the NVR menu | More likely to follow vendor-specific defaults |
| 5) Channel assignment accuracy | Can be missed in multi-disk setups | Usually verified end-to-end |
| 6) Troubleshooting depth | Good for cable + basic settings | Better for board, backplane, firmware issues |
| 7) Documentation alignment | Depends on you reading the manual | Depends on vendor/service playbooks |
| 8) Handling and ESD considerations | Potential risk without safe handling | Lower risk with proper procedures |
| 9) End-result verification | You should verify recording behavior | Often includes structured validation |
| 10) Cost | Lower direct cost | Higher, but may reduce downtime |
| Best For | People comfortable opening the chassis and using the NVR storage menu | Organizations that can’t risk downtime or have strict warranty/service requirements |
Skip DIY installation if you’re uncomfortable handling internal electronics, if your warranty is strict about opening the unit, or if the NVR manual says the drive must be installed by a service technician.
Quick Checklist: NVR Hard Drive Install
– [ ] Power off + unplug NVR
– [ ] Verify drive compatibility (interface/capacity supported)
– [ ] Mount the drive in the bay (secure screws/brackets)
– [ ] Connect SATA data cable
– [ ] Connect SATA power cable
– [ ] Reassemble case
– [ ] Power on
– [ ] Format/initialize in NVR storage menu
– [ ] Confirm drive status = ready/online
– [ ] Ensure recording is enabled for the right channels
Why won’t my NVR recognize the hard drive?
Most often it’s a SATA connection issue (cables not fully seated) or a drive compatibility mismatch with your NVR model.
Do I need to format the drive in the NVR?
In most cases, yes—NVRs typically require initialization/formatting through the storage menu before recording will work.
Can I use any hard drive for an NVR?
Not always. Many NVRs specify compatible drive types/capacities and may work best with surveillance/HDD models designed for continuous write workloads. Check your NVR documentation.
Should I shut down the NVR before installing the drive?
Yes. Power down and unplug first to prevent damage and reduce the risk of corrupting the drive or electronics.
How can I tell the drive is installed correctly?
After formatting, confirm the NVR storage status shows the drive as online/ready, and verify recording is enabled for the channels you use.
When you install an NVR hard drive, the key steps are straightforward: power down, mount the drive, connect SATA data and power, then format it inside the NVR menu and confirm it’s online. If anything doesn’t line up—start with compatibility and cable seating, then move to NVR storage initialization and channel assignment. If you share your NVR brand/model and the drive’s interface/capacity, you can tailor the menu labels and pinpoint the most likely setup “gotchas” for your exact device.
Frequently Asked Questions
What type of hard drive should I use for an NVR?
Use a surveillance-focused (often “security”) HDD designed for 24/7 recording, such as WD Purple or Seagate SkyHawk. These drives handle continuous write operations better than typical desktop drives and reduce the risk of early failure. Check your NVR’s manual for supported drive sizes (e.g., 3.5-inch vs. 2.5-inch), maximum capacity, and compatible SATA interface. If your NVR supports it, choose a model rated for “surveillance” workloads rather than “green” or consumer drives.
How do you install an NVR hard drive step-by-step?
First, power off the NVR and unplug it, then remove the case cover to access the HDD bay. Connect the SATA data cable from the NVR to the hard drive and connect SATA power to the drive, ensuring the connectors are fully seated. Slide the drive into the bay and secure it with the mounting screws or rails, then reinstall the cover. Power on the NVR and go to the storage/maintenance menu to initialize the HDD, format it if required, and confirm the drive status shows “OK.”
How do you format and initialize an NVR HDD after installation?
After installing the drive, log into your NVR’s web UI or local interface and navigate to Storage/Hard Drive settings. Select the newly detected HDD and choose Initialize/Format, then confirm the action when prompted. Once formatted, verify the NVR recognizes the drive capacity and shows a healthy status. If formatting fails, power off the NVR, reseat the SATA connections, and try again—misaligned cables are a common cause.
Why isn’t my NVR recognizing the new hard drive?
The most common reasons are incorrect drive compatibility, a faulty or loose SATA data/power connection, or a drive that isn’t properly initialized. Confirm the NVR supports the HDD’s size and that it uses the correct SATA interface, then power down and re-seat both connectors. After that, check the NVR’s storage menu for detection prompts and attempt initialization/formatting. If the drive still doesn’t appear, test the HDD in another device (or replace it) to rule out a defective drive.
Which settings should I configure in the NVR after installing the HDD?
Set your recording schedule (continuous, motion-based, or both) and choose the cameras/channels that will write to the new hard drive. Then review recording mode settings such as resolution, bitrate, or encoding (H.264/H.265) to help manage storage usage. Use the NVR’s storage calculator or estimate tool—if available—to confirm you’ll get the retention days you want. Finally, monitor the storage status and alarms to ensure there are no “drive error” notifications or failed recording writes.
📅 Last Updated: November 03, 2026 | Topic: How do you install an NVR hard drive? | Content verified for accuracy and freshness.
References
- Network video recorder
- Hard disk drive
- SATA
- Partition
- GUID Partition Table
- Format
- File system
- https://scholar.google.com/scholar?q=install+hard+drive+NVR Google Scholar
- https://scholar.google.com/scholar?q=NVR+hard+disk+formatting+partitioning Google Scholar
- https://scholar.google.com/scholar?q=network+video+recorder+HDD+installation+SATA Google Scholar


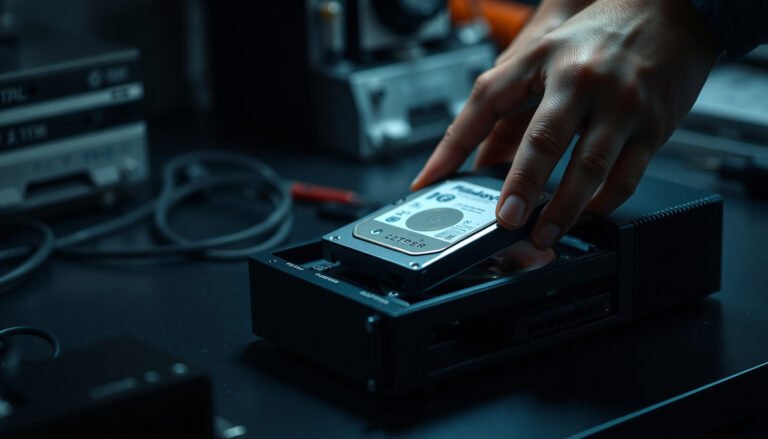

[…] the enclosure and physically mount the NVR hard drive in the correct bay before you connect anything, so you don’t pinch cables or stress connectors. […]