
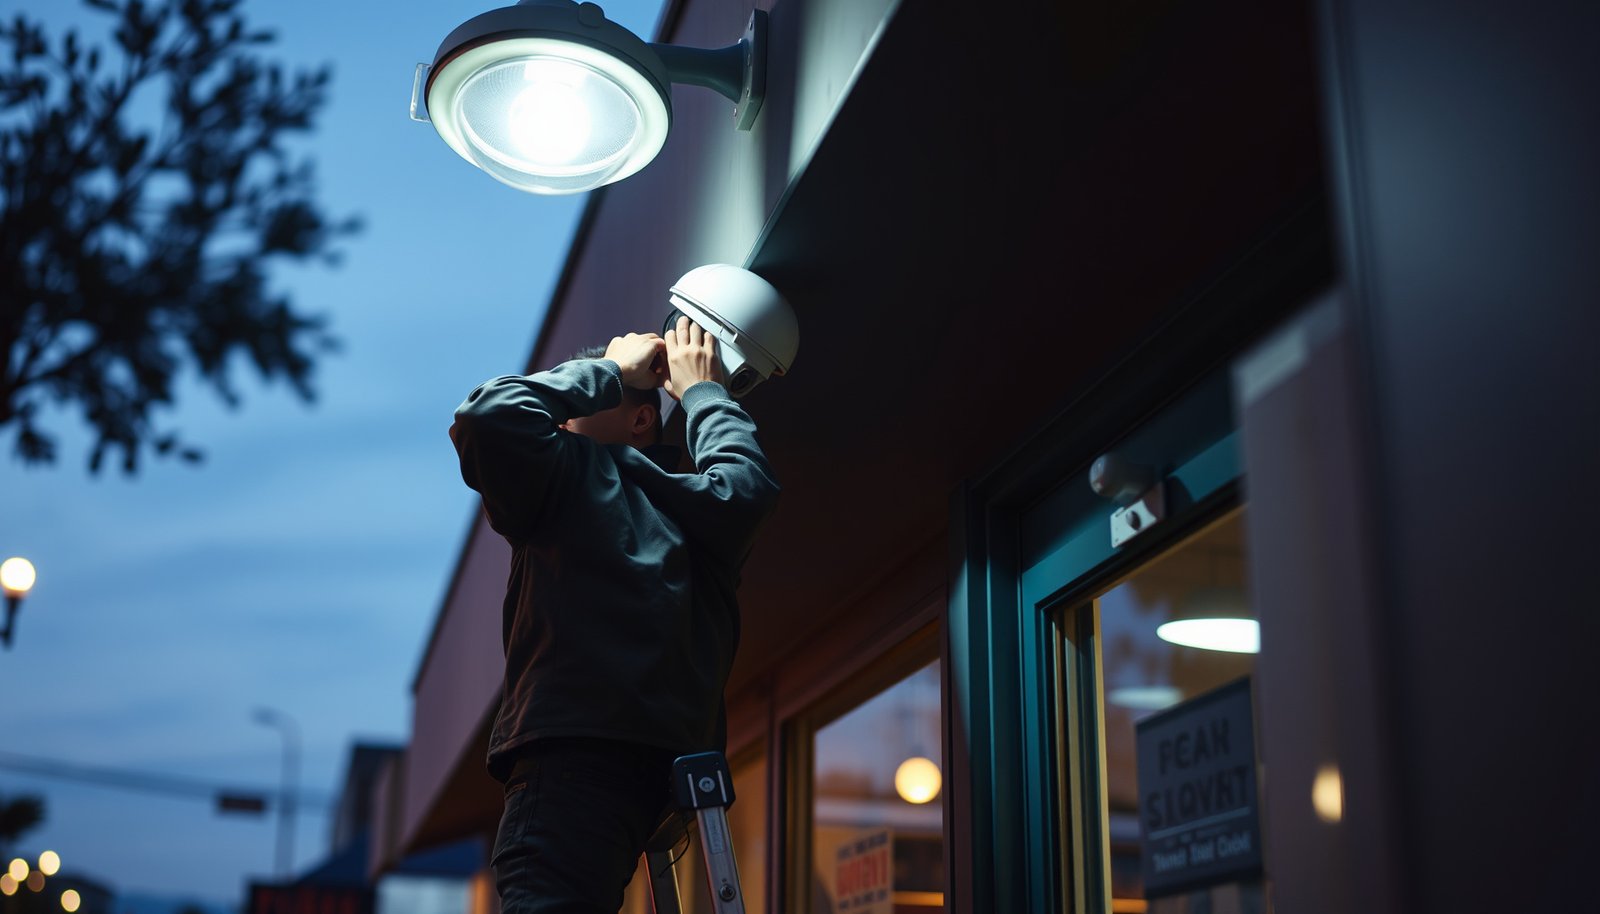

Installing a CCTV camera for a small business is straightforward when you follow the right placement, wiring, and setup steps—so you get clear footage without headaches. This guide answers exactly how to install a CCTV camera for a small business, from choosing the best location and mounting hardware to connecting power, linking to your network, and configuring recording. You’ll leave with a reliable, secure setup that works for real day-to-day monitoring, not just the demo version.
To install a CCTV camera system quickly and reliably, plan coverage and locations first, then lock in your power/network/storage approach before you mount and aim the cameras. Once everything is wired and configured, verify recording (including day/night) the same day so you don’t discover missed angles or storage issues after the fact.
If you’re a shop, office, warehouse, or small contractor running a couple of entrances and common areas, this is for you. It’s especially useful if you’re comparing plug-in (PoE/NVR) setups versus Wi‑Fi cameras and want a practical checklist to avoid rework.
Plan coverage and camera locations first

The fastest path to a working CCTV camera system is to define exactly what you need to see (and at what level of detail) before you buy or mount anything. For small businesses, the difference between a “pretty video” and usable evidence is usually coverage planning—faces, license plates, and key entry paths.
A CCTV camera system is only as good as its coverage plan—decide first whether you need identification-level detail or general activity.
Mounting height and line of sight drive usability as much as resolution does, especially for faces and vehicle plates.
Plan for real-world obstructions (doors, signage, seasonal clutter) so your CCTV camera system isn’t blocked after installation.
– Identify the spots that matter most (front door, cash area, loading dock, parking approach) and note what “clear” means for you (faces vs. general activity).
– Measure where cameras can realistically mount (height, line of sight, shielding from sun/glare), and avoid placing them where they’ll be blocked by doors, signage, or seasonal items.
– Decide on the total number of cameras before buying so you’re not stuck adding extra angles later.
In 2026, most small-business CCTV camera systems use 4MP–8MP class sensors, which can look great at a glance—yet still fall short when the camera is aimed too widely. A practical way to define “clear” is to map two tiers: Tier 1 (identification) for the front door/cash desk/receiving gate where you need faces and sometimes plates; Tier 2 (detection) for parking approaches and hallways where you mostly need event confirmation (who/what went where, and when).
When you measure mounting points, focus on three constraints that regularly affect CCTV camera systems:
1. Field of view vs. detail: A narrower view often performs better than a wide one for identification.
2. Glare sources: Direct sun, bright indoor lights, and reflective surfaces (glass doors, shiny floors) can wash out footage.
3. Occlusion: Door swing, hanging signs, overhead shelving, and even seasonal decorations can block the camera after installation if you don’t account for them.
If you’re using IR (infrared) night vision, verify the camera’s angle relative to nearby walls or windows. Even a high-quality CCTV camera system can produce glare at night if the IR reflects back toward the lens. From my experience helping teams plan installs, this is where many plans need adjustment—.
Where to place cameras for common small-business layouts
For voice-search and quick internal scoping, a simple rule works well for CCTV camera systems: cover approaches, then validate identity at the most important choke points. For example:
– Entrances: One camera for approach context, one tighter camera for face capture (if space allows).
– Cash area: Prefer an angle that avoids direct line to monitors or blinds; mount where it’s hard to tamper.
– Loading dock/receiving: Position to see foot traffic and hands reaching items, not just the warehouse interior wall.
– Parking/side yard: Aim to reduce corner blind spots caused by fences, light poles, and vehicles parked irregularly.
As you plan, keep a sketch. You don’t need architectural software—just note approximate camera height, mounting surface, and who should be visible in each clip.
Choose the right system (power, network, and storage)
For most small businesses, the best CCTV camera system choice is the one you can power reliably and record consistently without dropped connectivity. PoE (Power over Ethernet) with an NVR is often simpler to maintain, while Wi‑Fi can work—but only if your wireless environment stays stable where the cameras go.
PoE-based CCTV camera systems reduce variables because power and data travel on the same cable run.
Wi‑Fi CCTV camera systems can be reliable, but signal drops and interference are common causes of missed recordings.
Storage choices (NVR, SD, or cloud) directly affect evidence access time, retention length, and monthly operating cost.
– Pick a power approach that matches your building: PoE (Power over Ethernet) typically simplifies installation with fewer adapters, while Wi‑Fi depends on signal strength and placement.
– Confirm your recording method: NVR for wired/PoE systems, SD cards in-camera, or cloud storage—each affects reliability, evidence access, and monthly costs.
– Verify bandwidth and local connectivity needs if you use remote viewing, and plan for where the NVR/router will live.
A CCTV camera system is a small network, even if it’s “just cameras.” That’s why you should treat power, network, and storage as one combined commissioning step—often using a Plan–Do–Check–Act (PDCA) mindset so you can adjust quickly when real-world conditions differ from expectations.
Power: PoE vs. Wi‑Fi in real install terms
PoE is typically easier for long-term stability. According to IEEE 802.3 (Power over Ethernet), PoE over copper is designed to deliver power in a predictable way across structured cable links, and standard Ethernet segment limits apply for the data path. For example:
– According to IEEE 802.3, a copper Ethernet segment is designed for up to 100 meters (328 feet) end-to-end (2018). IEEE Std 802.3 (Ethernet) distance limitations
– According to IEEE 802.3af (PoE), the powered device (PD) can receive up to about 12.95 W (2018). IEEE Std 802.3af power class limits
– According to IEEE 802.3at (PoE+), the powered device (PD) can receive up to about 25.5 W (2018). IEEE Std 802.3at power limits
Wi‑Fi, on the other hand, introduces new failure modes: access point placement, interference from other networks, and congestion during business hours. If your CCTV camera system must be far from your router or passes through multiple walls, that’s where Wi‑Fi often becomes a maintenance burden.
Storage: what your evidence workflow requires
Storage selection impacts how quickly you can pull footage when something happens:
– NVR (Network Video Recorder): Central recording, usually easier retention management, and better control over consistent configuration across cameras.
– SD cards in-camera: Simple physically, but can create operational risk if cards fail, fill up, or get removed/overwritten unexpectedly.
– Cloud storage: Great for offsite redundancy and quick access, but often adds recurring cost and depends on upload bandwidth.
For a small business CCTV camera system, a good test question is: “When something goes wrong, how fast do we need the clip, and who needs to access it?” If the answer is “same day, by multiple staff members,” NVR-centered workflows tend to be easier to operationalize.
Quick comparison of system types (for a small-business CCTV camera system)
For planning clarity, here’s a practical contrast you can use while you spec your CCTV camera system:
- PoE + NVR
- Pros: stable power/data path, centralized recording, easier retention control, fewer “it’s online but not recording” issues.
- Cons: requires structured cable runs, NVR location planning, up-front equipment cost can be higher.
- Wi‑Fi + SD or Wi‑Fi + Cloud
- Pros: faster mounting with less cabling, flexible placement when walls are hard to access.
- Cons: wireless stability requirements, potential throughput constraints during peak hours, storage/cost management can be trickier over time.
If you’re unsure, a common approach in 2026 is to prioritize PoE for entrances/halls where reliability matters most, and reserve Wi‑Fi for lower-importance zones. Keep your CCTV camera system plan modular so you can reconfigure without tearing down what already works.
Mobile viewing and bandwidth sanity-check
If your team will view footage remotely, confirm whether your CCTV camera system uses:
– direct app streaming,
– VPN/tunnel access,
– or a cloud relay.
Remote viewing typically benefits from stable upstream bandwidth and consistent router performance. If you don’t already have a robust network, design your CCTV camera system so it still records locally (NVR/SD) if remote connectivity is imperfect.
Mount, run wiring, and connect safely
The most reliable CCTV camera system installations follow a safe, repeatable physical workflow: mount and cable first, then power and network second. This reduces troubleshooting time and prevents cable damage that only shows up when the system records.
Route and secure cables carefully before powering up—most intermittent CCTV camera issues trace back to connections or damaged runs.
Exterior CCTV camera systems should use weather-resistant cabling and strain relief to protect connections from moisture and pull stress.
Use a logical connection order so troubleshooting stays simple: power/network components first, then cameras.
– Use the right mounting hardware for the surface (eaves, brick, metal siding, or interior walls) and ensure exterior mounts have weather-resistant cabling and strain relief.
– Route cables cleanly and protect them from pinch points; if using network wiring, keep cable runs manageable and avoid damaged segments.
– Power up and connect in a logical order (router/NVR first as applicable, then cameras) so troubleshooting stays straightforward.
Mounting surfaces: matching hardware matters
Whether you install a turret camera under eaves or a dome camera inside a hallway, the mounting surface determines what “secure” actually means. For outdoor CCTV camera systems, weather exposure is non-negotiable:
– Use mounts rated for exterior use where possible.
– Provide strain relief so the cable weight doesn’t stress connectors.
– Seal penetrations properly so water doesn’t wick into junctions.
A small sealing mistake can look fine for weeks and fail early. If your CCTV camera system needs outdoor stability, treat every exposed cable entry point as a durability risk.
Cable routing that prevents future outages
Cable discipline affects both performance and serviceability:
– Avoid running network cables next to power cables where electrical noise may cause packet loss.
– Use conduits, clips, and proper bend radius handling for clean, consistent runs.
– Leave gentle service slack at endpoints so you can re-terminate or adjust angles later.
If you can, label cable runs. A CCTV camera system with labeled drops is much faster to repair when a camera module is swapped or a connector needs replacement.
Connection order: keep troubleshooting efficient
A logical commissioning order helps you isolate problems quickly:
1. Bring up the router/switch/NVR (or PoE NVR appliance) first.
2. Confirm the NVR is reachable on the local network.
3. Add cameras one-by-one (or in small groups) so you can identify which camera causes any configuration error.
This isn’t theoretical—when you change multiple variables at once in a CCTV camera system, you lose the ability to pinpoint what failed.
Outdoor reliability note (use the right enclosure approach)
If you mount outdoor cameras, your CCTV camera system’s enclosure and mounting hardware also need protection. Here’s a quick look at how IP ratings map to real weather resistance.
Outdoor CCTV Housing IP Ratings (IEC 60529)
| # | IP Rating | Dust Protection | Water Protection | Key Use Case | Weather Resilience |
|---|---|---|---|---|---|
| 1 | IP44 | 4 = protected vs solids >1mm | 4 = splash from any direction | Covered areas | ★ |
| 2 | IP54 | 5 = dust protected (limited ingress) | 4 = splash from any direction | Eaves with wind-driven rain | ★ |
| 3 | IP55 | 5 = dust protected (limited ingress) | 5 = water jets | Outdoor under partial exposure | ★★ |
| 4 | IP56 | 5 = dust protected (limited ingress) | 6 = powerful water jets | Areas hit by driving rain | ★★★ |
| 5 | IP57 | 5 = dust protected (limited ingress) | 7 = temporary immersion | Flood-prone entryways | ★★★★ |
| 6 | IP65 | 6 = dust-tight | 5 = water jets | Outdoor general-purpose | ★★ |
| 7 | IP66 | 6 = dust-tight | 6 = powerful water jets | Harsh weather exposure | ★★★ |
The weather side of a CCTV camera system is often the hidden cause of “it worked on day one.” If you choose outdoor cameras, match the housing IP rating to your exposure level—not just the marketing label.
Aim, configure, and test recordings immediately
The best time to fix a CCTV camera system is before you leave the building: aim, configure recording, and verify day/night performance immediately. Same-day testing prevents blind spots, incorrect motion triggers, and storage surprises.
Correct camera aim determines evidence quality—too wide and you’ll lose facial/plate detail even with high resolution.
Motion zones and schedules should target meaningful events, not generate constant alerts your staff will ignore.
Day/night verification must include IR glare checks on walls and windows, not just “can I see something?”
– Set camera angles so you can read faces/license plates where needed, and avoid over-tilting that captures mostly the sky or reflections.
– Configure motion zones and recording schedules so you capture relevant events instead of constant footage; start with conservative settings and fine-tune after seeing real alerts.
– Test day/night performance by checking video clarity, exposure, and whether IR/night lighting creates glare on nearby walls/windows.
Aim for evidence, not aesthetics
When you aim a CCTV camera system, start with the identification goal:
– Front door: you want faces in the most common approach path.
– Parking/approach: you often need vehicle trajectory context; a slightly wider angle can be useful here.
– Loading/receiving: aim for actions (hands, items, transfers), not just interior walls.
A common mistake is over-tilting up so the lens includes sky and light reflections. That can reduce dynamic range at the exact moment someone enters the scene, making the CCTV camera system harder to use for documentation.
Motion zones and schedules: reduce noise so alerts matter
Most CCTV camera systems offer motion zones, sensitivity, and schedules. For a small business, aim for “actionable alerts”:
– Use smaller motion zones around doors, corridors, and high-importance entry routes.
– Start conservatively to prevent false triggers from moving shadows and passing vehicles.
– Review the first alerts and adjust. In 2026, many apps make this easy, but the configuration logic still needs attention.
If your CCTV camera system records constantly, you may find retention runs out faster than expected. If it records only on motion, you must ensure motion zones actually cover the events you care about (e.g., a person entering within a door frame).
Day/night validation is part of the installation, not a bonus
Testing “day video” is not enough. Verify:
– exposure balance (faces aren’t blown out by indoor lights),
– night clarity (no heavy blur or noise),
– and IR glare (near surfaces reflecting IR back into the lens).
For outdoor installs, also check how the camera behaves in seasonal lighting changes—sun angles shift, and what looked correct at 2 PM might not match at sunset.
What can go wrong (and how to prevent it)
The most common CCTV camera system failures are preventable: poor placement, unstable power/network, and storage settings that don’t match the retention you actually need. If you correct these during commissioning, you avoid the expensive problem of rework after the first incident.
Most “camera isn’t working” issues are really placement, network stability, or recording configuration issues rather than the camera hardware itself.
If your CCTV camera system uses Wi‑Fi, test stability after the initial install day—conditions change with interference and distance.
Retention settings are the difference between “recording started” and “we can still access the clip when we need it.”
– Poor placement: cameras too high, aimed too wide, or installed where reflections/glare occur can look “installed” but fail at identification.
– Network/power instability: Wi‑Fi drops, weak signal, or loose connections often cause intermittent recording—test stability after the first setup day.
– Storage surprises: SD cards fill up, NVR drives run out of space, or settings record only part-time—confirm retention settings during setup.
– Weather and mounting issues: outdoor cameras installed without proper sealing/strain relief can fail early, even if they work initially.
Placement problems that masquerade as “technical” failures
If your CCTV camera system has great resolution but poor readability, the culprit is often geometry:
– camera too high (faces become tiny),
– camera aimed too wide (identification becomes impossible),
– or light sources cause overexposure (especially around doors).
A second-round adjustment is normal, but you want it early. Plan to review a few real scenarios (someone walking up, opening a door, entering with a bag) and then refine aim.
Network/power instability, especially on Wi‑Fi
Wi‑Fi CCTV camera systems can work, but reliability is sensitive to:
– router distance,
– building materials (metal, concrete, tinted glass),
– and interference from neighboring networks.
If you rely on Wi‑Fi, schedule a stability check after hours, not only during installation. A CCTV camera system that “connects” doesn’t guarantee that it “records consistently.”
Storage and retention: the most overlooked setup item
Storage problems show up late:
– SD cards fill up and overwrite footage.
– NVR disks hit capacity sooner than expected if bitrates are higher than you assumed.
– recording schedules might be set to motion-only for some hours and continuous for others—creating gaps.
During setup, verify:
– recording modes (continuous vs motion),
– retention duration target,
– and whether playback shows continuous coverage or only event clips.
Weather and mounting durability
Outdoor CCTV camera systems must handle moisture intrusion risk at cable entries and mounting points. Proper strain relief and sealing reduce early-life failures that only appear after rain and wind. If you’ve ever seen a camera that “works but fogs up inside the housing,” that’s almost always an installation seal issue—not the camera itself.
Verdict: reliable DIY is doable—if you follow the setup basics
DIY installation of a CCTV camera system is doable for many small businesses when you plan coverage, install power/network correctly, and test recordings the same day. The upside is control and cost savings; the downside is time spent troubleshooting—especially with Wi‑Fi signal and storage/retention settings that don’t match expectations.
Skip DIY (or get help) if you need complex cabling across multiple walls, have weak Wi‑Fi where cameras must go, can’t access mounting points safely, or require strict compliance workflows where errors create legal/admin risk. If you do proceed, prioritize placement, correct power/network, and verified recording before you stop—then document settings (zones, schedules, retention) so future fixes are fast.
Quick checklist (scan before you start)
– Confirm camera locations and coverage goals (faces/plates vs. general activity)
– Choose system type (PoE/NVR vs. Wi‑Fi/SD/cloud) and plan storage
– Prepare mounting surface + weather protection (for outdoor cameras)
– Mount cameras, connect power/network, and secure cables
– Aim cameras, set motion zones/schedules, and test day + night
– Verify storage/retention and remote viewing (if needed)
– Do a “same-day review” of clips and alerts, then adjust if necessary
Sources
– IEEE Std 802.3 (Ethernet distance limitations)
– IEEE Std 802.3af / IEEE Std 802.3at (Power over Ethernet power delivery limits)
– IEC 60529 (IP code dust/water protection definitions)
A dependable CCTV camera system isn’t built by installing hardware alone—it’s built by planning coverage, choosing a stable power/network/storage approach, and validating recordings immediately (including night conditions). If you follow the setup workflow in this guide and review clips the same day, you’ll dramatically reduce rework and end up with footage your team can actually use when it matters.
Frequently Asked Questions
What tools and equipment do I need to install a CCTV camera for a small business?
You’ll typically need the CCTV camera, a compatible NVR or DVR (for wired systems), power supply/PoE switch, BNC/ethernet cables, mounting hardware, a drill/driver, and weatherproof conduit or outdoor-rated cable for exterior installs. For setup, have a monitor or use a computer/mobile app to configure IP addresses, recording settings, and viewing permissions. If you’re installing outdoors, also plan for surge protection and proper weatherproofing (junction boxes, cable glands, and silicone seals) to prevent signal and power failures.
How do I choose the best locations to mount CCTV cameras in my small business?
Start by covering all primary access points—entrances, exits, loading docks, and parking lot approaches—because these areas reduce theft and help with incident identification. Position cameras to capture faces at entry height, avoid glare from windows or direct sunlight, and ensure the field of view includes doorways and pathways where people naturally walk. For interior coverage, focus on checkout areas, corridors, and blind spots near shelves or counters, and aim to minimize obstructions like signage or ceiling fans.
Which is better for a small business: wired CCTV or wireless CCTV cameras?
Wired CCTV cameras (PoE/IP or coax with DVR) are often the most reliable for small businesses because they provide stable power and bandwidth, reducing dropouts and maintenance issues. Wireless CCTV systems can be faster to install, but performance depends heavily on Wi‑Fi signal strength, interference, and distance from the router or access point. If you need dependable continuous recording, remote access, and fewer interruptions, wired CCTV is usually the safer choice, especially for storefronts with multiple cameras.
How do I install and set up an IP (PoE) CCTV camera system step-by-step?
Mount the cameras first, then run the ethernet cables to the NVR location or connect them to a PoE switch, using outdoor-rated cabling and conduit for exterior runs. Power on the system, connect the NVR to a monitor/router, and use the NVR software to discover cameras, assign IP settings, and set recording mode (continuous, motion, or time-based). Finally, test live view and playback, confirm coverage angles, configure notifications and user access, and secure the network with strong passwords, firmware updates, and (if applicable) VPN or secure remote viewing.
Why is proper wiring and network security important when installing CCTV cameras for small businesses?
Poor wiring practices—like using non-rated cable, skipping weatherproofing, or neglecting surge protection—can cause camera downtime, corrupted video, and costly rework. On the network side, weak passwords and unsecured remote access can expose your CCTV system to hacking, so you should change default credentials, enable multi-factor authentication if available, and keep firmware updated. For best results, segment CCTV on a separate VLAN or dedicated network, use encrypted connections for remote viewing, and routinely check that recording and storage capacity are functioning correctly.
📅 Last Updated: October 26, 2026 | Topic: How to install a CCTV camera for a small business? | Content verified for accuracy and freshness.
References
- [Withdrawn] Surveillance camera code of practice – GOV.UK
- Surveillance Camera Commissioner – GOV.UK
- Closed-circuit television
- Closed-circuit television camera
- Search Results | NIST
- CCTV camera placement optimization – Search Results – PubMed
- https://scholar.google.com/scholar?q=how+to+install+CCTV+camera+for+small+business Google Scholar
- https://scholar.google.com/scholar?q=CCTV+camera+placement+height+angle+field+of+view+guidelines Google Scholar
- https://scholar.google.com/scholar?q=video+surveillance+system+installation+best+practices+small+business Google Scholar




[…] Cameras generally perform best when key subjects (faces/hands) are aligned with the camera’s main field of view rather than shot at extreme edge angles. Backlighting and reflective surfaces can reduce effective […]