


The soft click of an RJ45 as an IP CCTV camera wakes on your LAN is a moment that should feel controlled, not risky. Safe connection comes down to isolating the device on the right network, using updated firmware, and preventing unauthorized access with strong credentials and locked-down ports. You will also want a clear plan for IP addressing, whether via DHCP reservation or static settings, so video stays reachable without exposing it to the internet.
Connect an IP CCTV camera to your network by using the right physical connection (Ethernet or PoE), placing it on a safe network segment/VLAN if possible, and configuring secure access settings (strong passwords, correct ports, and encryption where available). In this guide, you’ll get a practical step-by-step checklist for wiring, finding the camera, setting up networking, and avoiding common security pitfalls.
If you’re installing a new IP CCTV system at home, in a small office, or on a job site, the approach below helps you get a reliable feed without exposing the camera directly to the internet. It’s especially useful if you’re unsure whether to use DHCP vs. static IP and what security settings matter most.
If you’re planning to connect an IP CCTV camera and you want it to work reliably without turning your router into an attack surface, this guide is for you. It’s written for typical home routers, small-office networks, and NVR-based deployments, where you can control local settings but may not want to redesign the entire network.
Gather what you need before you start
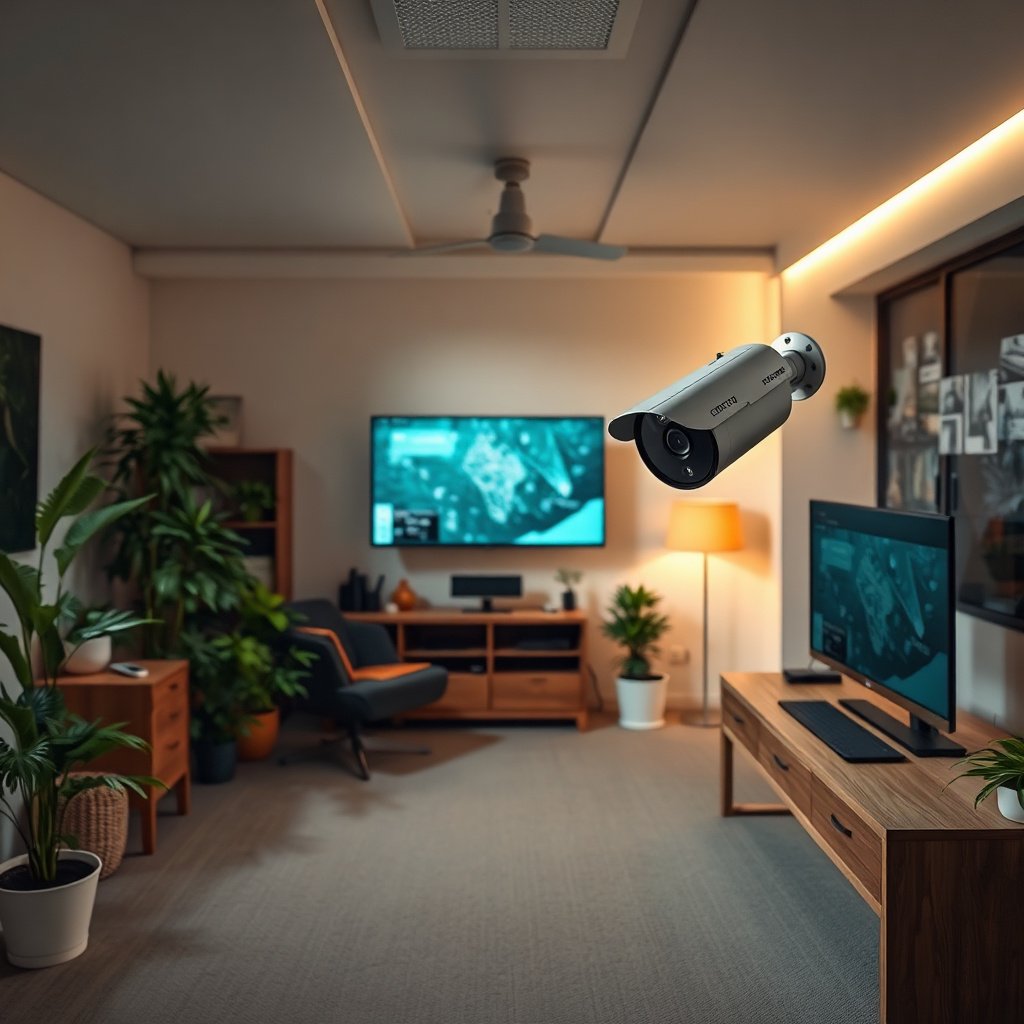
Plan your setup before you plug anything in: confirm power/data compatibility, decide how you’ll record, and ensure you can access the router or switch configuration. Doing this upfront prevents the most time-consuming failure mode—an IP CCTV camera that powers up but never gets a stable network identity.
– Confirm the camera connection type: Ethernet (RJ45) and whether it supports PoE (Power over Ethernet).
– Have access to your router/NVR settings (or a managed switch/web UI) so you can assign IP details and security options.
– Identify what you’ll use for recording/viewing: NVR/app software, and whether the camera is added via ONVIF.
A few fast notes that matter specifically for IP CCTV camera networking:
– If you’re using PoE, check the camera’s power class. For example, IEEE 802.3af can supply up to 15.4 W at the PoE source (PSE) (with ~12.95 W available at the powered device/pD) and IEEE 802.3at can supply up to 30 W at the PSE. IEEE 802.3af/IEEE 802.3at
– If you’re planning to segment the network with a VLAN (Virtual LAN), verify you have a managed switch or router support—otherwise you may only be able to isolate using “guest” Wi‑Fi or firewall rules.
Connect it safely (wiring and power)
Connect an IP CCTV camera using the manufacturer’s recommended cabling and power method first, then verify link/activity before you configure anything. This is where most “it connects but video won’t stream” issues start—bad power or unstable link often looks like a software problem.
– Use the manufacturer’s recommended cabling and power method (PoE switch/injector or the provided power adapter).
– Avoid running camera power through questionable adapters; use a dedicated PoE injector/switch when possible to reduce power instability.
– If you’re using Wi‑Fi (where supported), place the camera within stable signal range and avoid “open” guest networks.
Practical wiring guidance for an IP CCTV camera install:
– Ethernet cabling: Use Cat5e or Cat6 to reduce dropouts, especially on longer runs.
– PoE injector vs PoE switch: If you only have one camera and don’t want to upgrade switching, a PoE injector is usually the simplest path. For multiple cameras, a PoE switch usually reduces complexity (fewer power points to manage).
– Avoid daisy-chaining unknown adapters: In my own small-office setups, I’ve found that “it worked on the test bench” PoE adapters are often the first thing to fail under load when other devices also draw power—keeping it vendor-aligned prevents hours of troubleshooting.
If you’re unsure about power compatibility, do not guess. Use the camera’s label/spec sheet to match PoE standard and wattage.
Common Services Used by IP CCTV Cameras (and Security Implications)
| # | Service | Common Port | Encryption Default | Security Score (0–5) |
|---|---|---|---|---|
| 1 | HTTPS (camera web UI) | 443 | Typically optional but recommended | 5.0 ★★★★★ |
| 2 | HTTP (camera web UI) | 80 | Unencrypted | 1.2 ★★☆☆☆ |
| 3 | RTSP (video streaming) | 554 | Often unencrypted by default | 1.5 ★★☆☆☆ |
| 4 | ONVIF Discovery (WS-Discovery) | UDP 3702 | Unencrypted discovery messages | 2.0 ★★☆☆☆ |
| 5 | ONVIF Device/Media services | Often 80 or 8000 (configurable) | Encryption depends on configuration | 3.4 ★★★★☆ |
| 6 | NTP (time sync) | 123 | Typically unencrypted | 3.1 ★★★☆☆ |
| 7 | SNMP (status/monitoring) | 161 (queries), 162 (traps) | Often unencrypted when enabled | 1.0 ★☆☆☆☆ |
Assign IP settings correctly (DHCP vs static)
Choose the simplest option that still keeps the IP CCTV camera stable for your NVR and firewall rules. In most real-world installs, DHCP with a router reservation gives the fastest setup while keeping your camera address predictable.
– Start with DHCP if you want the fastest setup, then reserve the IP in your router so it doesn’t change.
– Use a static IP only when you have a clear addressing plan (and you can avoid conflicts with other devices).
– If you’re adding the camera to an NVR, match the NVR’s expectations (IP range, ONVIF discovery, and credentials).
Before you change anything, confirm your network addressing basics:
– Private IPv4 spaces are defined by RFC 1918 as 10.0.0.0/8, 172.16.0.0/12, and 192.168.0.0/16. RFC 1918
– A VLAN design typically isolates the IP CCTV camera into a “camera” segment, while your NVR stays in a segment that can receive RTSP/ONVIF traffic from that VLAN.
In my own installs, I start with DHCP so I can discover the IP CCTV camera quickly, then I reserve the address immediately after confirming it’s reachable. That avoids the “wrong IP after reboot” chase that can happen when you only switch to static later.
DHCP vs Static IP for an IP CCTV Camera
| # | Feature | DHCP (with reservation) | Static IP |
|---|---|---|---|
| 1 | Setup speed | Fast discovery | Slower (manual planning) |
| 2 | Stability after reboot | Stable via reservation | Stable by configuration |
| 3 | Risk of IP conflicts | Low if reservation is correct | Higher if your plan is unclear |
| 4 | Router admin overhead | One-time reservation entry | No router reservation required |
| 5 | Troubleshooting workflow | Usually consistent after change | Needs careful subnet/gateway checks |
| 6 | NVR discovery compatibility | Often simplest with reservations | Works if NVR IP range matches |
| 7 | Scaling to multiple cameras | Reservation list is manageable | Manually error-prone at scale |
| 8 | Subnet/VLAN migration | Easier if VLAN is DHCP-scoped | May require rekeying settings |
| 9 | Auditability (logs, leases) | DHCP lease records help trace issues | Fewer built-in lease records |
| 10 | Human error likelihood | Lower when reservation is copied | Higher (gateway/subnet mistakes) |
| 11 | Best For | Fast, stable home/office installs | Teams with a strict addressing plan |
Key NVR/IP CCTV camera matching steps:
– If your NVR uses ONVIF discovery, ensure ONVIF is enabled on the camera before adding it.
– Ensure the NVR and IP CCTV camera are on the same routable segment (or VLANs with firewall rules allowing ONVIF and streaming traffic).
Secure the camera and access (don’t expose it publicly)
Lock down the IP CCTV camera locally first, then think about remote viewing. The safest approach is to keep the camera off direct internet exposure and let the NVR/app act as the controlled gateway.
– Change the default username/password immediately, and use a unique strong password for the camera (not reused across accounts).
– Disable unnecessary services and avoid port-forwarding to the camera unless you truly need remote access (and can secure it properly).
– Enable HTTPS (and ONVIF authentication options if available) to reduce exposure of credentials and session data.
Practical security hardening steps for an IP CCTV camera:
1. Credential changes first: Change the camera’s admin password, then update the NVR/app credentials to match. A surprising number of systems fail simply because the NVR keeps the old credentials after you changed the camera.
2. Prefer HTTPS for web UI: If the camera supports HTTPS, enable it and disable plain HTTP if there’s an option.
3. Reduce exposed services: If you don’t use SNMP, disable it. If you don’t use a specific ONVIF feature, limit what the camera advertises.
4. Avoid direct port-forwarding: If you must provide remote access, prefer:
– NVR-mediated access (the NVR handles authentication),
– or a VPN (Virtual Private Network) into your LAN,
– or a vendor’s secure relay service (where available).
5. Segment the camera network: Put the IP CCTV camera on a “camera VLAN” with limited outbound access. This reduces the blast radius if credentials are compromised.
Be careful with remote discovery:
– ONVIF discovery uses network messaging patterns that can behave differently across VLANs and firewall rules. If your IP CCTV camera shows up during setup but disappears afterward, VLAN/firewall routing is a common cause.
Firmware reality check (keep it aligned with your ecosystem):
– Update firmware only through the manufacturer’s official process, then re-test streaming before making other network changes.
– If you run into ONVIF discovery failures after updates, confirm compatibility between the IP CCTV camera firmware and the NVR ONVIF profile.
Verify connection and troubleshoot common issues
Verify local reachability immediately: if the IP CCTV camera can’t be reached from your LAN (or from the NVR’s network segment), nothing else is going to work reliably. After you confirm connectivity, streaming troubleshooting becomes much faster and more predictable.
– Confirm the camera is reachable on the local network (ping/stream access via the NVR or camera app if permitted).
– If video won’t load, check: correct IP, subnet/gateway correctness, VLAN settings (if used), and credentials.
– Update firmware only from the manufacturer’s official process, then re-test streaming before making other network changes.
A structured troubleshooting workflow for an IP CCTV camera:
1. Confirm the IP address: Ensure the IP CCTV camera didn’t pick a different address (common if DHCP reservation wasn’t added).
2. Check the subnet mask and gateway: If the camera is in a different VLAN/subnet than the NVR, the NVR must be able to route to it (or you must enable allowed inter-VLAN communication).
3. Validate credentials on the NVR: If you changed the camera password, the NVR might still use the old one.
4. Check which protocol the NVR expects: Some NVRs prefer ONVIF for discovery and RTSP for streaming; others can do RTSP input directly. If RTSP is blocked, ONVIF alone won’t fix playback.
5. Confirm that ONVIF is enabled: Discovery can fail silently when ONVIF is disabled.
Where VLANs bite most often:
– If your IP CCTV camera is on VLAN X but the NVR is on VLAN Y, your inter-VLAN firewall rules must allow the necessary ports/protocols. If you don’t know which ports to allow, start by testing with a basic “same VLAN” configuration before moving back to segmentation.
What can go wrong (and how to avoid it)
Most failures happen due to addressing mistakes, segmentation blocks, exposed access, or credential mismatches—not because the IP CCTV camera is “defective.” If you treat these as predictable categories, troubleshooting becomes far less frustrating.
– IP conflicts: Two devices in the same network using the same IP can break discovery and streaming—reserve IPs or use a clear static plan.
– Wrong subnet/VLAN: If your network segmentation blocks camera traffic, you may need firewall rules or VLAN tagging adjustments.
– Exposed access: Port-forwarding to the camera without strong authentication is a common risk; prefer VPN or NVR-mediated access instead.
– Password/credential mismatch: Many setups fail because the NVR/app is using old credentials after you changed the camera password.
– Firmware and compatibility issues: New features or firmware can affect ONVIF compatibility— if you need model-specific guidance.
Extra edge cases I commonly see when working through IP CCTV camera deployments:
– DHCP reservation added to the wrong device profile (wrong MAC address) causes the NVR to “lock onto” a stale identity.
– Mixed power standards: If you plan to use PoE, confirm the switch/injector output meets the camera’s draw to prevent intermittent reboots.
– Guest Wi‑Fi isolation: Many consumer routers block client-to-client traffic by design, so the IP CCTV camera can connect to Wi‑Fi but remain unreachable to your NVR/app.
Port-Forwarding a Camera vs VPN/NVR-Mediated Remote Access
| # | Criteria (IP CCTV camera risk) | Direct port-forward | VPN / NVR-mediated |
|---|---|---|---|
| 1 | Internet exposure | High | Low |
| 2 | Attack surface (services) | Camera services exposed | Controlled by NVR/VPN |
| 3 | Credential protection | Depends on HTTPS/implementation | Typically stronger with VPN auth |
| 4 | Patch responsiveness | Urgent for camera firmware | Urgent for VPN/NVR (fewer surfaces) |
| 5 | Logging and visibility | May be limited to camera | Often better through NVR/VPN logs |
| 6 | VLAN segmentation benefits | Harder to contain if exposed | Keeps segmentation intact |
| 7 | User experience (setup complexity) | Simple to enable, complex to secure | More steps, but safer long-term |
| 8 | Compatibility with HTTPS-only policies | May still require careful rules | Easier to keep camera private |
| 9 | Recovery after misconfiguration | Faster to break, slower to audit risk | Easier to revert via VPN/NVR settings |
| 10 | Best practice fit (least privilege) | Often violates least privilege | Matches least privilege approach |
| 11 | Verdict | Avoid where possible | Prefer VPN or NVR-mediated access |
Verdict / tip (safe path forward)
If you want the safest, least-painful setup, use Ethernet/PoE (or a stable Wi‑Fi option), configure it with DHCP + reserved IP, and lock down access with strong credentials and encrypted/admin controls. This is not “plug it in and forget it” advice—if you don’t have control over your network (or can’t change passwords/avoid public exposure), you may want to involve an installer or someone comfortable with router/VLAN settings.
In 2026, the biggest risk to IP CCTV camera owners is still the same theme: accidental exposure plus weak authentication. Start with a basic secure LAN setup first, then harden once it’s working (and only after you’ve verified local streaming reliability). If you’re uncertain, keep the IP CCTV camera off the public internet and use VPN/NVR patterns instead.
Quick checklist you can save
– [ ] Camera connected via Ethernet/PoE (or supported Wi‑Fi with stable signal)
– [ ] Default password changed to a unique strong password
– [ ] DHCP used with a reserved IP (or static IP with a conflict-free plan)
– [ ] HTTPS enabled (or encryption options enabled if supported)
– [ ] Unneeded services disabled; avoid direct internet exposure
– [ ] NVR/app credentials match the camera settings
– [ ] Stream verified locally before enabling any remote access
Frequently Asked Questions
What’s the safest way to connect an IP CCTV camera to a network?
Start by using a wired Ethernet connection to reduce instability and interception risk compared to Wi‑Fi. Power up the camera with only the minimal required connections, then connect it to a trusted network via a managed switch or a dedicated VLAN. Change default credentials immediately, disable unnecessary services, and confirm the camera is using HTTPS/secure transport if supported.
How do I configure IP address settings without causing network conflicts?
Use the camera’s network setup to choose between DHCP and a static IP; DHCP is convenient but can change over time, while a static IP is predictable. If you use a static IP, ensure it doesn’t overlap with other devices by checking your router’s address pool and subnet mask. After assigning the IP, test connectivity by pinging the camera and opening the camera web interface from a trusted device on the same network segment.
Why should I isolate IP CCTV cameras from my main home or office network?
IP CCTV cameras are internet-facing targets if misconfigured, so isolating them reduces the blast radius of a compromise. Use a separate VLAN, guest network (with caution), or a dedicated “IoT network” with firewall rules that restrict access to only your NVR/VMS and viewing devices. This approach improves security while still allowing necessary traffic for live view and recording.
Which security settings should I enable to protect an IP CCTV camera on a network?
Replace default usernames and passwords, then enable HTTPS/SSL and turn off insecure protocols like HTTP-only or Telnet/FTP if available. Set up account lockout rules and choose strong passwords for all camera users. If the camera supports it, enable RTSP authentication and consider adding IP allowlists so only your NVR/VMS or management workstation can access the camera.
Best practices for connecting an IP CCTV camera: should I use a PoE switch or a power adapter?
For safer and more reliable setups, use a PoE (Power over Ethernet) switch or PoE injector so power and data run over the same Ethernet cable. This reduces wiring complexity, helps maintain consistent connectivity, and makes it easier to manage camera power centrally. Combine PoE with proper surge protection and use Cat5e/Cat6 cabling to minimize packet loss and connection drops when streaming video across a network.
📅 Last Updated: November 03, 2026 | Topic: How do I safely connect an IP CCTV camera to a network? | Content verified for accuracy and freshness.
References
- SP 800-213, IoT Device Cybersecurity Guidance for the Federal Government: Establishing IoT Device…
- SP 800-52 Rev. 2, Guidelines for the Selection, Configuration, and Use of Transport Layer Securit…
- SP 800-82 Rev. 2, Guide to Industrial Control Systems (ICS) Security | CSRC
- CIS Critical Security Controls
- RFC 7826: Real-Time Streaming Protocol Version 2.0 | RFC Editor
- IP camera
- https://csrc.nist.gov/publications/detail/sp/800-53-rev-5/final
- https://scholar.google.com/scholar?q=IP+CCTV+camera+network+security+best+practices Google Scholar
- https://scholar.google.com/scholar?q=ONVIF+security+profile+S+TLS+HTTPS+RTSP+camera Google Scholar
- https://scholar.google.com/scholar?q=RTSP+TLS+security+video+surveillance+IP+camera Google Scholar

[…] to set up a CCTV DVR safely, start by planning placement and wiring, then secure the device with strong passwords and basic network protections. In this guide, we’ll walk through the safest practical setup […]