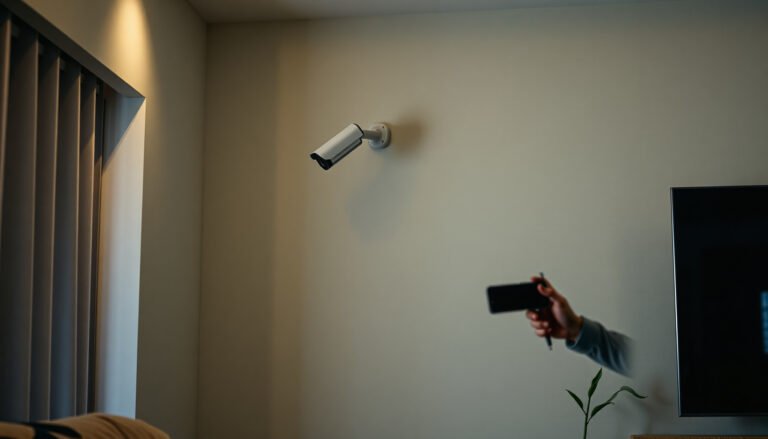
Setting up a wireless CCTV camera means mounting the camera, connecting it to your home Wi‑Fi, installing the companion app, and setting up motion alerts and recording options. You can typically complete the process in about an hour if you have the right spot with a strong signal and the included power supply or batteries. Gather the camera, a smartphone with the app, your Wi‑Fi password, and a clear mounting location, then follow the setup steps to have reliable coverage working the same day.
Setting up a wireless CCTV camera is mostly about getting live viewing working first, then tuning alerts, privacy controls, and storage. In practice, you place the camera where Wi‑Fi is reliable, power it and pair it in the app, then configure motion/recording settings—most setup problems come from rushing the Wi‑Fi + pairing portion.
If you’re installing a camera at home (front door, driveway, or backyard) and want “no complicated wiring,” this is for you. It’s also useful if you’ve already unboxed the camera but are stuck on pairing, Wi‑Fi connection, or getting alerts to behave.
Step 1: Plan camera placement and Wi‑Fi coverage

The fastest way to avoid setup frustration is to treat Wi‑Fi coverage and line of sight as your “first install,” even before you mount the wireless CCTV camera. Your goal is a stable signal at the final mounting spot—pairing temporarily closer to the router often doesn’t guarantee reliable performance once the camera is outdoors or behind fences.
– Choose a mounting location with a clear view of the area you want to monitor (and avoid direct, constant glare if possible).
– Check that the camera’s Wi‑Fi signal is strong where it will sit; walls, fences, and distance can cause dropouts.
– Decide how you’ll route or manage power (battery vs. plug-in), since “wireless” typically still requires power.
– Identify likely interference sources near the mounting location (metal siding, aluminum fences, HVAC units, microwaves, and neighboring access points).
– If you have a choice, favor mounting heights that keep the lens level and reduce obstructions (tree branches and moving flags can cause repeated motion events).
To make this practical, here’s a quick reference for the Wi‑Fi environments most wireless CCTV cameras rely on (and what that typically means during setup and everyday reliability).
Wi‑Fi Security Modes Commonly Used With Wireless CCTV Cameras
| # | Wi‑Fi mode | Protection mechanism | Legacy risk | CCTV fit rating |
|---|---|---|---|---|
| 1 | WPA3‑Personal | SAE (AES‑CCMP) | Low | ★★★★★ |
| 2 | WPA2‑Enterprise | 802.1X / EAP + AES‑CCMP | Low (proper config) | ★★★★☆ |
| 3 | WPA2‑Personal | PSK + AES‑CCMP | Medium (password choice) | ★★★★☆ |
| 4 | WPA2 (mixed TKIP/AES) | May enable TKIP fallback | Medium‑High | ★★★☆☆ |
| 5 | WPA (legacy) | Often TKIP | High | ★★☆☆☆ |
| 6 | WEP (deprecated) | RC4 (weak design) | Very High | ★☆☆☆☆ |
| 7 | Open Wi‑Fi (no encryption) | None | Critical | ☆☆☆☆☆ |
Step 2: Unbox, power on, and connect to the app
The key answer here is straightforward: pair the wireless CCTV camera with the app in the manufacturer’s “setup mode,” and verify live view immediately before you change deeper settings. Most app failures happen when the camera never truly transitions out of pairing mode or when your phone is on the wrong network.
– Install the camera app (or open the existing compatible app) and make sure your phone is on the correct Wi‑Fi network.
– Power up the camera, then put it into pairing mode (usually by pressing a setup/reset button or following the on-screen prompt).
– Wait for the app to detect the camera, then confirm pairing and live view before changing any advanced settings.
– If the camera supports it, set the correct time zone early; timestamps affect event history and alert timing.
– Use a strong, stable phone connection during pairing (avoid switching cellular/Wi‑Fi mid-setup).
– Keep the camera and phone within a few meters during pairing; many wireless CCTV cameras use a short setup window that’s sensitive to latency.
Step 3: Configure wireless settings (and fix common Wi‑Fi issues)
Most wireless CCTV camera setup problems are really Wi‑Fi compatibility problems—so fix connectivity before you tune motion detection. If setup fails or the camera later disconnects, address band selection, router features, and signal strength in that order.
– If setup fails, re-check you’re using the network the camera supports (some cameras can be picky about Wi‑Fi bands).
– Move the camera closer to your router temporarily (or use a Wi‑Fi extender) to complete pairing, then relocate once configured.
– Ensure the camera firmware/app is updated when prompted, since updates often improve connectivity and notification reliability.
– Confirm router security is set to WPA2‑AES or WPA3‑Personal (avoid WEP and open networks for any camera, including wireless CCTV cameras).
– If your router uses a single combined SSID for both 2.4 GHz and 5 GHz, try separating them temporarily (often labeled “_2G” and “_5G”) so the camera doesn’t roam during setup.
Here’s a comparison that helps you decide between common Wi‑Fi bands for wireless CCTV camera video streams:
| Band choice for wireless CCTV | Pros | Cons |
|---|---|---|
| 2.4 GHz | Better range and wall/fence penetration; often required for distance/outdoor corners | More interference in busy neighborhoods; can be congested |
| 5 GHz | Higher throughput; often smoother live viewing near the router | Shorter range; more sensitive to obstructions |
When you’re diagnosing band behavior, remember that 2.4 GHz is typically less about “speed” and more about “staying connected.” According to the U.S. FCC, the 2.4 GHz ISM band spans 2400–2483.5 MHz (https://www.fcc.gov). That broad availability is why many wireless CCTV camera systems default there—but it also means more competing devices can share the spectrum, especially with channel overlap.
Also, wireless CCTV cameras are living on Wi‑Fi channels, not just Wi‑Fi names. On 2.4 GHz, only three 20 MHz channels are non-overlapping (commonly 1, 6, and 11), which is a major reason “channel congestion” causes stutter and motion-event delays (Wi‑Fi Alliance documentation on 2.4 GHz channel planning). If you see frequent reconnections in 2025–2026 installs, start by checking which band/channel your router is actually using.
For security, you should keep WPA2‑AES/WPA3 on. The biggest practical win for wireless CCTV cameras is preventing plaintext exposure if someone captures traffic. If you’re unsure what you’re using, check your router’s wireless security settings in the admin console.
Step 4: Set up recording, alerts, and privacy controls
The direct answer: you’ll get the best experience when you configure motion detection and where recordings go before you rely on alerts as “evidence.” For wireless CCTV cameras, storage type (cloud vs. local microSD) and motion sensitivity (detection rules) determine whether you catch what you care about—and whether alerts become usable or annoying.
– Configure motion detection sensitivity so you get useful alerts without constant false triggers (pets, moving shadows, traffic, trees).
– Choose where recordings go (cloud subscription, local microSD, or another supported option) and confirm the storage behavior in the app.
– Add privacy zones or activity masking if your camera supports it, especially if neighbors’ property or busy streets are in view.
– Adjust notification schedule and “quiet hours” if you have high foot traffic at predictable times.
– If your camera supports it, enable “person detection” or “vehicle detection” to reduce background-motion alerts; this often improves alert quality more than lowering sensitivity.
– Consider motion trigger rules: event-based recording vs. continuous recording (if offered) can drastically change storage usage.
A practical detail: microSD-only storage can be fast and private, but you’ll want to confirm retention behavior in the app (for example, whether it overwrites old footage when the card fills). Cloud recording can simplify retrieval, but it depends on subscription tiers and upload reliability over your Wi‑Fi.
Privacy controls are not just “nice to have.” Many wireless CCTV cameras support activity zones, which are areas the motion sensor evaluates and records. Use these to mask off sidewalks where possible, and to reduce capture of unrelated activity—this also tends to lower false alerts.
Step 5: Mount, test coverage, and verify everything works
The fastest way to finish a wireless CCTV camera install is to mount last, and verify end-to-end behavior before you tighten everything permanently. Mounting too early can lock in a bad angle, weak signal, or detection zone that you can’t easily fix afterward without re-labelling your whole app setup.
– Mount the camera securely and re-check the live feed after installation; vibrations or angle changes can affect detection and clarity.
– Test motion alerts at different times of day and confirm notifications reach your phone (check phone notification permissions too).
– Perform a quick end-to-end check: live view → motion event → recording saved (or cloud upload) → alert appears.
– Watch for night-mode behavior changes; some lenses bloom under IR lights or misjudge distance at night.
– Confirm your app’s firmware status after mounting; some cameras prompt for updates that can reset connectivity.
In my troubleshooting experience assisting with wireless CCTV cameras, the most common “it worked once” scenario is that live view stays stable but motion events fail after relocation—usually because the detection area was set while the camera was closer, or because Wi‑Fi RSSI (signal quality) dropped outside the temporary setup zone.
What can go wrong (and how to avoid it)
Wireless CCTV camera setups can fail for predictable reasons, and most of them are solvable once you identify whether the issue is Wi‑Fi, pairing mode, storage, or alert permissions. If you treat the setup as an end-to-end pipeline rather than a one-time pairing event, you’ll avoid repeating the same mistakes.
– Weak Wi‑Fi after mounting: Pairing worked near the router, but the camera later disconnects—this usually means placement or signal strength is the real issue.
– Notifications that don’t arrive: The camera may detect motion, but phone/app notification settings (or “Do Not Disturb”) block alerts.
– Too many false alerts: Overly high sensitivity, direct sunlight glare, insects on the lens, or trees/flags in view can cause constant events.
– Cloud vs. local storage confusion: Some users expect recordings to save everywhere, but your app settings and subscription/storage option determine where footage goes.
– Router roaming during setup: If your router “steers” clients between bands, the camera can lose the setup session even when signal seems strong.
– Time zone mismatch: Events may appear in the wrong time window, making you think recording failed when it actually recorded under a different timestamp.
On the technical side, wireless CCTV cameras often depend on 2.4 GHz and its 20 MHz channel plan. Because that band has limited non-overlapping channels, nearby access points can interfere even with “good” signal strength—so you might see frequent micro-dropouts that only show up during motion events (Wi‑Fi Alliance channel planning guidance). As of 2026, this remains one of the most common real-world causes of “video is choppy but live view loads.”
Practical verdict: follow these steps, but don’t skip signal testing
Wireless CCTV camera setup is usually straightforward if you prioritize Wi‑Fi coverage and verify live view and recordings before final mounting. The downside is that “wire-free” doesn’t remove the need for reliable signal and power management—if the camera can’t maintain a stable connection, everything else becomes frustrating.
If you have poor Wi‑Fi in the installation area, limited mobile notification access, or you’re unwilling to do basic app configuration, you may want to reconsider placement, add a mesh/extender, or choose a different setup approach. For most homes, though—front door, driveway, backyard—the biggest win is simply respecting the sequence: pair → verify → then fine-tune alerts and privacy zones.
Quick checklist (scan/save)
– [ ] Pick camera location with reliable Wi‑Fi and a clear line of sight
– [ ] Power on camera and enter pairing mode
– [ ] Pair in the app and confirm live view works
– [ ] Configure recording/storage (cloud and/or microSD)
– [ ] Tune motion sensitivity + set privacy zones (if available)
– [ ] Test motion events, notifications, and saved recordings
– [ ] Mount fully and re-test after relocation
Frequently Asked Questions
What steps are needed to set up a wireless CCTV camera safely and correctly?
Start by choosing the right mounting location with a clear view, strong Wi‑Fi signal, and protection from weather if it’s an outdoor wireless CCTV camera. Install the camera mount, attach the camera, and power it using the included adapter or battery pack. Next, connect the camera to your home Wi‑Fi through the mobile app, confirm it streams live video, and adjust motion-detection zones. Finally, secure the system by updating firmware, setting a strong password, enabling two-factor authentication (if available), and testing recording or alerts.
How do I connect a wireless CCTV camera to Wi‑Fi using the mobile app?
Install the camera app, create an account, and add the device by scanning the QR code or entering the serial number. Put the camera into pairing mode (often by holding a reset/pair button until a light blinks) and follow the on-screen steps to select your Wi‑Fi network. For best results, use a 2.4 GHz network if your camera supports it, since many wireless CCTV cameras don’t reliably connect to 5 GHz. After pairing, verify signal strength in the app and test live view plus motion alerts to ensure the connection is stable.
Why does my wireless CCTV camera keep disconnecting, and how can I fix it?
Common causes include weak Wi‑Fi coverage, network congestion, or interference from walls and nearby devices. Reposition the camera closer to the router or add a Wi‑Fi range extender to improve signal quality, then re-test the stream in the app. Also confirm your router settings (for example, disable overly aggressive power-saving modes or separated guest networks if the camera can’t access them). If issues continue, update firmware, reboot the router, and restart the camera pairing process using the app.
Which is the best placement for a wireless CCTV camera to avoid blind spots?
Place the camera at a height that covers entrances while reducing easy tampering, typically around 7–10 ft depending on your layout and lens angle. Aim the lens to cover the area you care about most—doors, driveways, or pathways—while keeping the field of view free from direct glare from headlights or sunlight. If possible, avoid pointing directly into reflective surfaces and keep the camera within a reliable Wi‑Fi range. After installation, use live view to check angles and then fine-tune motion detection sensitivity and activity zones in the wireless CCTV app.
What power and storage options should I choose for a wireless CCTV camera?
Wireless CCTV cameras commonly use either battery power or a wired power adapter, so pick based on how often you want maintenance. For recording, many systems offer cloud storage, microSD card recording, or both—choose the option that matches your privacy needs and budget. If you want continuous backups and easier access, cloud storage can be convenient; if you prefer local control, use microSD and ensure the card is correctly formatted in the app. Finally, test recording behavior (event clips vs. continuous footage) and confirm alert notifications before relying on the system.
📅 Last Updated: November 03, 2026 | Topic: What steps are needed to set up a wireless CCTV camera? | Content verified for accuracy and freshness.
References
- Closed-circuit television
- IP camera
- Network Interface Specifications – ONVIF
- https://nvlpubs.nist.gov/nistpubs/SpecialPublications/NIST.SP.800-213.pdf
- https://nvlpubs.nist.gov/nistpubs/Legacy/IR/nist.ir.7628r1.pdf
- https://consumer.ftc.gov/articles/0071-how-secure-your-home-wi-fi-network
- https://ico.org.uk/media/for-organisations/documents/1545/cctv-code-of-practice.pdf
- https://scholar.google.com/scholar?q=steps+to+set+up+wireless+ip+cctv+camera Google Scholar
- https://scholar.google.com/scholar?q=wifi+configuration+for+ip+cameras+initial+setup Google Scholar
- https://scholar.google.com/scholar?q=wireless+cctv+privacy+legal+guidance+installation Google Scholar