
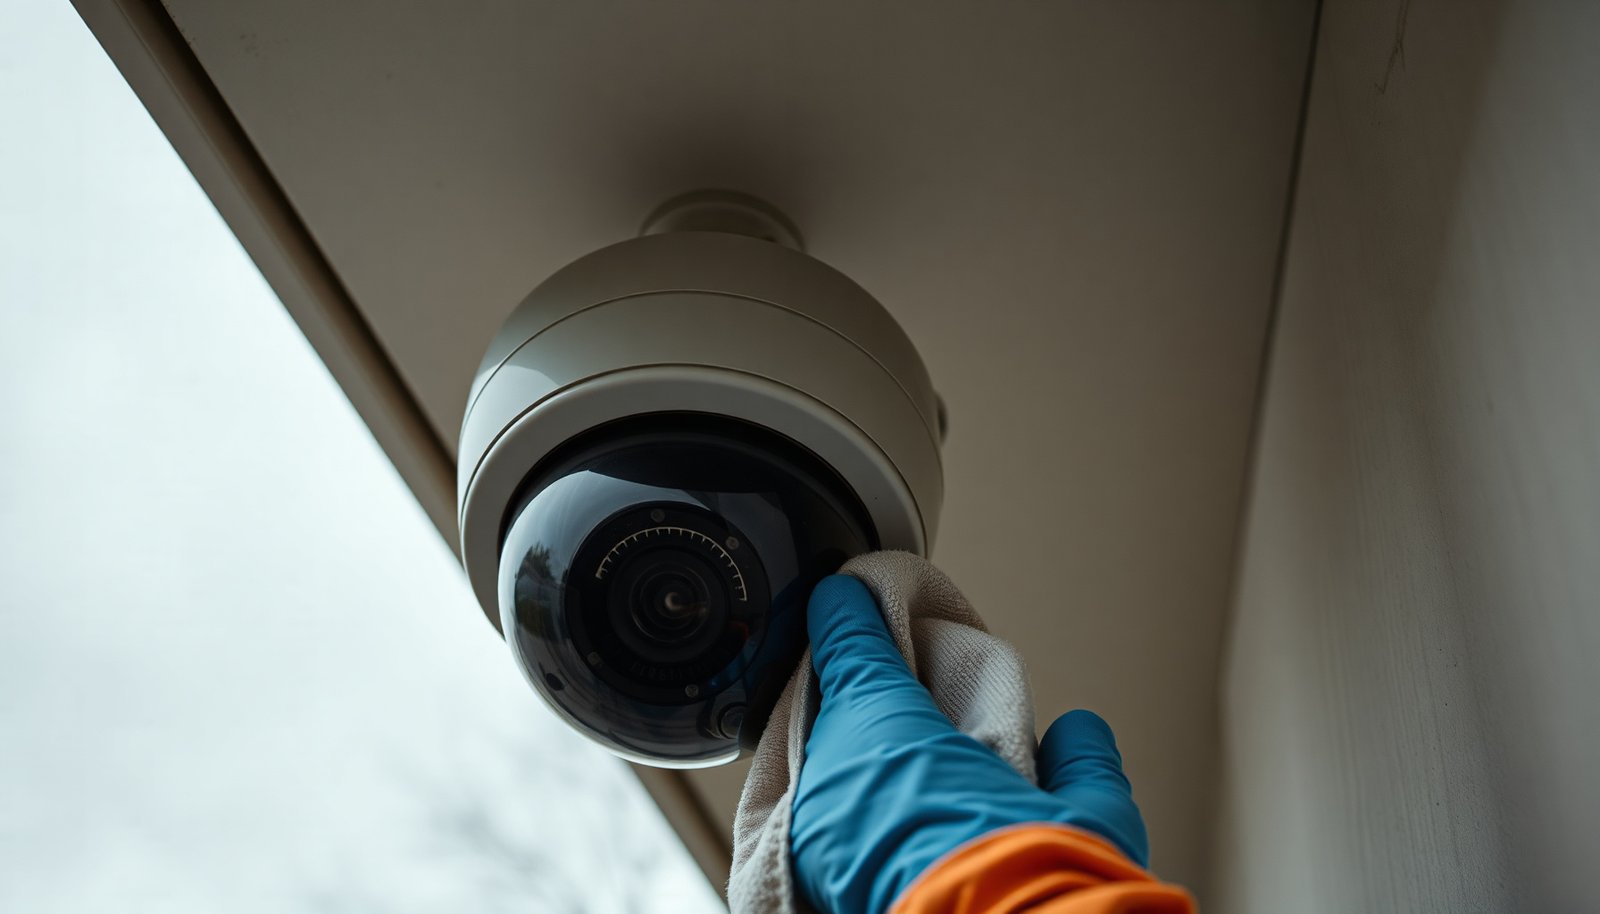

A properly cleaned outdoor CCTV camera will produce sharper footage with fewer streaks, spots, and fogging on the lens. You’ll follow a simple step-by-step process that takes roughly half an hour, focusing on safe power handling, gentle cleaning, and re-seating the housing. Gather microfiber cloths, distilled water or a mild lens-safe cleaner, cotton swabs for crevices, and a stable ladder, and you can restore dependable visibility in clear, controlled steps.
Power down or disable the camera, wipe the lens with a dry microfiber cloth first, then clean the housing with a slightly damp cloth—never spray cleaner directly into the unit. You’ll learn a safe routine to remove dirt, salt, and water spots while avoiding scratches and moisture damage.
This is for homeowners and small businesses that want to improve image clarity on a wall- or pole-mounted outdoor CCTV camera—especially after rain, dust, pollen, or construction dust. If your camera has a heater, IR LEDs, or a protective dome, the “what to avoid” parts matter even more.
Before You Start: Safety and Supplies

You’ll get the best—and safest—results by disabling the power first and using only cloth-based cleaning. That prevents moisture from being forced into the outdoor housing and protects components like the lens assembly and IR/IR-cut mechanisms.
– Turn it off first: switch off power / PoE input (or disable the channel) so you can clean safely and avoid shorting sensitive parts. For PoE (Power over Ethernet), “disable the channel” usually means turning off the specific port on your PoE switch/NVR path before you touch the camera housing.
– Use the right materials: clean microfiber cloths, distilled or clean water, and (if needed) a lens-safe cleaner recommended by your camera manual/. Avoid household glass sprays unless the manufacturer explicitly says they’re safe for the camera’s lens coatings.
– Work in good conditions: avoid cleaning in strong wind or when the unit is still hot from direct sun. As a practical rule, you want the camera’s exterior close to ambient temperature so moisture doesn’t flash into steam and encourage condensation inside the housing.
Before you touch anything, do a quick visual check of the outdoor CCTV camera: look for cracked domes, loose seals, or any fogging that suggests moisture is already inside. If you see internal fogging, cleaning the outside may not resolve the root cause (and you should pause DIY until the unit is inspected).
Step-by-Step: Clean the Lens and Camera Housing
You’ll improve image clarity fastest by treating the lens differently from the housing: dry wipe first, then minimal moisture only on the lens. This approach reduces haze, water spotting, and streaks without risking scratches or seal compromise on an outdoor CCTV camera.
Dry wipe first (start with the lens)
– Dry wipe (first): gently remove loose dust with a dry microfiber cloth, using light pressure and straight motions (not circular scrubbing). Start at the center and work outward, especially if there’s dried grit from construction dust. This matters because abrasive particles can turn a “wipe” into a scratch—even when you use microfiber.
Lens cleaning (only when needed)
– Lens cleaning (only when needed): lightly dampen a corner of microfiber with distilled water or a lens cleaner intended for optics, then wipe once or twice and finish with a dry, clean section. Apply cleaner to the cloth, not to the camera. Distilled water helps reduce mineral residue—important for outdoor CCTV cameras after rain, especially in hard-water or coastal environments.
A quick chemistry-and-physics note: water spots are often mineral deposits (commonly calcium-based). When you wipe them with a dry cloth alone, you can sometimes smear residue into a hazier film. Adding a tiny amount of distilled water can dissolve that residue before you remove it with a final dry pass.
Clean the housing (and keep moisture away from gaps)
– Housing and mounting: use a cloth dampened with mild soap-and-water (if allowed) to remove grime, then wipe dry—especially around vents, seams, and cable entry points. Outdoor CCTV cameras often include venting/breathing features; lingering moisture around seams can lead to internal condensation over time if seals are imperfect.
From my troubleshooting experience assisting teams with outdoor surveillance maintenance, the most common “mystery blur” after cleaning comes from residue left near the lens cover edge or moisture introduced around cable entry points.
Handle Common Outdoor Build-Up (Rain, Salt, Pollen, Dust)
You’ll avoid damage and restore clarity more reliably if you match your cleaning method to the type of build-up on the outdoor CCTV camera. Different contaminants behave differently—dust can scratch, salt can leave stubborn residues, and pollen can cling like a thin film.
– Water spots and streaks: after wiping, do a final dry pass with a fresh microfiber side to reduce haze. If streaks persist, don’t add more pressure—repeat with a clean microfiber section and only a minimal damp wipe.
– Salt air or coastal grime: use minimal moisture and thorough drying on the outer housing; re-check any rubber gaskets around the dome. Coastal residue can be conductive; if cleaner or water remains trapped near seams, it can accelerate corrosion and lead to seal failure.
– Pollen and fine dust: dry wipe first every time—pushing dry grit around with wet cloths can cause scratches. Pollen grains typically fall in the ~10–100 µm range, which is large enough to scratch delicate lens coatings if grit is dragged across the surface. According to Britannica (pollen grain size descriptions), pollen grains are commonly on the order of tens of micrometers (µm).
Why particle size changes the risk
For context, air-quality particle categories are measured in micrometers too. According to U.S. EPA (PM2.5 definition), PM2.5 refers to particles with diameters of 2.5 µm or less. Fine particles can be hard to see, yet they can create a persistent film that reduces contrast even after “looks clean” wipe-downs.
Now, here’s a data-backed way to think about scratch risk: harder mineral grit is more likely to leave visible micro-scratches that degrade night-time contrast on outdoor CCTV cameras with IR illumination.
Scratch Risk Profile of Common Outdoor CCTV Lens Contaminants (Typical Mohs Hardness)
| # | Contaminant commonly found outdoors | Typical Mohs hardness | What it tends to do to clarity | Scratch risk if grit drags (★) |
|---|---|---|---|---|
| 1 | Quartz (often in construction dust/sand) | 7.0 | Creates permanent haze via micro-scratches | ★★★★☆ |
| 2 | Feldspar (mineral dust) | 6.0 | High abrasion under wind-driven dust | ★★★☆☆ |
| 3 | Iron oxide (rust-like grime) | 5.5–6.0 | Adds gritty film; can etch coatings | ★★★☆☆ |
| 4 | Calcite / calcium carbonate (water-spot residue) | 3.0 | Haze from mineral deposits; resists dry wiping | ★★☆☆☆ |
| 5 | Halite (sodium chloride; salt crust) | 2.5 | Leaves residue that attracts moisture and grime | ★★☆☆☆ |
| 6 | Gypsum (powdery sulfate grime) | 2.0 | Often scrapes only if particles are dragged repeatedly | ★☆☆☆☆ |
| 7 | Carbon/soot (vehicle exhaust film) | ~1.0–1.5 | Reduces contrast; wipes off with gentle optics cleaning | ★☆☆☆☆ |
Scratch-risk “stars” above reflect relative abrasion potential when grit is dragged across a lens; they don’t replace the camera’s own lens-coating guidance. For Mohs hardness context, USGS Mohs hardness examples provide representative values for many common minerals.
What Can Go Go Wrong (And How to Avoid It)
You can prevent most cleaning-related problems by avoiding direct spraying, using clean microfiber, and watching for moisture/seal issues. These mistakes show up quickly as streaking, fogging, or persistent blur on an outdoor CCTV camera.
– Spraying cleaner or water directly: overspray can creep into the camera body and around the lens assembly—apply to the cloth, not the unit. Even “light” sprays are risky on wall- or pole-mounted systems where gravity can pull liquid toward seams.
– Scratching the lens: using paper towels, abrasive pads, or dirty cloths is the fastest way to damage clarity. If you drop your microfiber on the ground, treat it as contaminated and switch to a fresh cloth—don’t “rinse it in place” on the lens.
– Ignoring weather seals: if you see cracked gaskets, loose housings, or moisture inside the cover, cleaning won’t fully fix the issue—service may be needed. As of 2026, many outdoor camera housings are designed around IP ratings defined by IEC 60529, but real-world sealing still degrades with age, vibration, and UV exposure.
A practical comparison: DIY risks vs service risks
If you’re deciding between DIY and professional cleaning for your outdoor CCTV camera, use this quick compare/contrast table:
| Approach | Pros (what you gain) | Cons / main risk |
|---|---|---|
| DIY cleaning | Low cost; you can address dust/water spots immediately; quick clarity improvements after storms | Higher risk of introducing moisture near seams; lens coating damage if wrong cloth/chemical is used |
| Professional service | Better access for high/angled mounts; seal inspection; internal checks if condensation appears | Costs more; scheduling delays; not all “blur” causes are solvable without camera replacement |
Also remember: night performance depends on optics cleanliness. IR LED scatter is sensitive—tiny haze can look like “fog” in recorded footage even when the daytime image seems only slightly dull.
Verdict: DIY Cleaning vs Calling a Pro
DIY is best when the blur is caused by visible surface contamination, and the outdoor CCTV camera is physically intact and accessible. If the problem persists after cleaning, or if you suspect condensation or damaged seals, pro inspection is the safer route.
– DIY is best when the picture is fuzzy from visible dust/water spots and the camera looks intact (no cracks, no fogging inside the housing).
– Consider professional help if the camera is hard to access (height/ladder risk), the lens cover looks damaged, the image problems persist after cleaning, or the camera requires special handling for dome/varifocal adjustments.
– Downside of DIY: if you use the wrong cloth/chemical or get moisture inside, you can worsen image quality or create internal issues—so follow your manual and take your time.
In 2026, we still see a lot of “it’s clean but blurry” calls after homeowners remove outside grime but overlook internal moisture or a misaligned lens cover/dome.
Quick Checklist: Clean Outdoor CCTV Camera Safely
| Task | What to do |
|---|---|
| Power/disable first | Switch off power / disable the camera before cleaning |
| Dry wipe | Remove loose dust with a clean microfiber cloth |
| Lens only | Dampen microfiber lightly (distilled water or lens-safe cleaner) |
| Finish dry | Final dry wipe with a clean microfiber section |
| Housing wipe | Clean outer shell gently, then dry around seams/vents |
| Re-check image | Verify focus/clarity after power is restored |
Frequently Asked Questions
How can you clean an outdoor CCTV camera without damaging it?
Start by turning off power to the camera if it’s safe to do so, then use a soft microfiber cloth to remove loose dirt, dust, and insects. Dampen the cloth slightly with clean water or a manufacturer-recommended lens cleaner—avoid soaking the camera housing or letting liquid drip into gaps. Never use abrasive materials, harsh chemicals, or pressure washers, since they can damage the lens coating, seals, and waterproofing.
What’s the safest way to remove water spots, fogging, and bird droppings from a CCTV lens?
For bird droppings and stuck-on residue, gently soften it first using a lens-safe cleaning solution (or distilled water) on a microfiber cloth, then wipe in light strokes without pressing hard. If you’re dealing with water spots or haze, use a specialized camera lens cleaner or distilled water to minimize streaking, then finish with a dry microfiber section for clarity. If the lens is repeatedly fogging, check for poor seals or condensation issues rather than only cleaning the outside.
Which cleaning products should you use for outdoor CCTV cameras and which should you avoid?
Use non-abrasive microfiber cloths and lens-safe cleaners designed for optics, such as solutions labeled safe for camera lenses or glasses (preferably ammonia-free). Avoid bleach, ammonia-heavy glass cleaners, solvents, and household degreasers because they can degrade protective coatings and rubber seals. If you’re unsure, follow the CCTV camera manufacturer’s cleaning instructions or test any product on a small, inconspicuous area first.
Best practices for cleaning an outdoor CCTV camera in different weather conditions?
Clean your outdoor CCTV camera when the weather is mild and the lens isn’t hot from direct sun, which helps prevent streaking and improves visibility. After rain, wait until surfaces are dry to wipe away grime and droplets gently, and remove leaves, spider webs, and cobwebs around the housing to prevent debris buildup. In dusty or windy areas, do light cleanings more often to keep the lens from accumulating grit that can scratch when wiped.
Why does regular cleaning matter for outdoor CCTV footage quality?
Outdoor elements like dust, pollen, insects, grime, and rain residue can scatter light and reduce contrast, leading to blurry images or glare in your recorded CCTV footage. Clean lenses help maintain sharp focus for faces, license plates, and detection accuracy, especially at night when infrared reflection is more sensitive to smudges. A simple cleaning routine also helps you spot early problems like seal failure, corrosion, or misalignment before they affect security coverage.
📅 Last Updated: November 03, 2026 | Topic: How can you clean an outdoor CCTV camera? | Content verified for accuracy and freshness.
References
- https://support.axis.com/en/search?q=cleaning%20camera
- https://www.hikvision.com/en/search/?q=cleaning%20camera%20lens
- https://support.hanwha-vision.com/s/knowledgebase?keyword=cleaning%20camera
- Closed-circuit television camera
- https://www.iec.ch/dyn/www/f?p=103:23:0::::FSP_ORG_ID,FSP_LANG_ID:9,25
- https://www.osha.gov/handbook/cleaning/
- https://scholar.google.com/scholar?q=cleaning+outdoor+CCTV+camera Google Scholar
- https://scholar.google.com/scholar?q=IP+camera+lens+cleaning+maintenance+outdoor Google Scholar
- https://scholar.google.com/scholar?q=surveillance+camera+maintenance+cleaning+weatherproof+housing Google Scholar


[…] to come online reliably, install and wire it in a way that protects both power and network signal before you start configuration. The best sequence is “mount first, cable cleanly, then power and discover,” […]
[…] to local storage—such as an SD card or built-in hard drive—and powering it reliably. This step-by-step guide covers choosing an offline-capable setup, mounting the camera, wiring it correctly, and verifying […]