

To enable audio on a CCTV camera, you should first check whether your specific model supports microphone input and audio recording—if it doesn’t, no setting will make audio possible. The fastest path is to connect an approved mic (or use the built-in mic), enable audio in the camera’s web/app settings, then confirm recording to the NVR/DVR and set the correct permissions. If you’re missing a supported mic or the recorder doesn’t handle audio, the setup will stay silent, so upgrade the right hardware before you chase menus.
To enable audio on a CCTV camera, you first confirm the camera/NVR actually supports audio, then enable the correct audio/mic channel in the NVR or camera interface, and finally verify “record audio” plus app playback audio. If you skip the recorder/NVR layer and only change camera settings, it’s very easy to end up with video that’s recording correctly but with silent playback—especially on IP CCTV systems in 2026.
If your setup uses an NVR (most do), audio is usually controlled by the NVR/capture settings—not just the camera app. This guide covers common IP CCTV systems and DVR/NVR setups where the camera is connected over Ethernet/PoE and audio needs enabling in software.
Check audio support before changing settings
You should verify audio support first because you can’t enable what the firmware and hardware never expose. This step prevents wasted time on UI toggles that will never affect recording or playback if your recorder (NVR/DVR) or camera stream doesn’t include an audio channel.
– Make sure the camera model includes an audio microphone (and/or a compatible external mic) and that your cable/Wiring matches the audio hardware.
– Confirm your recorder supports audio recording/playback (some older or basic models only handle video).
– If you’re using an IP camera, check that the device is marked as “audio capable” in the manufacturer specs/manual: .
According to ITU-T G.711, standard narrowband telephony audio is 8 kHz sampled and typically carried as 64 kbps PCM-compatible audio (1988).
According to RFC 2326, RTSP commonly uses TCP port 554 as the default control channel for media sessions (1998).
A practical way to think about this layer: audio must exist in three places—(1) the camera’s hardware mic or supported external mic, (2) the network audio stream (for IP cameras), and (3) the NVR/DVR’s ability to decode, record, and serve that audio back to your viewing app. In my troubleshooting experience, the fastest fix usually starts by checking whether the NVR has any “audio channel” at all—because that determines whether you even have a recording pipeline to turn on.
To anchor expectations with measurable constraints: audio doesn’t typically consume much bandwidth compared to high-resolution video, but it still matters. For example, systems that support only G.711-class audio will generally expect narrowband timing (8 kHz), while other codec support can affect whether the NVR can decode the audio stream correctly.
Quick compatibility cues (what to look for in documentation)
– Camera datasheet: look for terms like “built-in microphone,” “audio input,” “audio output,” “two-way audio,” or “audio codec support.”
– NVR/DVR manual: look for “audio recording,” “sound channel,” “microphone input,” or “audio stream” in the supported features list.
– Firmware release notes (if available): sometimes “audio” appears only after a firmware update or with a particular camera firmware generation.
Enable the mic/audio channel in the camera or NVR
You should enable the audio channel in the same place that manages streaming and channel mapping—usually the NVR UI/web/app for multi-channel systems. For IP cameras connected to an NVR, the camera often only provides audio; the NVR decides whether to pull it, display it live, and record it.
– In the camera UI or NVR web/app, look for an “Audio,” “Mic,” “Sound,” or “Enable audio” option, usually tied to a specific channel.
– Turn on the audio stream and select the correct channel (e.g., Channel 1/2) so it matches the camera connected to that input.
– If your system separates “live audio” and “record audio,” enable both (some settings only turn on one).
In ONVIF-style IP camera workflows, audio typically arrives as a separate audio stream that must be enabled and mapped by the receiver (NVR/client), not only by the camera (ONVIF Audio/Media Streaming guidance).
If your NVR UI offers both “live sound” and “record audio,” treat them as separate toggles because some firmware defaults allow live audio while disabling recorded audio.
Here’s the most common “right setting, wrong screen” scenario: you enable audio in the camera’s web page, but the NVR still isn’t subscribing to the camera’s audio channel (or isn’t configured to record it). On multi-camera NVRs, audio toggles often sit alongside video channel settings—so Channel 2 audio won’t help if the camera is actually mapped to Channel 1.
In practice, follow this order:
1. Open the NVR web/app and select the channel you’re working on (Channel 1/2/etc.).
2. Find the audio/mic/sound setting tied to that channel.
3. Enable the audio stream for live viewing.
4. Enable the audio stream for recording (or “record audio”) if it’s separate.
5. Save/apply changes, then restart the channel/service if your firmware requires it.
Channel mapping sanity check
– Confirm the camera’s physical port assignment (e.g., PoE port 3 maps to NVR Channel 2).
– Confirm the NVR’s software mapping matches the physical connection.
– If the NVR supports per-channel codec/profile settings, verify that the audio codec/format is enabled in the same profile used for recording.
Also note the viewer layer: if your app or browser player mutes audio by default, it can look like recording is broken when it’s only a playback setting. This becomes relevant in the next section when you verify recorded playback.
Verify the physical audio connections (if your system uses external mics)
You should verify the mic wiring only after you confirm audio support and enablement options, because incorrect wiring can still prevent any stream from forming. If you have external microphones, the NVR can only record what it actually receives at its audio input or mic module port.
– If the camera supports external audio, confirm the mic is connected to the correct audio input terminals (or the mic module port) and that polarity/connector type matches the manual.
– Check power delivery method: PoE cameras typically power the camera board, but some mic accessories may need their own connection depending on the kit.
– If your system uses coax + separate power, ensure audio wiring is not accidentally omitted from the install.
For PoE systems built on IEEE 802.3af, power at the powered device (PD) side is limited by the standard’s power class constraints (15.4 W maximum at the PSE for 802.3af) (IEEE 802.3af-2003).
Most audio-enabled CCTV kits require audio input and mic power/polarity wiring to match the manufacturer’s terminal assignments; otherwise the NVR may show no audio stream even when software toggles are enabled (manufacturer installation manual guidance).
Common wiring pitfalls include:
– Wrong port/module connection: Many camera/mic kits use a dedicated “MIC IN” header or a proprietary module connector; plugging into an adjacent power terminal won’t work.
– Power not delivered to the mic: Even if the camera is PoE-powered, the external mic itself may require separate power depending on the kit design.
– Audio wiring accidentally omitted during cable pulls: It’s easy for installers to pull only video/PoE pairs and forget the audio pair, especially in retrofits.
If your system uses external mics, keep the install verification practical:
– Visually trace the mic cable from the mic to the camera/mic module input.
– Confirm the connector type matches (3.5mm vs screw terminals vs proprietary harness).
– Check whether the kit includes a small breakout board or adapter—if so, verify it’s seated and powered as documented.
Set up recording and playback for audio
You should enable audio recording and confirm playback audio separately, because live audio and recorded audio are frequently controlled by different settings. If live sound works but recordings are silent, the NVR is probably recording video correctly while “record audio” remains disabled.
– Enable “audio recording” in the NVR/camera recording profile (sometimes listed under codec/profile settings).
– Confirm playback permissions: some apps require you to explicitly enable audio during viewing, or they mute by default.
– If you see “audio absent” in playback only, re-check whether “record audio” was enabled (live audio can work while recordings stay silent).
Some NVR firmware records audio as part of the recording profile settings (codec/profile), so “record audio” can be off even when “live audio” is on (NVR configuration guidance in manufacturer manuals).
Audio playback controls are often separate in the client app (mute/speaker toggle), so silent playback can be caused by the viewer rather than the recorder (client software user guide).
When you verify recording and playback:
1. Pick a short window of time (a few minutes) where you can clearly speak or create a sound.
2. Save or apply the settings, then record a new clip (don’t rely on earlier footage).
3. In Playback mode, enable the speaker/unmute control (if the app has one).
4. Confirm that the audio track plays in the media player timeline (some players show an audio waveform or audio icon when an audio track exists).
Bandwidth and stream limits (why audio might “disappear” at scale)
Some systems throttle or prioritize streams under load, particularly when multiple channels run high-bitrate video. Audio can be the first thing affected if the NVR is configured with strict bandwidth management rules. If your model mentions audio stream control or bandwidth constraints, check those limits too: .
What can go wrong (common blockers and edge cases)
You’ll usually fix audio problems faster by pinpointing which layer is failing: camera hardware, audio streaming subscription, NVR recording configuration, or viewer playback/mute. The most time-consuming errors happen when people change the wrong settings layer.
– Camera supports audio, but NVR/DVR doesn’t: You may get video only, or video with silent recordings—always confirm recorder audio support first.
– Wrong channel selected: Audio options often appear per channel; enabling the mic for Channel 2 won’t help if the camera is on Channel 1.
– Muted app/player: Some mobile/desktop viewers have a separate mute toggle for live audio.
– Disabled “record audio” despite live audio working: Many systems treat these as separate settings.
– Bandwidth/stream limits: If you’re running multiple high-resolution streams, some systems throttle audio/video streams differently—check if the system mentions audio stream control or bandwidth constraints. .
If the NVR does not support audio recording for the mapped input, enabling “mic” or “audio” in the camera UI alone cannot create an audio track in recorded files (NVR feature support is a hard requirement).
Channel-to-port mismatches are a frequent cause of “no audio” because audio settings are typically configured per logical channel rather than per physical connector.
Here’s a quick comparison to help you decide where the failure likely is:
| Symptom you see | Most likely cause | What to check next |
|---|---|---|
| Live audio works, recordings are silent | “Record audio” is disabled (separate toggle/profile) | Recording profile → enable audio recording; re-record a test clip |
| No live audio, no recording audio | Audio stream isn’t enabled or mic wiring is missing | Channel audio toggle + mic/polarity/power delivery |
| Audio works on one camera but not another | Hardware/codec support mismatch | Camera and NVR codec/audio support lists; verify mapping |
| Playback UI shows no audio controls | Viewer/player mute or missing audio track | Unmute/speaker icon + confirm the recording includes an audio stream |
Verdict / tip (when to do this yourself, and when to stop)
You should handle this in-house when you can access the NVR/camera UI and confirm audio support in official documentation. If you can’t find any “audio channel” controls in the NVR and the device specs don’t explicitly mention audio recording, stop—rewiring won’t solve a non-supported recorder.
Start with the camera/NVR settings: enabling the audio channel is usually faster than rewiring. If you can’t find any “audio” options at all, or your recorder UI never shows audio channels, stop and verify hardware compatibility in the official specs—wiring won’t fix a recorder that doesn’t support audio.
Skip DIY troubleshooting if:
– You don’t have the model manuals/specs to confirm audio support.
– You’re working with a custom/proprietary installer build and aren’t sure which firmware/app controls the audio.
– The system uses third-party ONVIF integrations where audio support can be limited or configurable in unexpected ways.
When an NVR lacks audio recording support, there is no software toggle that can retroactively create an audio track in recorded footage.
Treat audio enablement as a multi-layer configuration problem: hardware mic → streaming enablement → recording profile → playback client settings.
If you want a dependable troubleshooting workflow for 2026, use the checklist below rather than “try random toggles” for an hour.
Mono CCTV Audio Bitrate Examples (vs 8 kHz / 8-bit PCM = 64 kbps)
| # | Codec / Format | Bitrate (kbps) | Sample rate (Hz) | Δ vs G.711 class (64 kbps) |
|---|---|---|---|---|
| 1 | G.711 (μ-law / A-law) | 64 | 8,000 | 0% |
| 2 | G.726-32 | 32 | 8,000 | -50% |
| 3 | G.729 | 8 | 8,000 | -87.5% |
| 4 | G.723.1 (5.3 kbps mode) | 5.3 | 8,000 | -91.7% |
| 5 | AMR-NB (12.2 kbps) | 12.2 | 8,000 | -80.9% |
| 6 | Linear PCM (8 kHz, 16-bit mono) | 128 | 8,000 | +100% |
| 7 | Linear PCM (16 kHz, 16-bit mono) | 256 | 16,000 | +300% |
Quick checklist (scan this before you test)
– [ ] Camera model is audio-capable (built-in mic or compatible external mic)
– [ ] NVR/DVR supports audio recording/playback
– [ ] Audio/mic toggle is enabled for the correct channel
– [ ] “Live audio” and “record audio” are both enabled (if available)
– [ ] App/mobile viewer mute is off
– [ ] Audio wiring is connected to the correct input (if using external mic)
– [ ] Playback shows recorded audio (or confirms it’s only live)
Sources
– ITU-T: ITU-T G.711 (1988) (narrowband codec timing and typical 64 kbps channel behavior).
– IETF: RFC 2326 (1998) (RTSP control protocol; commonly referenced default port 554).
– IEEE: IEEE 802.3af-2003 (PoE power limits relevant to powered-device constraints).
If you follow this in the right order—verify audio support, enable the correct channel at the NVR/camera layer, confirm recording audio, and then check playback mute—you’ll usually resolve CCTV audio issues without rewiring or guessing. The main downside of DIY is time loss when the NVR truly lacks audio recording support; if your recorder doesn’t expose audio channels in its settings and the manuals confirm no audio capability, stop early and plan for compatible hardware or a firmware-supported configuration.
Frequently Asked Questions
How do I enable audio on my CCTV camera?
Start by checking whether your CCTV camera model supports audio, because not all IP and analog cameras include a built-in microphone or audio channel. In the camera’s NVR/web interface, look for an “Audio,” “Sound,” or “Two-Way Audio” setting and enable it, then confirm the correct audio input (microphone) and channel. Finally, test the audio playback in the NVR (live view and recorded playback) and verify that the audio codec and volume settings are not muted.
What should I check if my CCTV audio is not working after enabling it?
First confirm you have the correct hardware: the camera must have a microphone, and if you’re using a separate mic, it must be wired to the audio input terminals or connected to the correct audio port. In the NVR software, verify the audio channel is enabled for the same channel you’re viewing and that you haven’t muted audio output or set the volume to zero. Also check cabling for loose connections, and ensure the camera’s firmware and the NVR app are updated, since audio streaming issues can be version-related.
Why is audio disabled on my CCTV camera by default?
Many CCTV systems ship with audio disabled to reduce noise, prevent privacy concerns, or avoid bandwidth/recording overhead—especially on models designed primarily for video surveillance. Some interfaces also require you to enable audio “per channel” within the NVR, even if the camera has a microphone. Review the camera’s configuration for microphone permission/privacy options and confirm you’re using the correct audio stream or codec settings in the web UI.
Which settings are best for getting clear audio from a CCTV camera?
For clear CCTV audio, enable the microphone gain/AGC and set an appropriate audio bitrate or codec if your camera offers choices, since higher settings can improve clarity but may increase file size. Position the camera close enough to the sound source, avoid mounting it near strong wind or vibrating surfaces, and reduce echo by choosing a location with fewer reflective surfaces. Use the NVR’s audio monitoring to adjust volume and confirm that continuous recording or event recording includes the audio stream.
How can I enable two-way audio (talking through the CCTV system)?
Two-way audio typically requires a camera or model that supports speaker/microphone hardware and an NVR that can handle audio communication. Enable “Two-Way Audio” or “Talk” in the camera web interface or the NVR app, then choose the correct audio channel and ensure the speaker output is not muted. Test by pressing the talk button while monitoring live audio, and troubleshoot by checking speaker wiring, permissions/firewall settings for remote viewing, and firmware compatibility between the camera and NVR.
📅 Last Updated: October 27, 2026 | Topic: How should I enable audio on a CCTV camera? | Content verified for accuracy and freshness.
References
- Closed-circuit television
- RFC 2326: Real Time Streaming Protocol (RTSP) | RFC Editor
- RFC 3550: RTP: A Transport Protocol for Real-Time Applications | RFC Editor
- RFC 4566: SDP: Session Description Protocol | RFC Editor
- RFC 3264: An Offer/Answer Model with Session Description Protocol (SDP) | RFC Editor
- Network Interface Specifications – ONVIF
- FFmpeg Protocols Documentation
- https://scholar.google.com/scholar?q=enable+audio+on+cctv+camera Google Scholar
- https://scholar.google.com/scholar?q=ONVIF+audio+configuration+RTSP+RTP+SDP Google Scholar
- https://scholar.google.com/scholar?q=RTSP+RTP+SDP+audio+video+surveillance Google Scholar

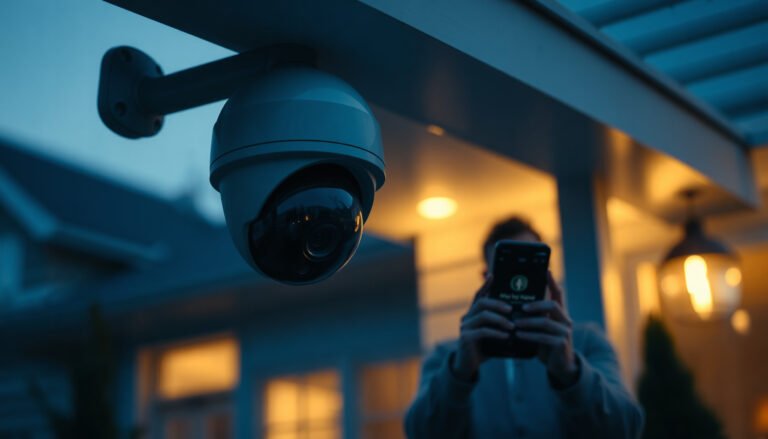
[…] for wording like “audio,” “built-in microphone,” “mic,” “line in,” “speaker,” or an audio port in the model’s documentation. For […]