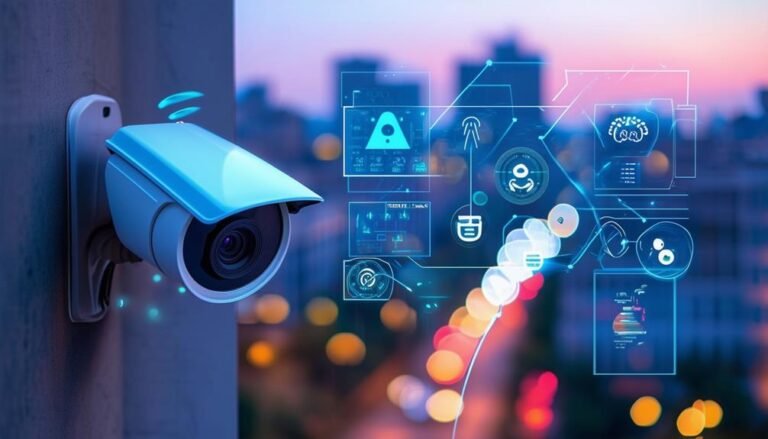
To set up your Dahua DVR for remote viewing, start by connecting it to a power source and ensuring it's powered on. Next, connect the DVR to the internet, either via Ethernet or Wi-Fi. You'll need to configure your network settings, choosing a static IP or using DHCP for easy access. Set up a Dynamic DNS to avoid issues with changing IP addresses, and then install the Dahua mobile app or software on your device. Finally, log in with your credentials to view your cameras remotely. Keep going to uncover tips that enhance your setup and security.
Understanding Dahua DVR Models
When it comes to selecting the right Dahua DVR model for your needs, how do you know which one is the best fit? Understanding the various models is essential to guarantee you're not just buying a device but investing in a tool that enhances your freedom. Dahua offers a range of DVRs, each designed with different features and capabilities that cater to diverse surveillance needs.
First, consider the number of channels you need. If you're monitoring a larger property, a model with more channels allows for extensive coverage, giving you peace of mind that every corner is under watch. Next, think about the video resolution; higher resolutions provide clearer images, which is crucial for identifying faces or license plates.
Another important aspect is storage capacity. Depending on how long you want to keep footage, you'll need a DVR that can accommodate larger hard drives. Additionally, some models support cloud storage, giving you flexibility and security in accessing your footage from anywhere.
You should also look into user interfaces. A user-friendly model can drastically reduce setup time and make remote viewing seamless. Finally, consider compatibility with other devices and cameras, guaranteeing your DVR can integrate smoothly into your existing security system.
Preparing Your DVR for Setup
Before you get started with your Dahua DVR, you'll need to connect it to a power source to guarantee it's operational. Next, configuring the network settings is vital for enabling remote access. Let's go through these essential steps to prepare your DVR for setup.
Connect to Power Source
To get your Dahua DVR up and running, you'll need to connect it to a power source. This step is essential, as it provides the energy your device needs to operate efficiently. Here's a quick overview of what you'll need to do:
| Step | Description |
|---|---|
| 1. Locate the Power Adapter | Find the power adapter included with your DVR. |
| 2. Connect to DVR | Plug the adapter into the DC power input on the DVR. |
| 3. Find an Outlet | Confirm the outlet is easily accessible for power. |
| 4. Plug it In | Insert the power adapter into the wall outlet. |
Once you've followed these steps, check that your DVR powers on. You should see lights indicating it's receiving power. If it doesn't turn on, double-check your connections. After you've confirmed it's powered up, you're one step closer to enjoying the freedom of remote viewing. Don't hesitate to reach out for help if you hit any roadblocks along the way; you're not alone in this journey!
Configure Network Settings
Configuring your DVR's network settings is vital for enabling remote access to your surveillance footage. Start by connecting your DVR to your router using an Ethernet cable. This wired connection guarantees a stable internet connection, which is critical for reliable remote viewing.
Next, power on your DVR and access the main menu using your remote or mouse. Navigate to the 'Network' settings, where you'll find options to configure your network. If your router supports DHCP, you can enable this feature, allowing your DVR to automatically obtain an IP address. This is the easiest way for most users.
If you prefer a static IP, you'll need to enter the IP address, subnet mask, gateway, and DNS manually. Make sure the IP address is unique and not in use by other devices on your network. Save the settings and test the connection to verify everything's working.
Connecting the DVR to the Internet
To connect your Dahua DVR to the internet, you'll need to adjust the network configuration settings first. This step is vital for ensuring your DVR communicates properly with your router. After that, you'll set up port forwarding to give remote access to your DVR.
Network Configuration Settings
Setting up your Dahua DVR for remote viewing requires proper network configuration settings, ensuring it connects seamlessly to the internet. First, access your DVR's settings menu, usually found under "Network" or "Configuration." You'll need to choose between a static IP or DHCP. If you opt for DHCP, your DVR will automatically receive an IP address from your router. For a static IP, enter an IP address that's within your network's range, along with the subnet mask and gateway.
Next, make sure your DNS settings are configured. You can use your router's IP address or a public DNS like Google's (8.8.8.8). This step is essential for accessing your DVR remotely.
Once these settings are in place, save your changes and restart your DVR. After rebooting, double-check that the DVR has an active internet connection. You can do this by pinging the IP address from a computer on the same network.
Getting your DVR online is your ticket to freedom, allowing you to monitor your property from anywhere. Keep your configuration secure, and you're ready to enjoy remote viewing whenever you want!
Port Forwarding Setup
Now, you'll need to enter the details for your DVR. Typically, you'll use port 37777 for the main control and port 80 for the web interface. Enter the local IP address of your DVR, which you can find in your network settings. Make sure to set the protocol to TCP/UDP for best results.
Once you've added these entries, save your settings and restart your router. To verify that port forwarding is working, you can use online port checking tools. If the ports show as open, you're all set! Enjoy the freedom of remote viewing your surveillance feeds whenever you want, wherever you are. Just remember to keep your DVR firmware updated for ideal security and performance.
Configuring Network Settings
While configuring the network settings on your Dahua DVR might seem challenging, it's essential for enabling remote viewing capabilities. By getting these settings right, you can access your security system from anywhere, allowing you to keep an eye on your property without being tied down.
To start, you'll need to connect the DVR to your network using an Ethernet cable. Once it's plugged in, access the DVR's interface through a monitor and navigate to the network settings. Here are a few key points to keep in mind:
- IP Address: Assign a static IP address to your DVR to avoid connection issues. This guarantees that your DVR's address doesn't change over time.
- Subnet Mask: Set this to the same subnet mask as your router, usually 255.255.255.0.
- Gateway: Use your router's IP address as the gateway. This allows your DVR to communicate with your network.
- DNS Server: You can use your ISP's DNS server or a public one like Google's (8.8.8.8) for better reliability.
- Test Connection: After entering these details, test the connection to verify everything is set up correctly.
Setting Up a Dynamic DNS
A Dynamic DNS (DDNS) service acts like a bridge between your changing IP address and your remote access needs, ensuring you can consistently connect to your Dahua DVR. This is particularly useful if your Internet Service Provider (ISP) assigns you a dynamic IP address that changes periodically, making it tricky to access your DVR remotely.
To set up DDNS, start by choosing a reliable DDNS provider. There are several options available, both free and paid, so pick one that fits your needs. Once you've registered, you'll receive a domain name that you'll use to access your DVR.
Next, log into your Dahua DVR's interface. Navigate to the network settings and look for the DDNS configuration section. Here, input the details provided by your DDNS provider, including your domain name, username, and password. Save your settings.
Once you've configured the DDNS on your DVR, test it by accessing your domain name from a web browser or a remote viewing app. If everything's set up correctly, you should be able to view your DVR's feed without any hassle, regardless of your IP changes.
Lastly, make sure to regularly check your DDNS status to avoid any connectivity issues. With DDNS, you're not just securing your surveillance access; you're reclaiming your freedom to monitor your space from anywhere. Enjoy the peace of mind that comes with knowing your home or business is just a click away!
Installing Remote Viewing Software
After setting up your Dynamic DNS for a stable connection, the next step is installing remote viewing software. This software will let you access your Dahua DVR from anywhere, giving you the freedom to monitor your security system without being tied down to a specific location. You'll want to choose software that's compatible with your DVR model, and luckily, Dahua offers their own application, which is user-friendly and reliable.
To get started, follow these steps:
- Download the Software: Visit Dahua's official website or your app store to find the latest version of the remote viewing software.
- Install the Application: Open the downloaded file and follow the installation prompts. It's typically a straightforward process.
- Configure the Settings: Once installed, launch the app and enter your DVR's Dynamic DNS address, along with your username and password.
- Test the Connection: After inputting your credentials, check to see if you can view your cameras. If all goes well, you're good to go!
- Explore Additional Features: Familiarize yourself with the software's features, like motion detection alerts or playback options, to maximize your remote viewing experience.
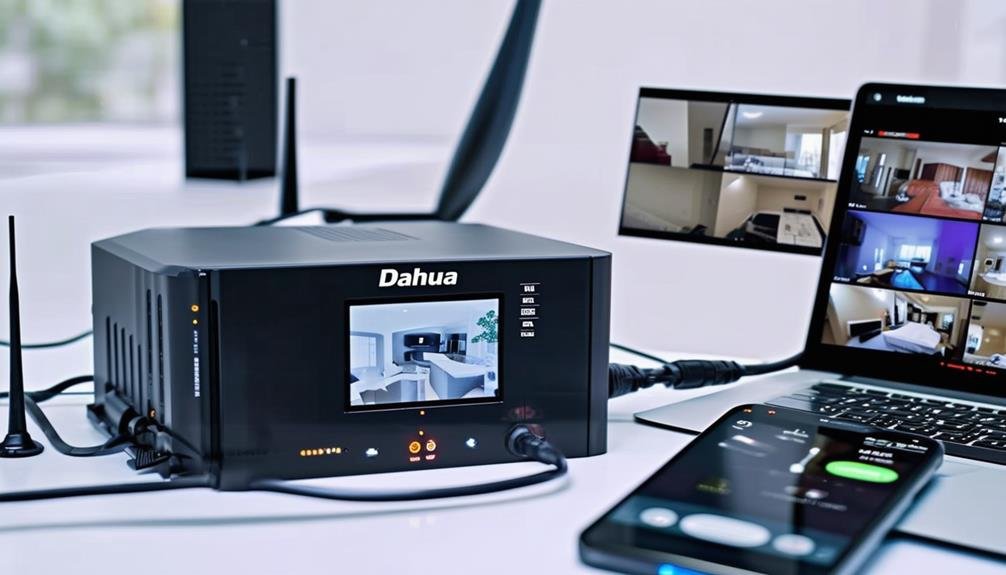
Accessing Your DVR Remotely
Many users find that accessing their Dahua DVR remotely is a game changer for monitoring their property. It gives you the freedom to check in on your home or business from anywhere, whether you're at work, on vacation, or simply out and about. To get started, you'll need to guarantee your DVR is connected to the internet. This typically involves using an Ethernet cable or Wi-Fi, depending on your setup.
Once your DVR is online, you can access it via a web browser or dedicated software on your computer. You'll enter your DVR's IP address into the browser's address bar. If you've configured everything correctly, you should see a login screen prompting you for your username and password. Make sure you keep these credentials secure to protect your privacy.
If you want even more flexibility, consider setting up dynamic DNS (DDNS). This way, even if your IP address changes, you can still access your DVR using a consistent domain name. Check your DVR's settings for a DDNS option and follow the prompts to set it up.
Using the Mobile App
To start using the Dahua mobile app for remote viewing, you'll first need to download it from your device's app store. Once you have it, configuring the device settings will help you connect your DVR to your smartphone. Finally, make sure your device is connected to Wi-Fi for seamless access to your camera feeds.
Download the Mobile App
Downloading the mobile app is an essential step in accessing your Dahua DVR remotely. With the right app, you'll have the freedom to monitor your property from anywhere, right from your smartphone. Whether you're at work, on vacation, or just out running errands, this app keeps you connected to your security system.
To get started, follow these simple steps:
- Go to your device's app store: Search for the Dahua app, usually named "DMSS" or "gDMSS" depending on your device.
- Download and install the app: Tap that download button and let it install on your phone.
- Open the app: Once it's installed, find the app icon and launch it.
- Create an account or log in: If you're new, you might need to register. Existing users can simply log in.
- Explore the app features: Familiarize yourself with the layout and options available to you for a seamless experience.
With the app in hand, you're one step closer to enjoying peace of mind, knowing your property is safe, no matter where life takes you!
Configure Device Settings
Once you've installed the app, it is crucial to configure your device settings for ideal remote viewing. Launch the app and log in using your DVR credentials. You'll see several options that allow you to customize your experience. Start by selecting the device you want to manage.
Adjust the stream settings to optimize video quality based on your internet speed. You can choose between high, medium, or low resolution; higher quality gives you clearer images but may require more bandwidth. For those times you're on the go, consider setting it to medium to maintain a good balance between quality and speed.
Next, check the notification settings. You'll want to enable alerts for motion detection or unusual activity. This way, you can keep an eye on things even when you're not actively watching.
Connect to Wi-Fi
Connecting your Dahua DVR to Wi-Fi using the mobile app is a straightforward process that enhances your remote viewing capabilities. First, verify your mobile device is connected to the same Wi-Fi network you want your DVR to use. Open the Dahua mobile app and log in with your credentials. Once you're in, navigate to the device management section.
Here, you'll find an option to add a device. Select the Wi-Fi settings and scan for available networks. Choose your Wi-Fi network and enter the password when prompted. After a successful connection, your DVR will synchronize with the app, allowing you to access your security feeds from anywhere.
To make this process even smoother, keep these tips in mind:
- Verify your DVR firmware is up-to-date.
- Maintain a strong Wi-Fi signal for better performance.
- Regularly check app updates for enhanced features.
- Use a unique password for your Wi-Fi network to enhance security.
- Familiarize yourself with the app's interface for easier navigation.
With these steps, you're all set to enjoy the freedom of remote viewing through your Dahua DVR!
Troubleshooting Common Issues
When setting up your Dahua DVR for remote viewing, you might encounter several common issues that can be frustrating. One of the first problems you might face is connection failure. Confirm your DVR is connected to the internet. Double-check your Wi-Fi settings or Ethernet connection to make certain they're properly configured. If you're using Wi-Fi, verify you're within range of your router.
Another common issue is incorrect login credentials. Make sure you're entering the right username and password. If you've forgotten them, you may need to reset the DVR to factory settings, which can be a hassle, but sometimes it's necessary.
If your remote viewing app isn't connecting, check for updates. Outdated software can cause compatibility issues. Confirm both the app and firmware on your DVR are up to date. Also, verify that your firewall isn't blocking the connection. Firewall settings on your router can prevent remote access if not configured properly.
Lastly, if the video feed is choppy or lagging, it might be due to bandwidth limitations. Make sure other devices on your network aren't hogging the bandwidth. You might also want to reflect on upgrading your internet plan if you're consistently experiencing slow speeds.
Enhancing Security Measures
To bolster the security of your Dahua DVR for remote viewing, it's essential to implement several best practices. These measures not only protect your footage but also guarantee your privacy remains intact. Here are some steps you can take to enhance your system's security:
- Change Default Passwords: Always change the factory default passwords. Use complex passwords that include a mix of letters, numbers, and symbols.
- Regular Firmware Updates: Keep your DVR's firmware updated. Manufacturers often release patches to fix vulnerabilities, so check for updates frequently.
- Enable Two-Factor Authentication: If your DVR supports it, enable two-factor authentication. This adds an extra layer of security, requiring a second form of identification.
- Limit User Access: Only grant remote access to trusted individuals. Set permissions appropriately to guarantee that others can't access sensitive features or settings.
- Use a VPN: For an added layer of security, consider using a Virtual Private Network (VPN) when accessing your DVR remotely. This encrypts your connection, safeguarding your data from prying eyes.
Frequently Asked Questions
Can I Use Multiple Devices to Access My DVR Remotely?
Yes, you can use multiple devices to access your DVR remotely. This flexibility lets you check your surveillance footage from your smartphone, tablet, or computer, giving you peace of mind wherever you are. Just make sure each device is connected to the internet and has the proper app or software installed. By doing this, you'll always have control and visibility, making it easier to stay connected to your security system.
What Internet Speed Is Required for Smooth Remote Viewing?
For smooth remote viewing, you'll want at least 3 Mbps upload speed for each camera you're accessing. Curiously, studies show that over 50% of users experience buffering issues when their upload speeds fall below this threshold. You don't want interruptions when you're checking in on your property. So, make sure your internet connection's up to snuff. With the right speed, you'll enjoy seamless access and peace of mind, no matter where you are.
How Do I Reset My DVR to Factory Settings?
If you wanna reset your DVR to factory settings, start by locating the menu button on the device or remote. Navigate to the settings or configuration menu. Look for an option labeled 'System' or 'Reset.' Once you find it, select 'Factory Reset' and confirm your choice. Keep in mind that this'll erase all your settings, so back up any important data first. You're gonna feel like you have a fresh start!
Is Remote Viewing Possible Without a Static IP Address?
Think of your DVR as a ship, sailing the vast ocean of the internet. You don't necessarily need a static IP to navigate these waters; dynamic DNS services can act as your compass, guiding you to your destination. These services allow you to access your DVR remotely, even with changing IPs. Just make certain you've got the right setup, and you can enjoy the freedom of remote viewing without being anchored to a static address.
Can I Receive Alerts for Motion Detection Remotely?
Yes, you can receive alerts for motion detection remotely. Most modern DVR systems allow you to set up notifications via email or mobile apps. Just make sure your device is configured correctly to send alerts when motion is detected. You might need to adjust sensitivity settings to avoid false alarms, but once it's all set up, you'll enjoy peace of mind knowing you'll be notified instantly of any activity.