Clearing up blurry CCTV footage starts with cleaning the camera lens and making sure it’s correctly focused. Adjust the focus if it’s off, and check the resolution settings for clarity. Sometimes, a simple firmware update can work wonders. Don’t forget to improve the lighting around the camera, as poor lighting can cause blurriness. Secure the camera to avoid any shakes or vibrations that could blur the image. Finally, check all connections to make sure they’re properly attached. There’s more you can do to sharpen that image and get clearer footage.
Clean the Camera Lens
One of the simplest solutions to blurry CCTV footage is to clean the camera lens. You might be surprised how much of a difference this basic step can make. Over time, dust, dirt, and grime can accumulate on the lens, distorting the image and making your CCTV footage look unclear. A quick lens cleaning can easily restore the crispness you’re missing, giving you back the clear view you need.
To get started, make lens cleaning a regular part of your maintenance routine. It’s easy, doesn’t take much time, and guarantees your cameras are always in top shape. Use a microfiber cloth and a gentle lens cleaner—nothing too harsh that could scratch the surface. Wipe the lens in a circular motion to remove any debris effectively. Don’t forget to clean the surrounding areas, too, because grime on the camera body can eventually transfer to the lens.
Incorporating this simple step into your maintenance routine can save you a lot of hassle down the line. You’ll feel freer knowing your security system is performing at its best without constant troubleshooting. So, grab that cloth and cleaner, and keep your lenses spotless!
Adjust the Focus
Once your lens is clean, the next step is adjusting the focus. You can either manually tweak the focus ring or rely on auto-focus calibration if your camera supports it. Ensuring proper focus will greatly enhance the clarity of your footage.
Manual Focus Adjustment
To sharpen your CCTV footage, manually adjusting the focus on the camera lens can be a quick and effective solution. First, locate the focus ring on your camera. This ring is essential for fine-tuning the sharpness of your image. Turn it slowly and carefully to find the best focal distance. Don’t be afraid to experiment a little; you’re in control here, and a bit of trial and error can go a long way.
When adjusting the focus ring, make sure that your camera is pointing at the area you want to monitor. It’s best to do this during daylight hours when visibility is high. For night-time footage, you might need to fine-tune the focus again under those specific conditions. You’ve got the freedom to tweak until you achieve the clearest possible image.
Auto-Focus Calibration
Auto-focus calibration can be a great way to guarantee your CCTV camera maintains clear footage without constant manual adjustments. Imagine the freedom of not having to tweak your camera every time it loses focus. By leveraging focus software, you can make sure your lens alignment is spot-on, giving you sharp, reliable images whenever you need them.
Here’s a quick guide to help you with auto-focus calibration:
| Step | Description |
|---|---|
| 1 | Access Focus Software: Most modern CCTV cameras come with built-in focus software. Open the app or software that corresponds with your camera. |
| 2 | Initiate Auto-Focus: Select the auto-focus option. Your camera will automatically adjust its lens alignment to find the best focus. |
| 3 | Check Footage: Once the auto-focus process is complete, review the footage to ensure it’s clear. If not, you may need to manually fine-tune. |
| 4 | Save Settings: If the focus looks good, save your settings to avoid losing the calibration. |
| 5 | Regular Checks: Periodically check the footage to ensure the auto-focus is still functioning as expected. |
Check the Resolution
Your camera’s resolution settings might be the culprit behind the blurry footage. If your resolution is set too low, you won’t get the crisp, clear images you’re after. To remedy this, explore your camera’s settings menu and locate the resolution options. Make sure it’s set to the highest possible setting that your camera supports. Higher resolution translates to better image quality, allowing you to capture finer details that might otherwise go unnoticed.
Don’t let restrictive settings hold you back. You’ve invested in a CCTV system for security and peace of mind, so why settle for anything less than the best performance? Adjusting the resolution is a quick and easy fix that can dramatically improve your footage quality.
Update Firmware
Updating the firmware can often resolve issues with blurry CCTV footage, guaranteeing your system runs smoothly with the latest improvements and bug fixes. Firmware updates can enhance software compatibility between your camera and other devices, making sure everything communicates effectively. This is essential for maintaining clear and consistent video quality.
Sometimes, older firmware versions might have unresolved bugs that lead to issues like blurry footage. By updating to the latest version, you’re applying necessary bug fixes that can correct these problems. Plus, manufacturers frequently release updates to improve performance, add new features, and enhance overall system stability.
Here’s a quick guide to help you update your CCTV camera firmware:
- Check the Manufacturer’s Website: Visit the official site for any firmware updates specific to your camera model.
- Download the Update: Ensure you download the correct version to avoid compatibility issues.
- Follow Instructions Carefully: Each manufacturer may have different steps, so read and follow their specific guidelines.
- Backup Your Settings: Before updating, save your current settings to prevent loss of important configurations.
Updating firmware is a straightforward and effective way to keep your CCTV system in top shape, giving you the freedom to focus on what truly matters—peace of mind.
Improve Lighting
To enhance your CCTV footage, you’ll need to focus on optimizing light placement and using infrared LEDs. Proper lighting can greatly enhance the clarity of your recordings. Let’s explore how adjusting these elements can make a noticeable difference.
Optimize Light Placement
Proper lighting can greatly enhance the clarity of your CCTV footage by reducing shadows and brightening dark areas. When you’re optimizing light placement, consider the angle adjustment and light diffusion to achieve the best results. The right angle can make a world of difference, guaranteeing that light hits the critical areas without causing glare or harsh shadows. Diffusing the light can help in softening the illumination, making the footage clearer and more detailed.
Here are some quick tips to get you started:
- Adjust angles: Position your lights at an angle to minimize shadows and avoid direct glare into the camera lens.
- Use diffusers: Softening the light with diffusers can help in reducing harsh contrasts and spread the light more evenly.
- Strategic placement: Place lights high up and aimed downward to cover larger areas and prevent dark spots.
- Avoid backlighting: Guarantee the primary light source isn’t coming from behind the subject, which can cause silhouettes and obscure details.
Use Infrared LEDs
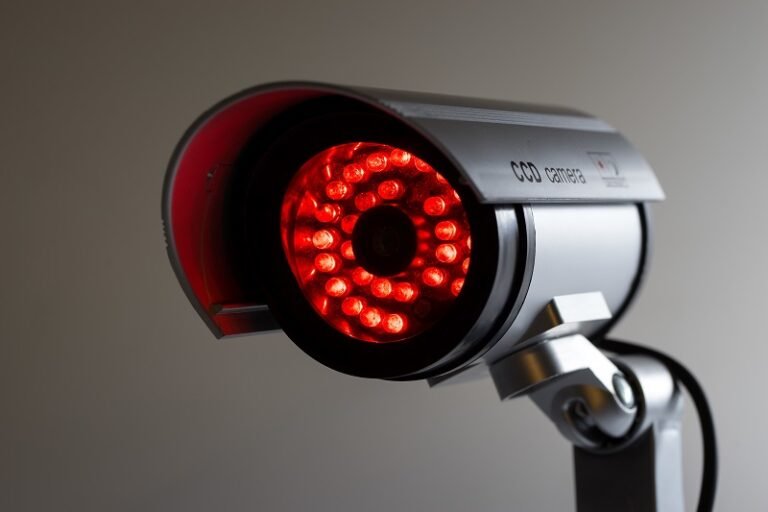
If optimizing natural and artificial light placement isn’t enough, using infrared LEDs can greatly enhance your CCTV footage in low-light conditions. These LEDs emit infrared light that’s invisible to the human eye but can be picked up by cameras with infrared sensitivity. This means your camera can “see” in the dark, giving you high-quality night vision footage without the need for intrusive lighting that could disturb your environment or signal the presence of your cameras.
You’ll find that infrared LEDs are particularly useful for outdoor surveillance, where lighting conditions can be unpredictable. With an effective night vision setup, you can monitor your property freely, regardless of the time. Plus, you won’t be tied down by the limitations of regular lighting fixtures.
When choosing infrared LEDs, make sure they’re compatible with your CCTV system. Some cameras come with built-in infrared LEDs, while others require external units. Either way, enhancing your system’s infrared sensitivity will help you capture clearer images in low-light scenarios. This small investment can make a world of difference, offering you the freedom to keep an eye on your surroundings 24/7, without compromising on image quality.
Secure the Camera
Securing your CCTV camera is crucial for enhancing the clarity of your footage. When your camera is not securely mounted, it can result in blurry images due to constant movement or vibrations. This is especially important in areas prone to high winds or other environmental factors. To prevent this, make sure your camera housing is robust and provides a stable platform for the camera.
Consider these tips to confirm your camera is secure:
- Use appropriate mounts: Make sure the mounts are sturdy and designed for your specific camera model.
- Tighten all screws and bolts: Loose screws can cause the camera to shake, leading to blurry footage.
- Vandal proofing: Opt for vandal-proof camera housing to protect against tampering and ensure stability.
- Check the mounting surface: Ensure the surface where the camera is mounted is strong and stable.
Check Connections
To guarantee your CCTV footage isn’t blurry, double-check all the connections between the camera and the recording equipment. It’s essential to know that a quick inspection can solve many issues. Start by examining the cable integrity. Damaged or worn-out cables can severely impact the quality of your footage. Make certain there are no kinks, cuts, or exposed wires. If you find any, it’s time to replace those cables.
Next, focus on the power supply. A critical and consistent power connection is vital for clear footage. If your camera isn’t receiving enough power, it might result in blurry or distorted images. Check the power cables for any signs of damage and make sure they are securely connected. Sometimes, simply unplugging and re-plugging them can make a difference.
Don’t forget to inspect any connectors or adapters in use. Loose connections can lead to intermittent signal loss, causing blurry footage. Tighten any loose screws and ensure all plugs fit snugly. By prioritizing cable integrity and a dependable power supply, you’re taking essential steps toward crisp, clear CCTV footage. Keeping these connections solid means you can enjoy the freedom of knowing your surveillance system is reliable.
Frequently Asked Questions
Can Weather Conditions Affect CCTV Camera Performance?
Ironically, just as you crave freedom, weather conditions can trap your CCTV camera’s performance. Moisture buildup and lens fogging often coincide with rain or humidity, obstructing the clarity you need. So yes, weather can definitely affect it.
How Often Should I Check My CCTV Footage for Clarity?
You should check your CCTV footage for clarity at least monthly. Establish a cleaning schedule and adjust resolution settings regularly to guarantee your system’s always capturing the best possible image, giving you peace of mind and freedom.
Can Wireless Interference Cause Blurry CCTV Footage?
Yes, wireless interference can definitely cause blurry CCTV footage. Signal interference and frequency disruptions can degrade image quality, so make sure your cameras are positioned away from other wireless devices to enjoy clear, uninterrupted surveillance.
What Are the Best Practices for Maintaining CCTV Cameras?
Just as Sherlock Holmes values clear vision, you should prioritize lens cleaning and cable management for your CCTV cameras. Regular maintenance guarantees your surveillance system remains sharp, giving you the freedom to oversee your space effectively.
Does the Type of Camera Lens Impact Image Quality?
Absolutely, the type of camera lens impacts image quality. Lens material and aperture size play significant roles. A higher-quality lens material guarantees clearer images, while a larger aperture size allows more light, enhancing clarity and detail.


