To delete clips on your Ezviz camera, start by logging into the Ezviz app. Go to the "Playback" or "Recordings" section to see your saved footage. Browse the clips and select any that you want to remove. If you're unsure, take a moment to watch them first. Once you've made your selections, confirm the deletion through the on-screen prompt and hit "Confirm." This guarantees the clips are permanently erased. Regularly managing your clips can help you maintain sufficient storage space. If you're curious about optimizing your settings for better efficiency, there's more to explore.
Accessing the Ezviz App
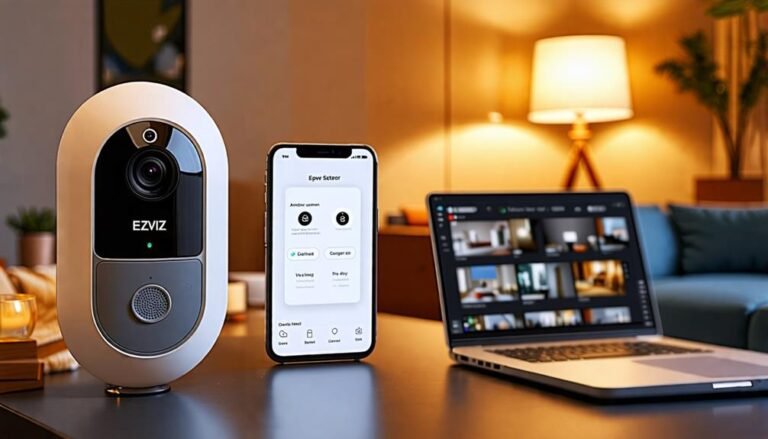
To get started with managing your clips, you'll need to access the Ezviz app on your smartphone or tablet. This app is your gateway to a world of control and freedom over your surveillance footage. If you haven't already, download the app from your device's app store. It's available for both Android and iOS, ensuring you can take charge regardless of your preferred platform.
Once you've got the app installed, open it and sign in using your credentials. If you're a new user, creating an account is quick and easy, allowing you to set up your security environment in no time. After logging in, you'll see a user-friendly interface that provides access to all your connected Ezviz cameras. This intuitive design empowers you to monitor your space effortlessly.
When you first enter the app, you might notice a live feed from your camera. Familiarize yourself with the layout, as it'll help you navigate to your clips and recordings later. Remember, the app's purpose is to give you the freedom to oversee your property without unnecessary hassle.
Whether you're at home or on the go, the Ezviz app lets you stay connected to your environment, providing peace of mind and control right at your fingertips. So take a moment to explore and customize your settings, ensuring you're ready to manage your clips effectively. Your security starts here!
Navigating to Recorded Clips
Once you're familiar with the Ezviz app's interface, locating your recorded clips is straightforward. You can quickly access your clips and take control of your surveillance footage without hassle. Here's how you can navigate through the app efficiently:
- Open the Ezviz app and log in if needed.
- Tap on the "Playback" or "Recordings" option, depending on your app version.
- You'll see a timeline or a list of recorded clips, which can be sorted by date or time.
To give you a clearer understanding of what to expect, here's a simple overview of the typical sections you might encounter:
| Section | Description | Action |
|---|---|---|
| Live View | Real-time camera feed | Tap to view live footage |
| Playback | Access recorded clips | Select to view past recordings |
| Settings | Customize your camera settings | Tap to adjust preferences |
| Notifications | Alerts regarding motion detection | Review alerts for activity |
Selecting Clips to Delete
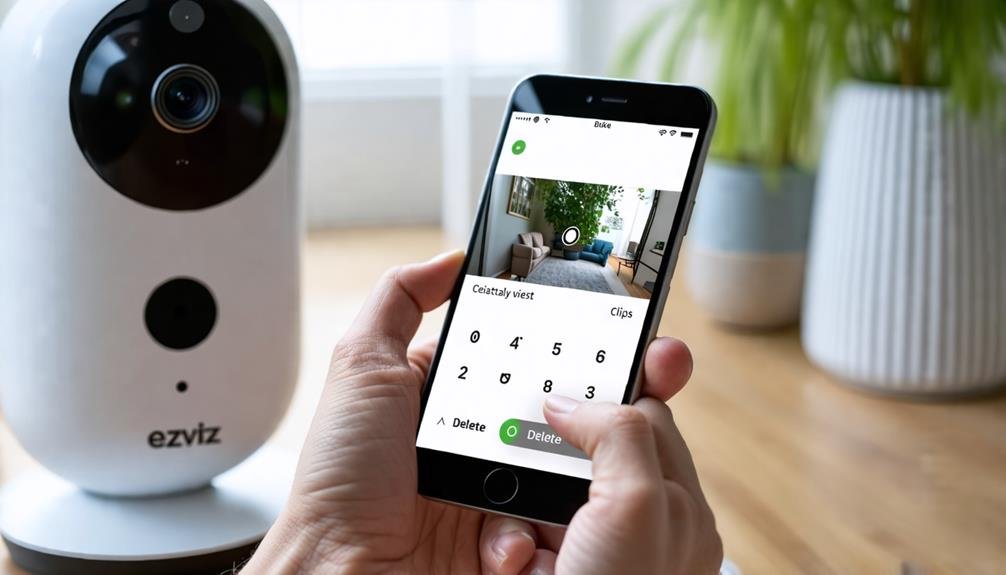
When you're ready to free up space on your Ezviz camera, selecting the clips you want to delete is a quick process. First, access the recorded clips section through the Ezviz app or your device's web interface. You'll be greeted with a list of your saved footage, making it easy to see what's taking up space.
Take a moment to browse through the clips. You'll want to look for anything that's no longer needed, whether it's redundant recordings or moments you've already reviewed. To select a clip, simply tap or click on it. You might notice that some apps allow you to select multiple clips at once, which can save you time if you're aiming to declutter efficiently.
As you go through your clips, keep in mind the freedom you'll gain by removing unnecessary footage. You're in control of your storage, and selecting the right clips to delete can streamline your experience. If you find a clip you're uncertain about, don't hesitate to take a second look; it's better to be sure than to regret a hasty decision.
Once you've picked the clips that no longer serve you, you'll be ready for the next steps in the deletion process. Enjoy the feeling of having a cleaner, more organized camera system, knowing you're making the most of your storage. Your Ezviz camera should serve your needs, not weigh you down with excess.
Confirming Deletion Process
After selecting the clips you want to delete, the next step is confirming the deletion process. This is where you take control of your camera's storage and guarantee you're only keeping what's essential. You'll see a prompt on your screen asking you to confirm your choice. Don't rush through this step; it's your opportunity to double-check that you're deleting the right clips.
Take a moment to review the selected clips. If you're confident in your decision, go ahead and hit the "Confirm" button. This action will finalize the deletion, so make sure you're ready to let go of those clips. It's liberating to clean up your storage and make space for new memories, but it's also important to be certain about what you're removing.
Once confirmed, the clips will be permanently erased from your Ezviz camera's storage. There's no turning back, so if you have any doubts, now's the time to reconsider. If you've mistakenly selected a clip you want to keep, you can cancel the deletion process before confirming. This flexibility is vital—it guarantees that you maintain control over your video content.
Ultimately, confirming the deletion process brings you one step closer to managing your camera's storage freedom. Embrace this moment of clarity as you streamline your clips. You're making room for new adventures and memories, and that's an empowering choice.
Tips for Managing Storage
To keep your Ezviz camera running smoothly, managing storage effectively is key. If you want to guarantee you've got enough space for important clips while avoiding unnecessary clutter, consider these tips for managing storage:
- Regularly Review Footage: Make it a habit to check your recorded clips weekly. Delete any footage that's no longer needed or relevant. This keeps your storage fresh and prevents overwhelming amounts of data.
- Set Up Motion Detection Sensitivity: Adjust your camera's motion detection settings to reduce unnecessary recordings. By fine-tuning sensitivity, you can minimize the number of clips captured, leading to less storage use.
- Utilize Cloud Storage: If your Ezviz camera offers cloud storage options, take advantage of them. Upload important clips to the cloud and then delete them from your local storage. This way, you free up space while retaining access to significant footage.
- Schedule Regular Maintenance: Set a reminder to perform storage checks and deletions every month. Consistency is key! A quick monthly review can prevent your device from becoming overwhelmed with data.
Frequently Asked Questions
Can I Recover Deleted Clips From the Ezviz Camera?
You might think that once a clip's deleted, it's gone for good, but don't lose hope just yet. If you're using an Ezviz camera, there could be a chance to recover those clips. Check your camera's app or cloud storage options; sometimes, deleted files can be restored. Remember, keeping backups and regularly checking your storage can give you the freedom to safeguard your important moments without worry.
Will Deleting Clips Free up Storage Space Immediately?
Yes, deleting clips will free up storage space immediately. When you remove unwanted footage, you reclaim that space right away, allowing you to store new recordings without worrying about running out of memory. It's like clearing out clutter from your life—once it's gone, you can breathe easier and have more room for what truly matters. So, don't hesitate to delete those clips and enjoy the freedom of ample storage!
Is There a Limit to the Number of Clips I Can Delete?
There's no strict limit to the number of clips you can delete. You're free to manage your storage as you see fit, which lets you prioritize important footage. If you've got a lot of clips piling up, don't hesitate to delete the ones you don't need anymore. This keeps your storage space clear and helps you focus on what really matters. So go ahead and take control of your footage!
Can I Delete Clips Remotely From My Smartphone?
Imagine your smartphone as a magic wand, granting you the freedom to control your digital domain. Yes, you can delete clips remotely from your smartphone, reclaiming space and peace of mind with just a few taps. It's like clearing away clutter from a cherished room, allowing you to focus on what truly matters. Simply access the app, navigate to your clips, and let go of what you don't need anymore. Enjoy that newfound freedom!
Does Deleting Clips Affect My Camera's Live Feed?
Deleting clips doesn't affect your camera's live feed. Your live view operates independently of stored recordings, so you can keep watching what's happening in real-time while managing your clips. If you want to maintain privacy or free up storage space, feel free to delete clips without worrying about interrupting your live surveillance. Enjoy the freedom of managing your footage while keeping an eye on what's important to you!