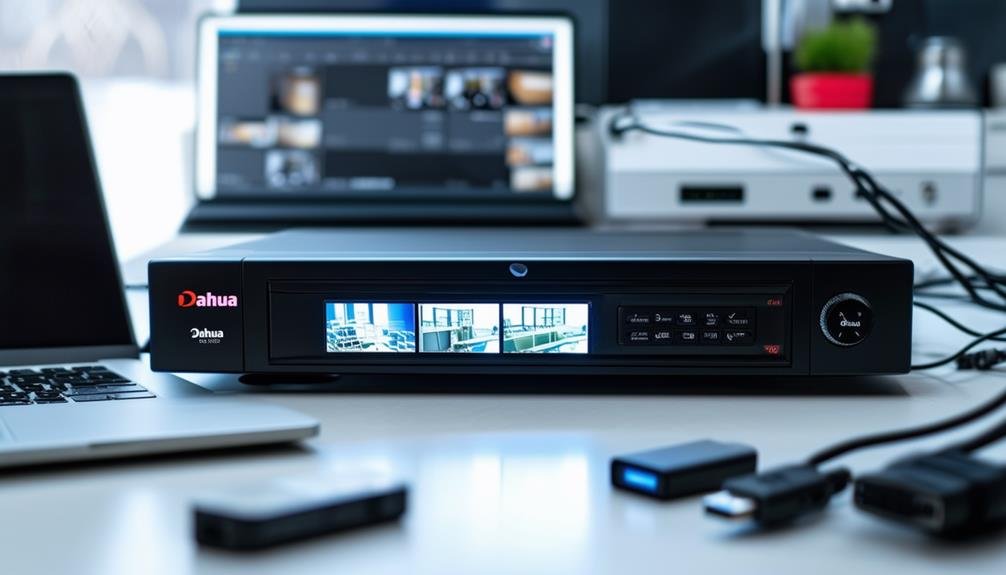
To save video from your Dahua DVR, start by powering it on and accessing the menu. Navigate to the Playback section and select the date of the footage you want. Once you've found the desired video, connect a USB drive formatted to FAT32. Adjust the start and end times for the footage you'd like to export and click "Export" or "Backup." After the transfer is complete, make sure to safely eject the USB drive. If you encounter any issues, there are simple troubleshooting steps to keep in mind. Keep exploring to uncover more helpful tips!
Understanding Dahua DVR Basics
When it comes to surveillance technology, understanding the basics of a Dahua DVR (Digital Video Recorder) is crucial for effective video management. These devices serve as the backbone of your security system, allowing you to capture, store, and manage video footage from your cameras. You're probably aware that a DVR can record multiple channels simultaneously, providing real-time surveillance and playback options. This means you can keep a watchful eye on your property, even when you're not physically present.
Dahua DVRs come with user-friendly interfaces, making it easy for you to navigate through menus and access recorded footage. You can customize settings according to your needs, such as adjusting the recording resolution or scheduling recordings during specific times. This flexibility empowers you to take control of your security setup and guarantee you're always in the loop.
It's important to know that Dahua DVRs support various compression formats, which helps optimize storage space without compromising video quality. This is particularly useful for those who value efficiency and want to maximize the lifespan of their storage devices. Additionally, many models offer remote access capabilities, enabling you to monitor your cameras from anywhere using a smartphone or computer.
Understanding these fundamental features of a Dahua DVR not only enhances your video management experience but also reinforces your sense of security. Embracing this technology allows you to protect your freedom and peace of mind.
Preparing Your Storage Device
Before you start saving video from your Dahua DVR, you'll want to prepare your storage device properly. Make sure you've selected the right storage format, have enough space available, and that your device meets all compatibility requirements. This step is essential for a smooth and successful video saving process.
Select Appropriate Storage Format
Frequently, selecting the appropriate storage format is essential for ensuring your recorded video from a Dahua DVR is easily accessible and playable on various devices. You've got options like MP4, AVI, or even MKV, each catering to different needs. If you're looking for compatibility, MP4 is often the best choice since it works seamlessly across most platforms and devices, from computers to smartphones.
When you want freedom in editing or playback, consider formats like AVI. While it might take up more space, it offers flexibility for video editors. On the other hand, if you're prioritizing high-quality video without worrying too much about storage, MKV is your friend. It's great for preserving quality but can be a bit less compatible with older devices.
Ultimately, think about how you plan to use your footage. Do you want to share it online, edit it, or just store it for safekeeping? Make your choice based on your needs, so you can enjoy your videos without the hassle of format issues later. Choose wisely, and you'll have more freedom to enjoy your recordings on your terms!
Ensure Sufficient Storage Space
Ensuring you have sufficient storage space is essential for a smooth video-saving process from your Dahua DVR. You wouldn't want to run out of space right in the middle of saving important footage, would you? The first step is to check the storage capacity of your device.
Consider the following table to help you plan your storage needs:
| Video Quality | Average File Size (per hour) | Recommended Storage (for 24 hours) |
|---|---|---|
| 720p | 1.5 GB | 36 GB |
| 1080p | 3 GB | 72 GB |
| 4K | 12 GB | 288 GB |
| Motion Detection | Varies | Varies |
| Audio Enabled | Additional 0.5 GB | Additional 12 GB |
Check Compatibility Requirements
After confirming you have enough storage space, the next step is to check the compatibility of your storage device with the Dahua DVR. You want to make sure that your hard drive or USB drive meets the specifications required by your DVR system. Most Dahua DVRs support standard formats, but it's always good to double-check.
First, look for the file system format. Your device should usually be formatted to FAT32 or NTFS. If it's not, you can easily reformat it using your computer. Just remember that reformatting will erase all existing data, so back it up first!
Next, consider the storage capacity. Dahua DVRs typically support drives up to 4TB, but some models can handle more. Consult your DVR's manual for specific limits.
Lastly, verify your device is in good working condition. A faulty or unreliable storage device can lead to lost footage, and that's the last thing you want. By checking these compatibility requirements, you can save your videos without a hitch and enjoy the freedom that comes with knowing your data is secure.
Accessing the DVR Menu
To access the DVR menu, you'll first need to power on the device. Once it's running, you can navigate through the interface to find the options you need. From there, selecting video files becomes a straightforward task that'll set you on the path to saving your footage.
Powering On the DVR
Powering on your Dahua DVR is the first step to accessing the menu and saving your video footage. To get started, locate the power button on the front or side of the device. Press it, and you'll see the unit spring to life. Wait a moment for the boot-up process to complete; this usually takes just a few seconds.
Once powered on, your DVR will automatically begin initializing. This is when you'll want to verify that your monitor or TV is connected and set to the right input source. You should see the Dahua logo appear, followed by the main interface of the DVR.
If everything's functioning correctly, you'll be ready to go. You may need your remote control or mouse to navigate through the various options once you access the menu. It's essential to guarantee the DVR is connected to a reliable power source to avoid any interruptions, which could lead to missed footage. Enjoy the freedom of managing your recordings and accessing your video data without hassle. You're now on your way to saving those important moments!
Navigating the Interface
Once you're at the main interface, maneuvering the DVR menu is straightforward. You've got a user-friendly layout designed for easy exploration, so you can quickly access the features you need. The main options typically include Live View, Playback, Settings, and Backup. Each of these options will help you manage your recordings and system preferences efficiently.
Here's a quick overview of the main menu options:
| Menu Option | Description | Shortcut Key |
|---|---|---|
| Live View | View live feeds from your cameras | F1 |
| Playback | Access recorded videos | F2 |
| Settings | Adjust DVR configurations | F3 |
| Backup | Save footage to an external device | F4 |
Feel free to explore these options; each one leads you to more control over your system. You can personalize settings and make your surveillance experience your own. Just remember to familiarize yourself with the layout, and you'll find maneuvering the interface becomes second nature. Enjoy the freedom that comes with mastering your DVR!
Selecting Video Files
After getting familiar with the interface, your next step is selecting the video files you want to save. Start by accessing the DVR menu; you'll typically find this option on the main screen. Look for the "Playback" option—it's essential for sifting through your recorded footage.
Once you're in Playback mode, you'll see a calendar display that shows the dates of recorded videos. Pick the day you're interested in and watch as the available video files pop up. You can scroll through the list, and by clicking on each file, you can preview the video to confirm it's the one you need.
If you're after specific times, use the timeline feature to jump straight to the desired segment. This is where you can reclaim your freedom—no more sifting through endless footage. After pinpointing the right video, select it, and then look for the export option. It's usually represented by an icon that looks like a file or an arrow. This is your path to saving those cherished moments or critical evidence, allowing you to access your footage anytime, anywhere. Enjoy the liberation that comes with having your videos at your fingertips!
Locating the Video Files
Finding video files on a Dahua DVR can seem intimidating at first, but it's actually quite straightforward. Once you understand the layout and navigation, you'll feel empowered to access your footage in no time. Start by powering on your DVR and using your remote or mouse to access the main menu. From there, you'll want to navigate to the "Playback" section, where you can locate your recorded video files.
To help you visualize the process, here's a simple table:
| Step | Action | Notes |
|---|---|---|
| 1 | Power on your DVR | Verify it's fully booted |
| 2 | Access the main menu | Use the remote or mouse |
| 3 | Navigate to "Playback" | This is where all footage is stored |
Once you're in the playback menu, you'll see options to filter your search by date, time, or camera. Depending on your setup, it may take a moment for the files to load. Don't rush—take a breath and enjoy the freedom of knowing you can easily find what you need.
Feel free to explore the various filters to refine your search. It's all about making your experience seamless. After locating your desired files, you're just steps away from saving or exporting them for your personal use. Embrace this newfound knowledge, and enjoy the flexibility that comes with accessing your video footage!
Selecting Desired Footage
To select your desired footage on a Dahua DVR, start by using the date and time filters you set up in the playback section. This feature empowers you to pinpoint exactly when the events you want to review took place. Here's how to make the most of it:
- Choose the Date: Navigate to the calendar and click on the date you want to check. This narrows down your search, making it easier to find the specific footage you need.
- Set the Time: After selecting the date, use the time slider or input the exact time range. This gives you the freedom to zoom in on the moments that matter most.
- Preview the Footage: Once you've filtered it down, take a moment to preview the clips. This lets you confirm you're looking at the right footage before you go any further.
Exporting the Video
Once you've located the footage you want, exporting it from your Dahua DVR is a straightforward process. First, make certain you've got a USB drive inserted into the DVR. It's best to use a drive formatted to FAT32 to guarantee compatibility. Once that's set, navigate to the playback menu where you found your footage.
Select the time frame you want to export by adjusting the start and end times. After you've done that, look for an option that says "Export" or "Backup." Click on that, and the system will prompt you to choose your USB drive as the destination.
You'll want to select the format for your files. Dahua DVRs typically allow you to export in formats like AVI or MP4, but check your specific model for options. Once you've made your selections, hit "OK." The export process may take a few moments, so be patient. You'll see a progress bar indicating how much time is left.
When the transfer's complete, safely eject your USB drive. You can now take that footage and do what you want with it—share it, edit it, or keep it for your records. This freedom to access and manipulate your video is what makes using a Dahua DVR worthwhile. Enjoy the peace of mind that comes with having your important footage at your fingertips!
Troubleshooting Common Issues
Sometimes, issues can arise when exporting video from your Dahua DVR, and knowing how to troubleshoot these problems can save you time and frustration. Here are three common hurdles you might encounter:
- Insufficient Storage Space: Confirm that your export device has enough space. If your USB drive or external hard drive is nearly full, the export process might fail.
- File Format Compatibility: Make sure the video format you're trying to export is supported by the device you're using. If your media player can't recognize the format, it won't play the video.
- Connection Issues: If you're exporting over a network, check your connection. A weak or unstable network can disrupt the export process, leaving you with incomplete files.
To address these issues, start by checking your storage space. If you need to, free up some room or switch to a larger drive. Next, verify the format settings in your DVR. If the default settings don't match your needs, adjust them to a format that works for you. Finally, if you're using a network connection, consider switching to a wired connection for stability, or confirm your Wi-Fi signal is strong.
Tips for Future Backups
When it comes to ensuring your video footage is safe and accessible, planning ahead for future backups is essential. You don't want to find yourself scrambling when something goes wrong, so take proactive steps to secure your data. First, establish a regular backup schedule. Depending on how often you record, you might want to back up your footage daily, weekly, or monthly. Consistency is key—set reminders if needed.
Next, choose a reliable storage solution. External hard drives are great for large amounts of data, but consider cloud storage for added security and remote access. This way, you can easily retrieve your footage from anywhere, giving you that freedom you value.
Also, don't forget to check your backup integrity regularly. It's easy to assume everything's fine, but corruption can occur without warning. Test a few files periodically to confirm they're in good condition.
Lastly, consider using software that automates the backup process. Many programs can help streamline your workflow, ensuring that you never miss a backup. This will save you time and energy, allowing you to focus on what truly matters.
With these tips in mind, you'll have peace of mind knowing your video footage is secure. By taking the time to plan ahead, you're not just protecting your data; you're ensuring you can access it freely whenever you need it. Embrace this freedom and take control of your video backups today!
Frequently Asked Questions
Can I Save Video Directly to My Computer From the DVR?
Yes, you can save video directly to your computer from the DVR, but it might vary based on your device's setup. You'll usually need to connect your DVR to your computer via a network or USB. Once connected, you can access the DVR's interface and select the footage you want to save. Just make sure you have the necessary software installed to facilitate the transfer. Enjoy the freedom of having your footage readily available!
What File Formats Are Supported for Video Export?
When you're looking to export video, you'll want to know the supported file formats. Most systems typically allow formats like AVI, MP4, or even MKV. It's great to have options, so you can choose the one that suits your needs best. Just make sure your playback device can handle the format you select. By knowing these details, you can enjoy your videos without hassle and maintain that freedom to watch them anywhere!
Is It Possible to Schedule Automatic Backups?
Yes, it's definitely possible to schedule automatic backups for your videos. You'll want to check your device settings, as most systems allow you to set specific times for backups. This way, you can guarantee your footage is saved regularly without having to think about it. Once you've configured the schedule, you'll enjoy the freedom of knowing your valuable recordings are safely stored, giving you peace of mind and time for other things.
How Do I Protect My Exported Video Files?
To protect your exported video files, you should start by storing them in a secure location, like an encrypted external hard drive or cloud service. Make certain to use strong passwords for access. You might also consider creating multiple backups to avoid loss. Regularly check the integrity of these files and update your security measures as needed. Keeping your software up-to-date can also help prevent unauthorized access and guarantee your files remain safe.
Can Multiple Users Access the DVR Simultaneously?
Think of your DVR as a bustling café, where multiple friends can gather and share stories. Yes, you can have multiple users accessing the DVR simultaneously, just as friends can enjoy each other's company without stepping on toes. This setup gives you the freedom to monitor and manage your security needs without feeling confined. Just make certain each user has the right permissions, and you'll create a harmonious environment for everyone involved.