To set up a live outdoor webcam, start by choosing a high-quality, weatherproof camera with at least 1080p resolution and night vision. Pick an ideal location that offers stunning views and easy access for maintenance. Next, gather essential equipment like mounting brackets and power supplies. Install the camera securely, ensuring proper cable management. Connect it to Wi-Fi, confirming your network credentials are correct. Finally, optimize footage by positioning the camera for the best light and minimizing obstructions. With these basics covered, you're on your way to a successful setup, and there's plenty more you can discover to enhance your experience.
Choosing the Right Webcam
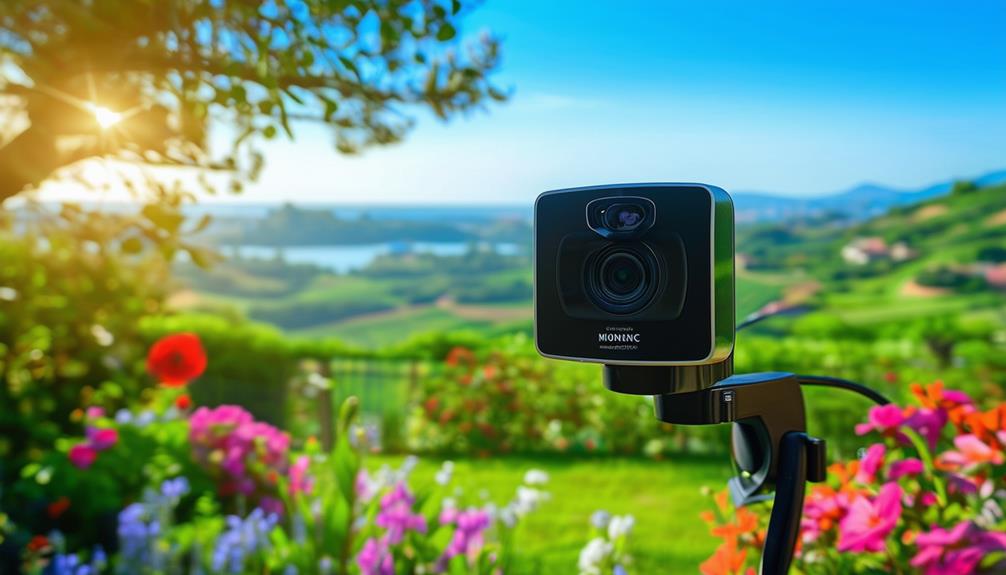
When it comes to setting up your live outdoor webcam, selecting the right device can make all the difference. You'll want something that not only meets your needs but also fits your lifestyle and the environment you're aiming to capture. Think about where you plan to place your camera. If you're looking to stream nature scenes or keep an eye on your backyard, a camera with a wide field of view and high resolution will guarantee you don't miss any detail.
Consider the weather conditions in your area too. If rain or snow is a regular occurrence, look for a webcam that's weatherproof and built to withstand the elements. You wouldn't want to be constantly replacing your device just because you wanted to enjoy the freedom of watching the outdoors.
Additionally, think about connectivity options. A webcam that connects easily to Wi-Fi will allow you to access your feed from anywhere, so you can enjoy that sense of freedom without being tied down to a specific location. Some cameras even offer mobile apps, giving you the flexibility to monitor your feed on the go.
Essential Equipment Needed
To set up your outdoor webcam effectively, you'll need to take into account a few key pieces of equipment. First, think about the right camera selection, then explore various mounting options that will keep it secure. Finally, understanding your connectivity requirements is essential to guarantee smooth streaming.
Camera Selection Tips
Choosing the right camera is vital for setting up a live outdoor webcam that delivers clear, reliable footage. With so many options available, it can feel overwhelming, but focusing on a few key features can help you make the best choice for your needs. Here are some tips to guide you:
- Resolution: Look for a camera with at least 1080p resolution. Higher resolution means clearer images, which is significant for capturing details in your outdoor setting.
- Weatherproofing: Since it's an outdoor setup, choose a camera that's specifically designed to withstand the elements. An IP65 rating or higher will offer good protection against dust and water.
- Night Vision: If you plan to capture footage after dark, opt for a camera with infrared night vision. This feature guarantees you don't miss any action when the sun goes down.
- Field of View: Consider a camera with a wide field of view to cover more area. A wider angle lets you capture more of your outdoor space without the need for multiple cameras.
Mounting Options Available
While selecting the right mounting option is crucial for your outdoor webcam's performance, it's important to take into account the environment and the specific features of your camera. You've got several options to choose from, each offering its own benefits.
First up, wall mounts are ideal for sturdy surfaces and provide a fixed position, ensuring your camera captures consistent footage. If you want flexibility, consider a tripod. It allows you to move the camera easily, so you can adjust angles as needed. Just make sure it's weatherproof if you're using it outdoors.
Another great option is a pole mount. This can elevate your camera, giving you a wider field of view, which is perfect for monitoring larger areas. If you're looking for something more versatile, a gimbal mount can help you pan and tilt the camera remotely, offering dynamic coverage.
Connectivity Requirements Explained
A reliable connection is essential for your outdoor webcam to function effectively. Without solid connectivity, you won't be able to stream your breathtaking views or capture those spontaneous moments. Here's what you need to guarantee a seamless experience:
- High-Speed Internet: Aim for a minimum upload speed of 3 Mbps for smooth streaming. The faster, the better, especially if you plan to stream in HD.
- Power Source: Your webcam needs a reliable power source. Consider using solar panels or a nearby outlet to keep your camera running without interruptions.
- Quality Router: A robust router enhances the range and stability of your connection. Ensure it's rated for outdoor use if you're placing it far from your home.
- Wi-Fi Extender: If your camera is positioned far from your router, a Wi-Fi extender can boost the signal, allowing for a more reliable connection.
Ideal Locations for Setup
When setting up a live outdoor webcam, picking the right location is essential for capturing the best footage. You'll want to focus on places that showcase the beauty of nature or interesting activities, while also ensuring you have a clear view and stable connectivity.
Start by considering areas with vibrant scenery, like parks, lakes, or mountain vistas. These spots not only provide stunning visuals but also draw in viewers who appreciate the great outdoors. If you're near a beach, a webcam capturing the waves can transport viewers to a serene escape.
Next, think about locations with activities. If there are festivals, farmers' markets, or wildlife areas, these can create dynamic content that keeps your audience engaged. Just make sure you've got the necessary permissions to film in public spaces where people might be present.
Another vital factor is accessibility. Choose a location that's easy for you to reach, so you can maintain and monitor your webcam without hassle. Safety is also key; avoid areas that pose risks, either from environmental factors or wildlife.
Lastly, consider the lighting. Ideally, you want a location that gets good natural light throughout the day. Early morning or late afternoon can offer the best lighting conditions, enhancing the quality of your footage. By thoughtfully selecting your webcam's location, you'll create an inviting and enchanting viewing experience that resonates with your audience's desire for freedom and exploration.
Installation Steps
Before you plunge into the installation process, it's crucial to gather all the necessary equipment and tools. This will guarantee a smooth and hassle-free setup so you can start enjoying your live outdoor webcam in no time. Here's a handy list of what you'll need:
- Webcam: Choose a weatherproof model suitable for outdoor use.
- Mounting Bracket: This'll help you secure the camera in place.
- Power Supply: Depending on your setup, you might need an extension cord or a solar panel.
- Tools: Grab a screwdriver, drill, and any other tools you might need for mounting.
Once you've got everything ready, find a good location for your webcam. Consider angles that capture interesting views while guaranteeing the camera is secure and out of reach of potential tampering.
Start by attaching the mounting bracket to the desired surface—whether it's a wall, fence, or tree. Make sure it's sturdy; you don't want your camera swinging in the wind. Next, attach the webcam to the bracket, ensuring it's tightly secured.
If you're using a wired camera, run the power cable neatly along the wall or ground, avoiding any tripping hazards. For wireless options, make sure to keep the area tidy and cables hidden if any are needed.
Once that's all done, step back and admire your work. You're one step closer to capturing all those beautiful outdoor moments!
Connecting to Wi-Fi
To connect your live outdoor webcam to Wi-Fi, start by ensuring you have your network name and password handy. You're aiming for a seamless connection that'll allow you to capture the beauty of nature, so let's get started. First, power on your webcam and navigate to the settings menu. Look for the Wi-Fi or network option, and select it. This will prompt you to enter your network credentials.
Once you've input your network name and password, double-check for any typos. It can be easy to overlook a small detail! After entering the correct information, hit 'connect' or 'save.' Your webcam should begin the connection process. This might take a few moments, so be patient. Once connected, you should see a confirmation message on the screen.
If you run into issues, it can help to check the signal strength of your Wi-Fi. Here's a quick reference table for troubleshooting:
| Issue | Solution |
|---|---|
| No Wi-Fi signal found | Move the webcam closer to the router |
| Incorrect password | Re-enter the password carefully |
| Connection timeout | Restart the webcam and try again |
With these steps, you'll be well on your way to setting up your webcam. Once you've established that connection, you'll be free to enjoy live streaming your outdoor adventures!
Tips for Optimal Footage
To capture the best footage from your outdoor webcam, you'll want to start by selecting the ideal location. Pay attention to lighting conditions, as natural light can greatly enhance your video quality. Finally, ensuring stable connectivity is essential to maintain a smooth and uninterrupted stream.
Select Ideal Location
Choosing the right location for your live outdoor webcam is essential for capturing high-quality footage. You want to guarantee that your setup showcases the beauty of nature while providing a clear view of the desired scene. Here are some tips to help you select the ideal spot:
- Scenic View: Look for areas with stunning landscapes or interesting wildlife. A picturesque backdrop will attract viewers and keep them engaged.
- Accessibility: Choose a location that's easy to access for setup and maintenance. You don't want to struggle every time you need to check on your equipment.
- Protection from Elements: Find a spot that offers some shelter from harsh weather conditions, like wind and rain. This will help your webcam last longer and maintain quality.
- Minimal Disruptions: Avoid busy areas with constant foot traffic or noise. A tranquil setting will provide a peaceful viewing experience, allowing nature to shine.
Optimize Lighting Conditions
Once you've found the perfect spot for your live outdoor webcam, the next step is to optimize the lighting conditions for the best footage. Natural light is your best friend, so try to position your camera where it can capture the most sunlight without glare. Early mornings and late afternoons are ideal, as the sun is lower in the sky, creating softer, more flattering light.
Avoid placing the camera in direct sunlight during midday, as harsh lighting can wash out details and create unappealing shadows. If your setup allows, consider using diffusers or reflectors to soften the light. These tools can help create a balanced look, enhancing your footage's quality while keeping the vibe natural.
Don't forget to keep an eye on the weather! Overcast days can actually provide great lighting, but sudden storms can change everything. It's essential to adapt to changing conditions and adjust your camera settings accordingly.
Ensure Stable Connectivity
A reliable internet connection is essential for your live outdoor webcam to stream high-quality footage without interruptions. If you want to capture the beauty of nature or the hustle and bustle of outdoor events, ensuring stable connectivity is key. Here are some tips to help you achieve superior footage:
- Choose the Right Location: Place your webcam close to your router to minimize distance and obstructions. If possible, elevate it for a better line of sight.
- Use a Wired Connection: Whenever feasible, connect your webcam via Ethernet. This often provides a more stable and faster connection than Wi-Fi.
- Test Your Speed: Use online tools to check your internet speed. Aim for at least 5 Mbps upload speed for smooth streaming.
- Consider a Signal Booster: If you're relying on Wi-Fi, a signal booster can extend your network's reach and strengthen the connection.
Frequently Asked Questions
How Do I Maintain My Outdoor Webcam in Harsh Weather?
Maintaining your outdoor webcam in harsh weather can be essential for its longevity. You should make certain it's housed in a durable, weatherproof enclosure to protect it from rain and snow. Regularly check for dirt and debris that could obstruct the lens or affect performance. It's also a good idea to use a surge protector to guard against electrical issues. Finally, keep an eye on the firmware updates to guarantee peak functionality.
Can I Use Solar Power for My Outdoor Webcam?
Absolutely, you can use solar power for your outdoor webcam! In fact, studies show that solar energy can reduce your electricity costs by up to 75%. By harnessing the sun, you're not just cutting costs; you're embracing freedom from traditional power sources. Just make certain your solar panels are positioned well to capture sunlight. With a reliable solar setup, you can monitor your outdoor space without worrying about power outages or increasing bills!
What Are the Best Settings for Night Visibility?
When it comes to night visibility, you'll want to adjust your settings for ideal performance. Increase the brightness and contrast to enhance image clarity in low light. If your camera has a night vision mode, make sure it's activated. Consider using infrared settings if available, as they can help capture clearer images without disturbing wildlife. Finally, test different positions and angles to find the best view that suits your needs!
Is There a Way to Access the Webcam Remotely?
Accessing your webcam remotely is like opening a window to the world, letting you peek in from anywhere. You can achieve this by using a dynamic DNS service or configuring your router to allow remote access. Make sure you've set up proper security measures, like a strong password. Once you've got that sorted, you'll be free to monitor your outdoor space anytime, anywhere, giving you peace of mind without being tethered to a specific location.
How Can I Secure My Outdoor Webcam From Theft?
To secure your outdoor webcam from theft, consider mounting it high out of reach and using a sturdy, tamper-resistant enclosure. You might also want to attach it to a wall or a tree with durable screws. Employ a security system with alarms or motion sensors to deter thieves. Finally, make sure you've got a strong password on the camera's settings to prevent unauthorized access. Keeping it discreet can also minimize visibility to potential thieves.


