To reset your Ezviz device, start by finding the reset button, usually located on the back or bottom. You'll need a pin or similar tool to press it. Hold the button for about 10 seconds until you see a blinking light, which indicates the device is resetting. This process restores factory settings and clears glitches. After the reboot, you may need to reconfigure your settings, so keep your Ezviz app handy to add the device back to your network. There's more to know about troubleshooting and optimizing your device, so keep going to guarantee everything works smoothly.
Understanding the Reset Process
Resetting your Ezviz device can seem intimidating, but understanding the reset process makes it much easier. You want your device to work seamlessly, and sometimes, a reset is all it takes to restore that functionality. Knowing the steps involved can empower you, allowing you to take control of your device and your security.
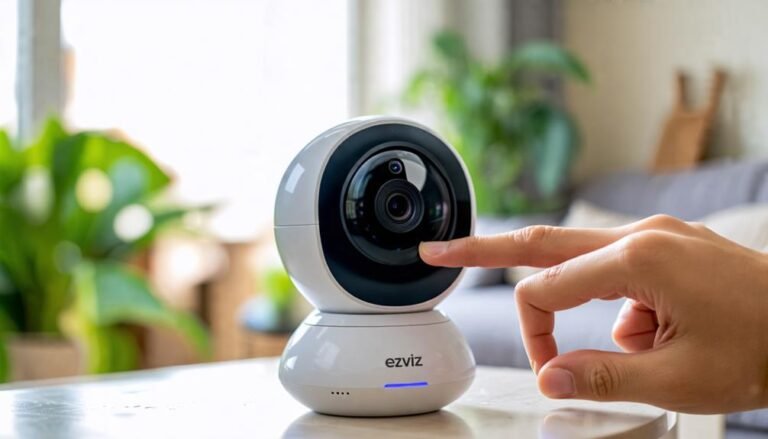
First, familiarize yourself with the device's physical structure. The reset button is usually located on the back or bottom of the unit, often hidden behind a small hole. You'll need a pin or a similar tool to press it. This isn't just a button; it's the key to revealing your device's potential again.
When you press and hold the reset button, you're initiating a process that clears any glitches and restores factory settings. It's essential to hold the button for about 10 seconds. During this time, you'll often see a blinking light, indicating the device is resetting. This moment is your chance to breathe—freedom is just around the corner.
After releasing the button, give your device a moment to power back up. You may need to reconnect and reconfigure settings, but that's simply part of the journey back to functionality. Remember, this reset process is about liberation—freeing your device from issues and allowing it to serve you better. With a clear understanding of these steps, you're equipped to tackle any reset challenge that comes your way.
Preparing for the Reset
Before embarking on the reset process, it's vital to gather everything you need for a smooth shift. You'll want to make certain you have your Ezviz device nearby, as well as the power adapter and any relevant cables. If you've got the user manual, that's a bonus, but don't stress if you can't find it. You'll also need a stable internet connection to help you set things back up afterward.
Next, find a comfortable and quiet space where you can focus on the reset process. This isn't just about practicality; it's about giving yourself the freedom to think clearly and avoid distractions. You want to be in a position to follow through without interruptions.
Make sure your device is plugged in and turned on; it's imperative to confirm that everything's powered up before you start. Take a moment to clear your mind and remind yourself why you're resetting. Whether it's to fix a glitch, improve performance, or simply start fresh, acknowledging your intention can empower you as you proceed.
Lastly, if you've got any important data or settings you'd like to keep, consider jotting them down or backing them up beforehand. This way, you can plunge into the reset with confidence, knowing you're prepared for the freedom that comes with a fresh start. Once you're all set, you'll be ready to tackle the next steps with ease.
Identifying Your Ezviz Device
Before you reset your Ezviz device, it's important to identify exactly what type you have. There are several models, each with its own features and settings. We'll guide you through the steps to pinpoint your specific device model for a smooth reset process.
Device Types Overview
How can you tell which Ezviz device you have? Understanding the different types can help you find the right resetting method. Ezviz offers various devices, including indoor cameras, outdoor cameras, and smart home products. Each type serves a unique purpose and has distinct features, so identifying yours is key to enhancing your freedom and security.
Here's a quick overview to help you distinguish between the device types:
| Device Type | Description | Use Case |
|---|---|---|
| Indoor Cameras | Compact, wireless, suited for homes | Monitoring indoor spaces |
| Outdoor Cameras | Weather-resistant, with night vision | Securing outdoor areas |
| Smart Home Products | Sensors, alarms, and smart plugs | Automating your living space |
Knowing your device type not only simplifies the resetting process but also empowers you to utilize its features fully. Whether you're safeguarding your home or streamlining your daily routine, identifying your Ezviz device is the first step toward enjoying the freedom of a connected lifestyle. So take a moment to explore what you've got!
Model Identification Steps
Identifying your specific Ezviz model is essential for effective troubleshooting and resetting. Start by checking the device itself; most Ezviz products have a label on the bottom or back that displays the model number. This number usually begins with "C" or "H," followed by several digits.
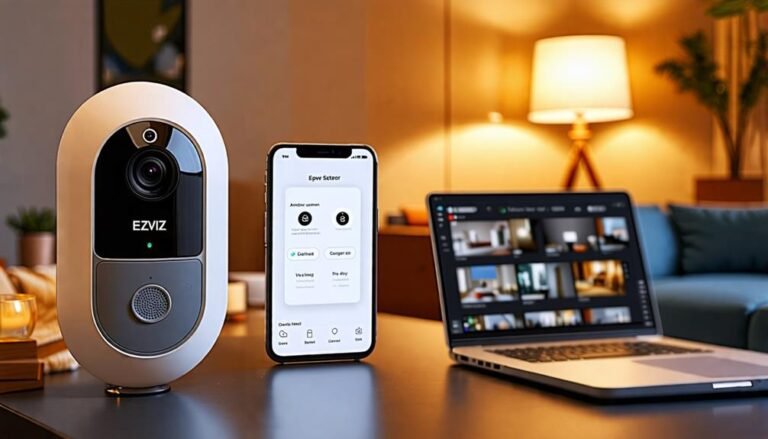
If you can't find the label, don't worry! You can also use the Ezviz app. Just open the app on your smartphone and log in. Once you're in, navigate to the device list; it'll show all connected devices along with their respective models. This can save you time and guarantee you're working with the right information.
Another method is to refer to the original packaging or the user manual that came with your device. These resources typically include the model number, making it easier to identify what you're working with.
Taking these steps will empower you to troubleshoot issues effectively and reset your device when necessary. Knowing your model gives you the freedom to take control of your Ezviz experience and guarantees you're following the right procedures for your specific device.
Performing a Soft Reset
Performing a soft reset on your Ezviz device can be a quick and effective way to resolve minor issues without losing your settings. You'll want to understand the soft reset process, as it offers several benefits, like restoring functionality while keeping your configurations intact. Let's go through the step-by-step instructions to get your device back on track.
Understanding Soft Reset Process
When your Ezviz device isn't functioning properly, a soft reset can often resolve minor issues without erasing your settings. This method is simple and keeps your configurations intact, giving you a sense of control over your device.
Here's how to perform a soft reset:
- Locate the Reset Button: Find the small reset button on your Ezviz device, usually hidden in a pinhole.
- Use a Tool: Grab a paperclip or a similar tool to press the button. This gives you the freedom to reset without complicated procedures.
- Press and Hold: Firmly press and hold the reset button for about 10 seconds. You'll feel a reassuring click that signifies it's working.
- Wait for Reboot: Release the button and wait for your device to reboot. You'll notice the lights blinking, indicating it's resetting and ready for action.
Benefits of Soft Reset
Soft resetting your Ezviz device can offer several advantages that enhance your overall experience. First and foremost, it's a quick and simple way to resolve minor glitches or connectivity issues without erasing your settings. This means you can get back to enjoying your device without the hassle of reconfiguring everything.
Additionally, a soft reset can help improve performance. If your device has been sluggish or unresponsive, a reset can refresh its system, allowing it to run more smoothly. You'll likely notice faster load times and reduced lag, giving you a more seamless experience.
Moreover, performing a soft reset is non-invasive, meaning you won't lose any of your saved data or preferences. This allows you to maintain your customized settings while still addressing any problems that may arise.
Lastly, it's a great way to keep your device in prime condition. Regularly soft resetting can help maintain its functionality and longevity, ensuring you get the most out of your investment. Embracing this simple action can empower you, giving you the freedom to enjoy your Ezviz device without the frustration of technical hiccups.
Step-by-Step Instructions
If you've been experiencing issues with your Ezviz device, resetting it can be a straightforward solution. A soft reset often resolves minor glitches and helps restore your device's functionality without losing any important settings.
Here's how to perform a soft reset:
- Locate the reset button: This is usually found on the back or bottom of your device. It's often a small pinhole.
- Get a paperclip or similar tool: You'll need something thin to press the button inside the pinhole.
- Press and hold the reset button: Use the paperclip to hold down the button for about 10-15 seconds. You should see the LED indicator change, signaling that the reset is in progress.
- Wait for the device to reboot: After releasing the button, give your Ezviz device a moment to restart. Once it's back on, check if the issues have been resolved.
This simple process can free your device from those annoying glitches, allowing you to enjoy uninterrupted security and peace of mind. Remember, a little reset can go a long way toward restoring your freedom with technology!
Executing a Hard Reset
To restore your Ezviz device to its factory settings, executing a hard reset is often necessary, especially if you're facing persistent issues. This process can help you break free from glitches or connectivity problems that just won't go away. Fortunately, it's straightforward.
First, locate the reset button on your Ezviz device. It's usually a tiny pinhole, often found on the back or bottom. You'll need a paperclip or a similar tool to press it. Once you've got that ready, make sure your device is powered on.
Now, use the paperclip to push and hold the reset button. You'll want to keep it pressed for about 10 seconds. During this time, look for the LED indicator light on your device. If it starts flashing or changing colors, that's a good sign—it means the reset process has begun.
After releasing the button, give your device a moment to complete the reset. It may take a minute or two, so don't rush it. Once the lights stabilize, your Ezviz device should be back to its original factory settings, ready for a fresh start.
Reconfiguring Your Device
Reconfiguring your Ezviz device is essential after a hard reset, as it sets up your device for peak performance. You want to ascertain that your device operates smoothly and provides the freedom to monitor your space effectively. Let's walk through the steps to get you back on track.
- Connect to the App: Open the Ezviz app on your smartphone. Make sure you're connected to the same Wi-Fi network that you want your device to use.
- Add Device: Tap on the "Add Device" button. The app will guide you to scan the QR code displayed on your Ezviz camera or enter its serial number manually.
- Wi-Fi Configuration: Choose your preferred Wi-Fi network and enter the password. This allows your device to connect seamlessly, enhancing your sense of security without interruptions.
- Customize Settings: Once connected, take a moment to personalize your settings. You can adjust motion detection sensitivity, notification preferences, and even set up cloud storage for recorded footage.
Troubleshooting Common Issues
Many users encounter common issues when setting up or using their Ezviz devices, but most problems can be resolved with a few simple troubleshooting steps. First, if your device isn't connecting to Wi-Fi, make sure you're within range of your router. Check that your Wi-Fi password is correct, as even a small typo can cause connection failures. Restart your router, and then try to reconnect the device.
If you're facing issues with video streaming or poor image quality, verify that your internet speed meets the requirements for your device. Sometimes, reducing the video quality in the app can help if bandwidth is limited. Also, check if there are any obstructions between your device and the Wi-Fi router that might interfere with the signal.
If the Ezviz app isn't functioning properly, try force-closing it and reopening it. Make sure you've got the latest version of the app installed, as updates often fix bugs and improve performance. If the problem persists, uninstall and reinstall the app; this can clear up any lingering issues.
Lastly, if the device isn't responding to commands, a simple reset might do the trick. Hold the reset button until you see the indicator light flash, then reconfigure the device. Remember, troubleshooting is all about trial and error, so don't lose hope—freedom from tech frustrations is just a few steps away!
Verifying Device Functionality
Verifying your Ezviz device's functionality is essential for confirming it's operating as intended. After a reset, you want to make sure everything's working smoothly so you can enjoy the freedom of knowing your home is secure. Here's how to check that your device is back to life and doing its job:
- Check the Power Indicator: Make sure the LED light is on. This shows that your device has power and is ready to go.
- Connect to Wi-Fi: Confirm that your device is reconnected to your home Wi-Fi. You can do this through the Ezviz app; a strong connection means it's online and communicating.
- Test the Camera Feed: Access the live feed through the app. If you can see the video, your camera is functioning properly. If not, you may need to troubleshoot further.
- Review Notifications: Check that your alerts are coming through. If you receive notifications when motion is detected, your device is actively monitoring your space.
Tips for Future Use
Once you've confirmed your Ezviz device is functioning properly, it's time to think about how to optimize its use moving forward. First, be sure to regularly update your device's firmware. These updates often include enhanced security features and improved functionality, keeping your system running smoothly and securely.
Next, consider adjusting your camera settings based on your lifestyle. If you're often away from home, set up motion detection alerts to notify you of any unusual activity. You can customize these notifications so you're only alerted to events that truly matter.
Also, take advantage of the Ezviz app. It offers a range of features, like remote viewing and playback, giving you control even when you're on the go. Familiarize yourself with its interface, so you can quickly access what you need.
Make sure to secure your Wi-Fi network, too. A strong password and encryption will help protect your device from unauthorized access. Remember, freedom comes with responsibility—keeping your data safe is essential.
Lastly, consider how you want to use the footage. Whether for personal security or monitoring pets, think about cloud storage options that suit your needs. Many services offer flexible plans, giving you the freedom to choose what works best for you.
Frequently Asked Questions
Can I Reset My Ezviz Device Remotely?
You can't reset your Ezviz device remotely. While it might seem convenient, device resets usually require physical access to guarantee security and functionality. If you're looking for control and freedom over your devices, it's crucial to have that hands-on capability. If you're facing issues, consider checking your app settings or user manual for troubleshooting tips that might help without the need for a full reset. Stay empowered and in control!
Will Resetting Erase All My Recorded Footage?
Imagine your memories being swept away like sand through your fingers. When you reset your device, it typically doesn't erase your recorded footage, but it might depend on the specific settings and storage options you've chosen. Always check your device's manual or app settings to be sure. To maintain your precious recordings, consider backing them up before resetting. Freedom to enjoy your memories shouldn't come at the cost of losing them!
How Often Should I Reset My Ezviz Device?
You should reset your Ezviz device whenever you're experiencing connectivity issues, software glitches, or if you're planning to sell it. There's no set schedule for resets, but doing it every few months can help maintain peak performance. If you notice any unusual behavior or lag, it's a good idea to reset it then too. Just remember, resetting may erase settings, so be prepared to set it up again afterward.
Is There a Warranty Impact From Resetting My Device?
Resetting your device typically won't void the warranty, but it's important to check the specific terms from the manufacturer. Most warranties cover defects in materials and workmanship, so as long as you're not causing physical damage or tampering with internal components, you should be fine. Just keep your receipt and any warranty documentation handy, in case you need to reference it later. Enjoy the freedom of using your device worry-free!
Can I Reset Multiple Ezviz Devices at Once?
You can't reset multiple Ezviz devices at once; each device needs to be reset individually. It might feel a bit tedious, but it guarantees each one's settings are properly restored. If you're looking for freedom from issues or glitches, taking the time to reset each device can lead to a smoother experience. Just follow the specific instructions for each device, and you'll be back up and running in no time!