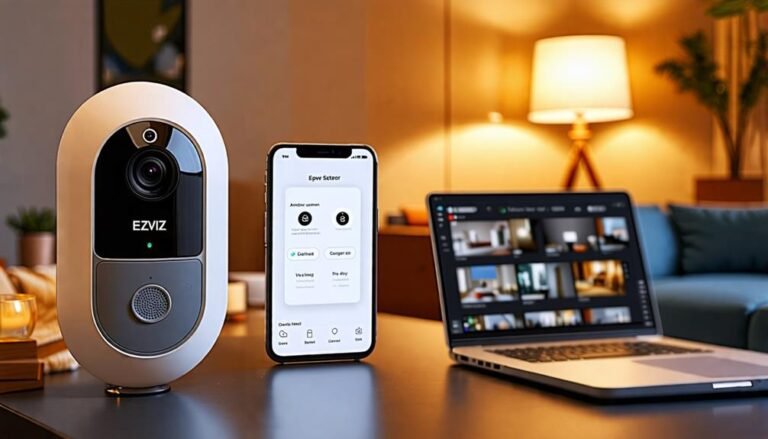
To reset your Ezviz DVR, start by backing up any important footage and ensuring the device is charged. Power it on and connect it to a monitor. Access the menu using the remote, then navigate to "Settings," usually represented by a gear icon. Look for "Factory Reset" or similar options under "Advanced Settings." Confirm the reset by selecting 'Yes,' then wait for the device to restart. If needed, you can also press and hold the reset button located on the unit for about 10 seconds. For more detailed steps on setup and troubleshooting, you might want to explore further.
Reasons to Reset Your DVR
Why might you need to reset your DVR? There are several compelling reasons that could lead you to take this step. First, if you're experiencing frequent freezes or glitches during playback, it can be frustrating. A reset might just be the remedy to restore smooth functionality. You deserve to enjoy your shows without interruptions, and a fresh start could help.
Another reason might be related to storage issues. Over time, your DVR might fill up with recordings, and you may find it difficult to manage your saved shows. Resetting the device can clear out the clutter, giving you the freedom to record new content without worrying about running out of space. After all, the last thing you want is to miss out on your favorite programs.
A reset can also come in handy if you've recently changed your internet service provider or your network settings. Sometimes, compatibility issues arise, and a reset can help re-establish proper connections. You want your DVR to work seamlessly with your network, allowing you to stream and record without hassle.
Lastly, if you're planning to sell or give away your DVR, resetting it guarantees that your personal data is wiped clean. It's vital to protect your privacy and make sure that the next user starts with a blank slate. Taking control of your DVR through a reset can ultimately enhance your viewing experience, giving you the freedom to enjoy your content without limitations.
Preparing for the Reset
Before you reset your Ezviz DVR, it's important to take a few preparatory steps to secure a smooth process. You'll want to make sure everything is in place, so you can reclaim your freedom to enjoy your surveillance system without any hiccups. Start by backing up any vital footage you might need later. It's your right to have access to important moments, and a backup guarantees you won't lose them.
Next, gather the necessary tools. You'll need a small tool to press the reset button, usually a pin or paperclip. Also, keep your device manual handy, as it can guide you through the reset process. Having everything at your fingertips can make the difference between feeling lost and empowered.
Lastly, consider jotting down your current settings. This can help you restore your preferences after the reset, giving you peace of mind to customize your setup just how you like it.
Here's a quick checklist to help you prepare:
| Step | Description | Emotion Evoked |
|---|---|---|
| Backup Footage | Save important recordings | Security |
| Gather Tools | Have a pin and manual ready | Preparedness |
| Note Current Settings | Write down your settings | Control |
| Charge the DVR | Make sure it has enough power for the reset | Freedom to act |
Taking these steps makes sure you're ready for a successful reset and can enjoy the freedom that comes with a fully functional Ezviz DVR.
Accessing the DVR Menu
To access the DVR menu, start by powering on your Ezviz device and connecting it to your monitor or TV. Make certain the connection is secure, as a stable link will guarantee you see everything clearly on the screen. Once it's powered up, you should see the Ezviz logo appear. If the display doesn't show up, check your cables and inputs; you want to feel in control of your setup.
Now, grab your remote or your mouse, depending on how you're interacting with the DVR. You'll want to press the "Menu" button, which is usually located on the remote. If you're using a mouse, just click on the menu icon to pull it up. This menu is your gateway to controlling your DVR and accessing various features. It's designed to give you the freedom to customize your settings, view recordings, and manage your camera feeds.
Take a moment to familiarize yourself with the layout of the menu. You'll typically find options for system settings, playback, and camera management. Each section is designed to empower you to tailor the DVR to your specific needs. Navigate through the options using your remote or mouse, and don't hesitate to explore. This exploration is part of taking control of your security setup. Remember, the more comfortable you are with the menu, the more effectively you can manage your Ezviz DVR.
Finding the Reset Option
Locating the reset option on your Ezviz DVR is a straightforward process that can save you from potential headaches. To get started, you'll want to navigate through the DVR's menu. This is usually done using the remote or buttons on the device itself. Look for a section labeled "Settings" or "System Settings." It's often represented by a gear icon, which is a universal symbol for configuration.
Once you're in the settings menu, keep an eye out for options like "Advanced Settings" or "Maintenance." These sections are where the reset option typically resides. You might see something labeled "Factory Reset," "Restore Factory Settings," or simply "Reset." The wording can vary slightly depending on the model, but the meaning remains the same.
If you're having trouble finding the reset option, consult the user manual that came with your DVR. It usually contains a detailed breakdown of the menu structure, making it easier for you to locate what you need. If you've lost the manual, don't worry; you can often find digital copies on the manufacturer's website.
Confirming the Reset Process
Once you've accessed the reset option, confirming the reset process is vital to guarantee your Ezviz DVR is properly restored. This step assures that all settings are cleared, giving you a fresh start and the freedom to configure your device as you wish. Here's how you can confirm the reset:
- Review the Settings Prompt: After selecting the reset option, a prompt will appear on your screen. It'll typically ask you to confirm your decision. Take a moment to read this carefully; it's your chance to reconsider if needed.
- Select 'Yes': If you're sure you want to proceed, select 'Yes' or 'Confirm'. This action signals to the device that you're ready to wipe the current settings. It's an empowering choice, allowing you to take control of your device's functionality.
- Wait for Restart: Once you confirm, the DVR will begin the reset process. You'll see a progress bar or a notification indicating that the device is restarting. Be patient here; it's important to let it complete the process without interruptions.
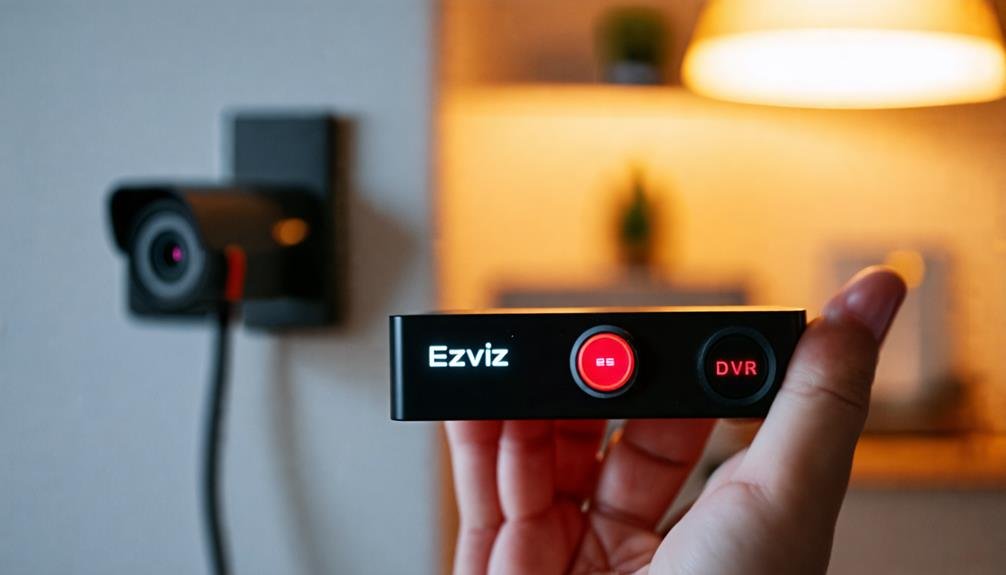
Resetting via Physical Button
To reset your Ezviz DVR using the physical button, you'll first need to locate the reset button on the device. Once you've found it, you can perform the reset process easily. Let's go through the steps to get your DVR back on track.
Locate the Reset Button
Finding the reset button on your Ezviz DVR can be a straightforward task if you know where to look. It's crucial to pinpoint this button to regain control over your device. Here's how to locate it:
- Check the Manual: Your DVR's user manual usually has a diagram showing the reset button's location. If you don't have a physical copy, you can find a digital version online.
- Look at the Back or Bottom: Most Ezviz DVRs have the reset button located at the back or bottom of the device. Inspect these areas closely; it might be a small, recessed button requiring a pin or paperclip to press.
- Identify the Label: The reset button is often labeled "Reset" or "RST." Look for these markings—this can save you time and frustration.
Once you've found the reset button, you'll be ready to take the next step in reclaiming your DVR freedom. Don't let technical difficulties hold you back—locating this button is the first step toward a fresh start with your device.
Perform the Reset Process
Resetting your Ezviz DVR is a simple yet effective way to resolve issues and restore functionality. To perform the reset process, grab a small, pointed object like a paperclip and locate the reset button you found earlier. With your DVR powered on, gently press and hold the reset button for about 10 seconds. You'll notice the device's lights flicker or change, signaling that it's rebooting.
Once the lights stabilize, you can release the button. This process will revert your DVR to its factory settings, so keep in mind that any custom configurations, recordings, or settings you've set up will be lost. But if freedom from glitches and errors is what you seek, this reset is a vital step.
After the reset, your DVR will guide you through the initial setup process. Follow the on-screen prompts to reconfigure your settings, like language preference and network connections. It's your chance to set things up just the way you like. Enjoy the newfound clarity and responsiveness of your Ezviz DVR, and remember, you can always repeat this process if issues arise again. Embrace the freedom of a well-functioning device!
Reconfiguring Your DVR Settings
Once you've reset your Ezviz DVR, you'll need to reconfigure your settings to get everything running smoothly again. Start by accessing the DVR menu, where you can adjust video settings to fit your preferences. Don't forget to save your configuration changes to guarantee they take effect!
Accessing DVR Menu
Accessing the DVR menu is essential for reconfiguring your settings and optimizing your system's performance. It's where you can take control and customize your DVR to fit your unique needs. Here's how to do it:
- Power On Your DVR: Start by ensuring your DVR is powered on and connected to your monitor. You want a clear view of what you're adjusting.
- Use the Remote: Grab your remote and press the 'Menu' button. This action usually brings up the main menu screen, allowing you to navigate through various options.
- Navigate Through Options: Use the arrow keys to scroll through settings. Look for categories like System Settings, Recording Settings, and Network Settings to tailor your experience.
Once you've accessed the menu, you'll find the freedom to adjust everything from recording schedules to user preferences. Take your time exploring each option; the more familiar you become, the better you can optimize your DVR for your lifestyle. Remember, it's all about making the system work for you!
Adjusting Video Settings
Adjusting video settings is essential for ensuring that your recordings look their best. You've got the power to customize the quality and clarity of your footage, making it easier to capture all those important moments. Start by accessing the video settings menu on your Ezviz DVR. Here, you'll find options like resolution, frame rate, and bitrate.
Choose a resolution that meets your needs; higher resolutions provide clearer images but require more storage space. Next, consider the frame rate. A higher frame rate can make motion smoother, which is vital for capturing fast-moving subjects. If you find that storage becomes an issue, you might want to lower it to save space.
Bitrate is another key factor—higher bitrates yield better quality, but again, they take up more storage. You'll want to strike a balance between quality and efficiency, depending on how much recording time you need.
Lastly, don't forget about the option for color settings and filters. You can enhance your footage even more, ensuring you get the most out of your recordings. Take your time to experiment with these settings, and don't hesitate to make adjustments as needed!
Saving Configuration Changes
To save your configuration changes on the Ezviz DVR, simply navigate to the settings menu after making your adjustments. It's important to guarantee that all your settings reflect your preferences for maximum control over your security system. Here's how to secure those changes:
- Select 'Save': After you've made your adjustments, look for the 'Save' button. This will commit all the settings you've just configured.
- Confirm Changes: A prompt may appear asking you to confirm your changes. It's crucial to hit 'Yes' or 'Confirm' to finalize your settings. This step guarantees everything is updated correctly.
- Reboot if Necessary: Some updates might require a system reboot. If prompted, allow the DVR to restart to apply all changes efficiently.
Taking these steps guarantees that your Ezviz DVR operates just the way you want it. You're not just customizing settings; you're taking control of your security system. Remember, freedom lies in the ability to tailor your environment. So, don't hesitate to make those changes and enjoy the peace of mind that comes with a well-configured DVR!
Troubleshooting Post-Reset Issues
After resetting your Ezviz DVR, you may encounter a few common issues that can disrupt your setup. First, check whether your DVR powers on properly. If it doesn't, verify it's plugged in securely and that the power outlet is functioning. Sometimes, a simple power cycle can resolve this, so unplug it for a minute and then plug it back in.
Next, you might find that the video feed isn't displaying as expected. If you're not seeing any images, confirm that all camera connections are secure and that each camera is powered on. It's also worth checking your network connection. If your DVR relies on a network for remote access, verify it's connected properly and that your internet is working.
You could also experience issues with login credentials. After a reset, the default username and password are often restored. If you've forgotten the defaults, refer to the manual or the manufacturer's website for the correct information.
Lastly, if the DVR isn't recording or you're encountering storage issues, make sure your hard drive is properly installed and formatted. Sometimes, a reset can affect settings, so double-check that everything aligns with your preferences.
While these glitches can be frustrating, they're usually manageable. Take a systematic approach to troubleshooting each issue, and you'll be back to enjoying the freedom and security your Ezviz DVR provides in no time.
Tips for Future Prevention
Maintaining your Ezviz DVR effectively can help prevent future issues and guarantee smooth operation. You don't want to find yourself in a situation where you need to reset it again. Here are some tips to keep your device running smoothly:
- Regularly Update Firmware: Make certain your DVR's firmware is always up to date. Manufacturers often release updates to fix bugs and improve performance. Check for updates every few months or enable automatic updates if possible.
- Monitor Storage Space: Keep an eye on your storage capacity. If your DVR's hard drive is nearing full, it could lead to performance issues. Delete unnecessary footage or invest in a larger hard drive to make sure you have enough space for recordings.
- Maintain Clean Connections: Dust and debris can obstruct connections and ports. Regularly inspect and clean your DVR's connections to make certain they're secure and free of grime. This simple step can prevent connectivity issues and make sure your device stays in top shape.
Frequently Asked Questions
Will Resetting My Ezviz DVR Delete Recorded Footage?
When you reset your device, it's natural to worry about losing your recorded footage. Generally, a reset can erase saved data, including recordings. If you value your footage, it's wise to back it up before proceeding. You should check the specific model's guidelines, as some devices might have options to preserve recordings. Taking a moment to explore your options can help guarantee you maintain that precious footage you want to keep safe.
How Can I Backup My Settings Before a Reset?
Before you reset your device, it's wise to back up your settings. You can usually do this by accessing the settings menu and looking for a backup or export option. Make sure to save it to a secure location, like an external drive or cloud storage. This way, you won't lose any custom configurations. Once you've backed everything up, you can proceed with the reset, knowing your settings are safe.
What if My DVR Doesn't Respond to the Reset?
If your DVR isn't responding to the reset, don't panic. First, check the power supply and make sure everything's plugged in properly. Sometimes, a hard reboot can help – just unplug it for a minute, then plug it back in. If it still doesn't work, consider looking for firmware updates or consulting the user manual for troubleshooting steps. Remember, your device deserves a little patience, and solutions usually come with a bit of persistence.
Is There a Factory Reset Option on Ezviz DVRS?
Imagine you're trying to regain control over your security footage after a glitch. Yes, there's typically a factory reset option on Ezviz DVRs. To access it, you'd usually press and hold the reset button on the device. This option can restore your system to its original settings, freeing you from frustrating issues. However, keep in mind that it'll erase all your saved data, so make sure you've backed up anything important before proceeding.
Can I Reset My DVR Remotely?
Yes, you can reset your DVR remotely, but it largely depends on the features your device supports. If your DVR allows remote access through an app or web interface, you should find an option to reset it there. Just make sure you're connected to the internet and have the necessary permissions. Always check the manual for specific instructions, as some models might require a direct connection for resets.