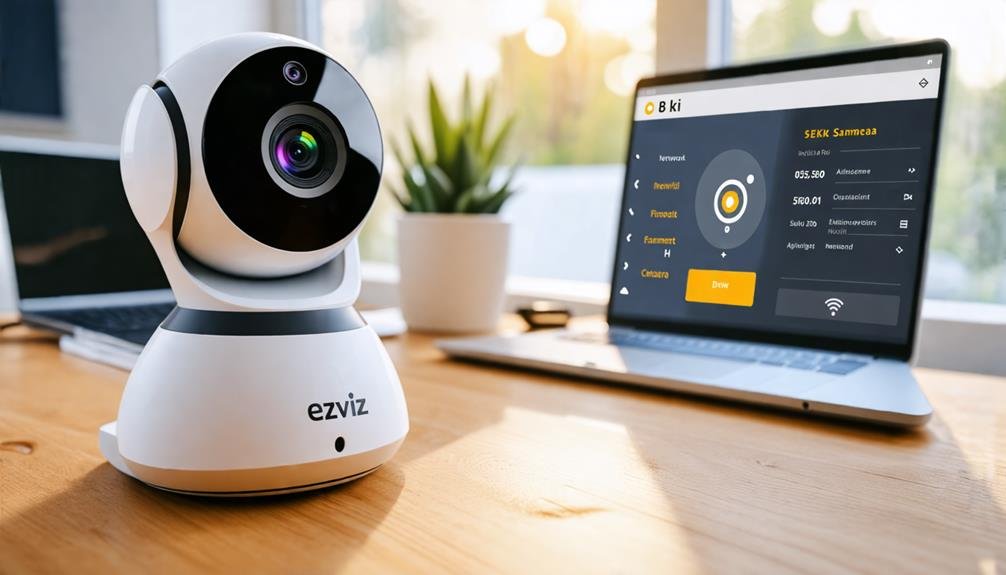
To find your Ezviz camera's IP address, you can use the Ezviz app for a straightforward approach. First, verify your camera is connected to Wi-Fi, then download and open the app. Tap the camera icon and check the "Device Info" section for the IP address. Alternatively, connect to the same network as your camera, access your router's interface by entering its IP address in a browser, and look for connected devices. You can also use Command Prompt on Windows or terminal commands on macOS/Linux to list connected devices. There's plenty more you can explore to streamline your setup.
Understanding IP Addresses
Often, people overlook the importance of understanding IP addresses when setting up devices like Ezviz cameras. But grasping what an IP address is and how it works can empower you to take control of your home security. An IP address is fundamentally a unique identifier for a device on a network. Just like your home has an address, your camera needs one to communicate effectively within your network.
When you connect your Ezviz camera to your Wi-Fi, it gets assigned an IP address. This address allows it to send and receive data, enabling you to access your camera's live feed and recordings. If you want to adjust settings or troubleshoot issues, knowing the camera's IP address makes it easier to navigate your network.
It's important to understand that there are two types of IP addresses: static and dynamic. A static IP address remains constant, while a dynamic one can change each time you restart your router or device. For most home setups, dynamic addresses are common, but if you want a reliable connection, you might consider setting a static IP for your Ezviz camera.
Using the Ezviz App
When setting up your Ezviz camera, utilizing the Ezviz app is a straightforward way to find its IP address. This app is designed to enhance your control over your camera, giving you the freedom to manage your security without any hassle. First, verify you've downloaded the Ezviz app from the App Store or Google Play. Once installed, open the app and sign in or create an account.
Next, connect your camera to your Wi-Fi network if you haven't already. The app will guide you through this process step by step. After your camera's connected, it should automatically appear on your app's main screen. Tap on the camera icon to access its settings.
In the camera settings menu, look for the "Device Info" section. This is where you'll find essential details about your camera, including the IP address. Note that the IP address allows you to pinpoint your camera's location on your network, granting you greater control over your surveillance system.
If you're planning to integrate the camera with other smart home devices or want to access it remotely, having the IP address handy will be invaluable. The Ezviz app not only makes finding your camera's IP address a breeze but also empowers you to customize your security system to fit your lifestyle. Embrace the technology, and keep your home secure with confidence and freedom.
Accessing the Router Interface
If you prefer a more hands-on approach or need additional details about your Ezviz camera's IP address, accessing your router's interface is an effective method. By doing this, you can easily see all devices connected to your network, including your camera. Here's a step-by-step guide to help you navigate through this process.
- Connect your computer or smartphone to the same network as your Ezviz camera.
- Open a web browser and type your router's IP address in the address bar. Common default addresses are 192.168.1.1 or 192.168.0.1.
- Log in using your router's admin credentials. If you haven't changed them, check your router's manual for the default username and password.
- Once you're in, look for a section labeled "Connected Devices" or "DHCP Client List." This section varies by router brand.
| Device Name | IP Address |
|---|---|
| Ezviz Camera | 192.168.1.10 |
| Smartphone | 192.168.1.11 |
| Laptop | 192.168.1.12 |
| Smart TV | 192.168.1.13 |
| Tablet | 192.168.1.14 |
Once you find the Ezviz camera listed, note down its IP address. This will give you the freedom to access your camera settings directly through a web browser or other applications. Enjoy managing your Ezviz camera with ease!
Using Command Prompt
To find your Ezviz camera's IP address, you can use the Command Prompt on your computer. By running a few simple network commands, you'll be able to locate the camera's IP quickly. Let's go through the steps to make this process straightforward.
Accessing Command Prompt
Accessing the Command Prompt is a straightforward process that can help you find your Ezviz camera's IP address. Whether you're using Windows or a similar operating system, it's a simple task that grants you the tools you need to take control of your network.
To get started, click on the Start menu or the search bar at the bottom left of your screen. Type "cmd" into the search box, and you should see "Command Prompt" pop up in the results. Just click on it, and a black window will appear. This is your gateway to network insights.
For those who love to immerse themselves in tech, the Command Prompt is like a treasure chest of information. It allows you to interact with your system directly, giving you the freedom to explore and troubleshoot. Plus, it doesn't require you to navigate through a bunch of menus, which can feel constraining. Once you've got this window open, you're well on your way to uncovering your Ezviz camera's IP address and taking charge of your home security setup. So, let's get going and unleash that potential!
Running Network Commands
Now that you've got the Command Prompt open, it's time to run some network commands to find your Ezviz camera's IP address. Start by typing 'ipconfig' and hit Enter. This command shows you the IP configuration of your network. Look for the "Default Gateway" under your active network connection; it's usually something like 192.168.1.1 or 192.168.0.1.
Next, use the 'ping' command. Type 'ping ' and press Enter. This tests the connection to that gateway. If you get replies, you're good to go.
Now, let's scan for devices on your network. Type 'arp -a' and hit Enter. This command displays all devices connected to your network along with their IP addresses. Look for unfamiliar addresses; your Ezviz camera should be among them.
If you still can't find it, consider using 'net view'. This command lists all devices connected to your network. It might help you identify your camera's IP address more easily.
These commands give you the freedom to explore your network and find your Ezviz camera effortlessly. Happy hunting!
Locating Camera IP
While you might think finding your Ezviz camera's IP address is complicated, using the Command Prompt can make it straightforward. First, connect your computer to the same network as your camera. Then, open the Command Prompt by typing "cmd" in the Windows search bar and hitting Enter.
Once you're in the Command Prompt, type "arp -a" and press Enter. This command displays a list of all devices connected to your network along with their IP addresses. Scan through the list for your camera; it might be labeled as "Ezviz" or have a MAC address starting with a specific manufacturer code.
If you're not sure, you can also identify your camera by looking for unfamiliar devices that aren't your computer or router. Once you spot the IP address, you've got what you need!
Now you can access your camera's settings or stream video effortlessly. Embrace the freedom that comes with knowing how to navigate your network, and don't hesitate to explore more features of your camera. You're now equipped to take control of your Ezviz experience!
Network Scanning Tools
When searching for your Ezviz camera's IP address, network scanning tools can be incredibly helpful. Popular network scanners can simplify the process, allowing you to quickly identify devices on your network. You can also utilize command line options if you prefer a more hands-on approach.
Popular Network Scanners
Network scanners are essential tools for identifying devices on your local network, and they can be particularly helpful when trying to locate the IP address of your Ezviz camera. With the right network scanner, you can quickly discover all connected devices, ensuring you maintain control over your network. Here are some popular network scanners you might want to take into account:
- Nmap: A powerful open-source tool that provides detailed information about devices and services on your network.
- Advanced IP Scanner: User-friendly and fast, this tool allows you to scan your network and even access shared folders.
- Angry IP Scanner: Lightweight and straightforward, it offers quick scanning and can export results in various formats.
- Fing: A mobile app that detects devices on your network and provides useful information like IP and MAC addresses.
- NetSpot: Primarily for Wi-Fi analysis, it can help identify devices connected to your network while optimizing your Wi-Fi performance.
Using these tools, you'll not only find your Ezviz camera's IP address but also enhance your overall network management. Enjoy exploring!
Using Command Line
To locate your Ezviz camera's IP address efficiently, you can utilize command line tools that come built into most operating systems. This method gives you a direct way to scan your network without the need for extra software.
If you're on Windows, open the Command Prompt by typing "cmd" in the search bar. Once it's open, type 'arp -a' and hit Enter. This command will display a list of all devices connected to your network along with their IP addresses. Look for your camera in the list; it might be identified by its MAC address, which you can find on the camera itself.
For macOS or Linux users, open the Terminal and use the command 'sudo arp -a'. You'll also see a list of connected devices.
Checking Camera Settings
Checking the camera settings is essential for pinpointing your Ezviz camera's IP address. The camera's settings will often reveal the network information you need, making it easier to connect and manage your device. You don't have to be a tech whiz; just follow these straightforward steps to find your IP address.
First, access your Ezviz camera through the mobile app or web interface. Once you're logged in, navigate to the settings menu. Here, you'll typically find network settings that display important information about your connection.
Look for the following key details:
- Device Name: Identifies your camera on the network.
- Network Type: Indicates if your camera is connected via Wi-Fi or Ethernet.
- IP Address: This is the unique address assigned to your camera on the network.
- Subnet Mask: Helps define the network range.
- Gateway: The router's IP address that connects your camera to the internet.
Once you've located your camera's IP address, jot it down. You can use this information to access your camera directly or make adjustments in your router settings. Remember, keeping your camera settings organized will save you time and hassle in the long run. So, take a moment to explore and understand what your Ezviz camera has to offer, and enjoy the freedom of a well-connected security setup!
Troubleshooting Connection Issues
Even after locating your Ezviz camera's IP address, you might encounter connection issues that prevent you from accessing the camera or managing its settings. First, double-check that your camera is powered on and connected to your network. If it's wired, make sure the Ethernet cable's securely plugged in. For Wi-Fi connections, confirm that the camera is within range of your router.
Next, verify your network settings. Sometimes, routers can block certain devices. Make sure your camera's IP address isn't conflicting with another device. You can do this by checking your router's DHCP client list. If you spot a conflict, consider assigning a static IP address to your camera.
If you're still struggling, try rebooting both your camera and router. This can often resolve minor connectivity issues. After rebooting, give it a few minutes for everything to reconnect.
Another step is to check your firewall settings. Sometimes, security software can prevent your camera from connecting to the internet. Confirm that your firewall isn't blocking the camera's IP address or the Ezviz app.
Lastly, if nothing seems to work, consider resetting your camera to factory settings. This will erase any current configurations but can often resolve persistent connection problems. After resetting, you'll need to set it up again using the Ezviz app. Remember, troubleshooting can feel frustrating, but with a little patience, you'll reclaim access to your camera and its features.
Frequently Asked Questions
How Can I Reset My Ezviz Camera to Factory Settings?
Ever felt the frustration of a camera that just won't cooperate? To reset your Ezviz camera to factory settings, locate the reset button, usually found on the device's body. Press and hold it for about 10 seconds until you see the indicator light flash. You'll regain control, allowing you to customize your settings freely. It's a simple step, but it can bring back the peace of mind you deserve.
Will Changing My Network Affect the Camera's IP Address?
Yes, changing your network will affect your camera's IP address. When you switch networks, your camera will connect to the new router, which assigns it a different IP address. It is crucial to recognize that if you're using DHCP, the address can change each time the camera reconnects. If you want stability, consider setting a static IP address for your camera in your router's settings, ensuring it always has the same address regardless of network changes.
Can I Access My Camera Remotely Without the IP Address?
Imagine sitting on a sunlit patio, sipping coffee, and wanting to check on your home. You might wonder if you can access your camera remotely without knowing its IP address. Well, you can! Many camera apps let you connect through your account, bypassing the need for an IP. Just guarantee your camera's connected to the internet, and you're free to watch over your space, no matter where you are.
What Should I Do if My Camera Is Offline?
If your camera's offline, don't panic! First, check your internet connection; it might be the culprit. Restart your camera and router to reset any glitches. Make sure the camera's power source is working. If it's still offline, try re-linking it to your app or software. Keep an eye on firmware updates too; they can resolve connectivity issues. Stay proactive, and you'll regain access to your camera in no time!
Are Ezviz Cameras Compatible With Third-Party Software?
Ever wondered if you can expand your monitoring options? Ezviz cameras typically aren't designed for compatibility with third-party software, which can limit your freedom in customizing your setup. However, some users have found workarounds or integrations that might be possible. Before diving in, check the specific model and its features. Ultimately, you'll want to make certain your security system meets your unique needs without compromising functionality. It's all about having control over your environment!


