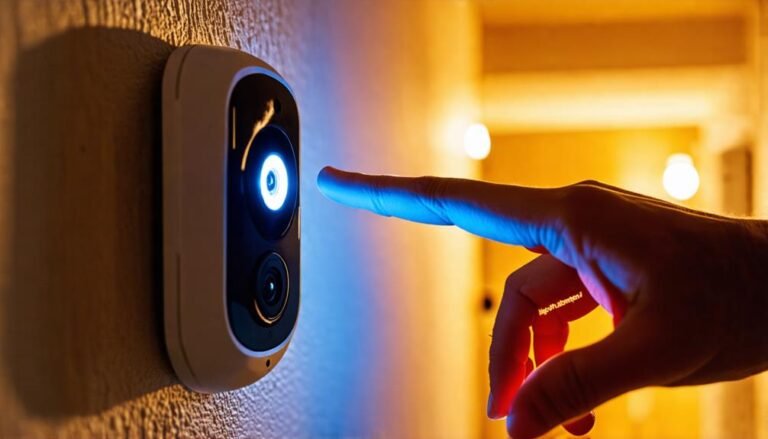
To connect your Night Owl cameras to the TV, start by using an HDMI cable to link your Night Owl DVR to the TV's HDMI port, usually HDMI 1. Make sure the DVR is powered on, and then select the appropriate HDMI input using your TV remote. If there's no signal, double-check that all connections are secure and restart both the DVR and TV. Updating the firmware on both devices can also help with connectivity issues. For a smoother setup experience, consider using the Night Owl Protect App for added features. There's more to discover about optimizing your connection!
Understanding HDMI Connections
When setting up your Night Owl cameras, understanding HDMI connections is vital. These connections allow you to link your Night Owl DVR directly to your TV, giving you the freedom to monitor your camera feeds in high definition. To get started, you'll need a reliable HDMI cable that connects the DVR to your TV's HDMI port, typically labeled as HDMI 1.
Before diving in, confirm your DVR is powered on. Then, grab your TV remote and select the correct HDMI input using the input or source button. This step is important for viewing the live feeds from your cameras. It's also important to verify that all HDMI cable connections are secure on both the DVR and the TV. Loose connections can lead to frustrating signal issues, which can hinder your ability to keep an eye on things.
If you find that there's no signal appearing on your TV, don't panic. Start by troubleshooting. Check the functionality of your HDMI cable by testing it with another device, like a gaming console or a streaming box. Make sure the input source on your TV is correctly set as well. By confirming solid HDMI cable connections and following these steps, you'll enjoy seamless real-time monitoring of your Night Owl camera feeds. With everything in place, you can embrace the freedom of knowing your space is secure, all while enjoying the clarity that comes with HDMI technology.
Setting Up Night Owl DVR
To set up your Night Owl DVR, you'll need to connect it properly to your TV and guarantee everything's powered on. Start with the initial setup process, and if you run into any issues, we'll cover some common troubleshooting tips. Let's make certain you're ready to get your system up and running smoothly.
Required Equipment and Connections
Setting up your Night Owl DVR to connect with your TV requires a few essential pieces of equipment. You want to guarantee everything's in place before diving into the setup process. Here's what you'll need:
- HDMI cable: This is vital for connecting your DVR to the TV.
- Camera power adapter: Make sure your cameras are powered up and ready.
- Compatible TV: Your TV should support HDMI connections, especially if you've got a Vizio model.
- Remote control: You'll use this to switch to the correct HDMI input on your TV.
- Firmware updates: Check for these on both your Night Owl DVR and your TV for peak performance.
Once you have all these items, you'll be ready to go. Just remember to connect the HDMI cable from the DVR to the TV's HDMI port, typically HDMI 1. After confirming the DVR is powered on, use the input/source button on the remote to select the right HDMI input. With everything set up, you'll be one step closer to enjoying your camera feeds on the big screen!
Initial Setup Process
Before diving into the initial setup of your Night Owl DVR, make certain it's powered on and connected to your TV with the HDMI cable. Plug it into the HDMI port, typically HDMI 1. Once that's done, grab your TV remote and press the input/source button to select the correct HDMI input where your DVR is connected.
If you have an older system, you'll need the TV or monitor for setup. Newer systems offer a bit more freedom; you can set them up via the Night Owl Protect App on your mobile device. It's a breeze! Just follow the prompts, and you'll be up and running in no time.
During the setup, verify all connections are secure. Don't forget to check for firmware updates on both the DVR and the TV, as this can lead to peak performance. Once your initial setup is complete, you can disconnect the TV for the newer models, allowing you to place your cameras flexibly.
Lastly, if you're looking to enhance your experience, consider the CMS Download and Setup for accessing your cameras remotely. Enjoy the freedom of monitoring your space effortlessly!
Troubleshooting Common Issues
After completing the initial setup, you might encounter some common issues when trying to connect your Night Owl DVR to the TV. Don't worry; most of these problems are easy to fix. Here's a quick troubleshooting guide to get you back on track:
- Make sure the HDMI cable is securely connected from the Night Owl DVR to the correct HDMI port on your TV (usually HDMI 1).
- If you see no signal, check that the DVR is powered on and that all HDMI connections are snug.
- Restart both your Vizio TV and Night Owl DVR to reset connections; this often resolves signal issues.
- If the problem persists, test the HDMI cable with another device to rule out faults, and consider checking for firmware updates for both your DVR and TV.
- For older systems needing a monitor for setup, verify you finish the initial configuration before switching to a TV for viewing.
If you're still having issues, you can always use the Night Owl Protect App to monitor your cameras and manage settings remotely. Enjoy the freedom of seamless connectivity!
Connecting to Your TV
Connecting your Night Owl cameras to your TV is a straightforward process that enhances your surveillance experience. To start, grab an HDMI cable and connect it from the Night Owl DVR's HDMI output to your TV's HDMI input. This simple step is your gateway to viewing your camera feeds directly on your screen.
Once you've made the connection, power on both the Night Owl DVR and your TV. Use the TV remote to select the HDMI input source where the DVR is connected. If you've done everything correctly, your camera footage should appear on the screen.
For older systems, remember that a TV or monitor is necessary for the initial setup. However, newer systems can be conveniently set up via the Night Owl Protect App on your mobile device.
If nothing shows up on your TV, double-check that the HDMI connections are secure and that your DVR is powered on. It's also a good practice to regularly check for firmware updates on both devices for peak performance.
Here's a quick reference table to help you connect:
| Step | Action |
|---|---|
| 1. Connect | Plug HDMI cable into DVR and TV |
| 2. Power On | Turn on both the DVR and TV |
| 3. Select Input | Use the remote to choose the correct HDMI port |
| 4. Verify Connection | Check HDMI connections and power status |
Troubleshooting Common Issues
If you're having trouble getting your Night Owl cameras to display on your Vizio TV, there are a few common issues you might run into. First, check your HDMI connections and guarantee that everything's powered on. Then, we'll look into network connectivity troubles that could be affecting your setup.
HDMI Connection Problems
HDMI connection issues can be frustrating, especially when you just want to view your Night Owl camera feed on your TV. If you're experiencing HDMI connection problems, here are some quick troubleshooting tips to help you out:
- Check Connections: Verify the HDMI cable is securely connected to both your Night Owl DVR and the selected HDMI port on your TV.
- Power Up: Make sure your DVR is powered on; a powered-down device won't transmit any signal.
- Test the Cable: Try using the HDMI cable with another device to check if the cable itself is faulty.
- Input Source: Use the input/source button on your Vizio TV remote to confirm you're set to the correct HDMI input.
- Restart Devices: Restart both your Vizio TV and Night Owl DVR to reset connections, as this can resolve temporary issues.
Power Supply Issues
Power supply issues can greatly impact the performance of your Night Owl cameras, especially when it comes to features like night vision. If you're experiencing night vision problems, it might be due to an insufficient power supply. Connecting your cameras directly to a power adapter can resolve these issues, ensuring they operate effectively even in low-light conditions.
It's essential to check and secure all power connections to your cameras. Loose or damaged connections can lead to disruptions in functionality or signal loss. Regularly inspecting your power sources and adapters for wear can help prevent inconsistent camera operation. You wouldn't want your security system to falter when you need it most, right?
Additionally, to optimize performance, make sure your cameras are mounted at least 7 feet above the ground. This height not only helps with the camera's alignment but also minimizes potential power-related misalignment issues.
For better management of your camera system, consider downloading the Owl Protect CMS Download. This tool can assist you in monitoring and troubleshooting any power-related concerns more effectively, keeping your surveillance running smoothly.
Network Connectivity Troubleshooting
When connecting your Night Owl cameras to a TV, guaranteeing proper network connectivity is essential for best performance. If you're facing issues, here are some troubleshooting tips to help you out:
- Make sure all wires are properly connected to the DVR and that it's powered on.
- Verify that your HDMI cable is securely plugged into both the Night Owl DVR and your Vizio TV's HDMI input, and select the correct input source.
- If you see no signal on the TV, test the HDMI cable with another device to rule out cable issues. Restart both the Vizio TV and Night Owl DVR to reset connections.
- Check for any firmware updates on the DVR and TV, since outdated software can cause connectivity problems.
- Guarantee your DVR is connected to the internet and confirm that your network upload speed is sufficient for accessing camera feeds.
Using the Night Owl App
The Night Owl Protect App is your go-to tool for managing and monitoring your Night Owl cameras from anywhere. With this app, you can easily access live camera feeds right from your iOS or Android device, giving you the freedom to keep an eye on your property no matter where you are. To get started, make certain you have the correct admin password for your device and complete the email confirmation during your account setup.
Once you've got everything set up, the Night Owl Protect App becomes your command center. You can enjoy live view and playback features, allowing you to review footage whenever you need to. Plus, the app sends you notifications so you're always in the loop about any activity detected by your cameras. You can even configure camera settings, like motion detection zones, directly through the app—no need for a computer, which streamlines the process and enhances convenience.
Regular updates to the Night Owl Protect App guarantee you're using the best features and security enhancements available. This means your surveillance system is always operating at peak performance. Embrace the freedom of managing your security with just a few taps on your smartphone. With the Night Owl Protect App, you're in control, and your peace of mind is just a click away. So, download the app, and take charge of your security today!
Customer Support Resources
Night Owl provides a variety of customer support resources to guarantee you can easily connect your cameras to your TV. You're not alone on this journey, and Night Owl's support is designed to empower you every step of the way. Here's how you can tap into their extensive resources:
- Online Forums: Engage with other users and find solutions to common issues related to camera connections.
- FAQs: Browse through frequently asked questions on their official website for quick answers.
- 24/7 Technical Support: Get help whenever you need it—no matter the hour—with dedicated tech support for complex connection problems.
- Video Tutorials: Check out step-by-step guides on YouTube that visually walk you through the setup process.
- Night Owl Protect App: Use this app to manage your devices and access camera feeds remotely, which can streamline your connection experience.
Frequently Asked Questions
Can You View Night Owl Cameras on a TV?
Yes, you can view Night Owl cameras on your TV. Just connect the DVR to your TV using an HDMI cable, and make sure the DVR is powered on. Select the right input source on your TV, and you'll be able to see live camera feeds and playback recorded footage. If you run into any issues, double-check that all cables are secure and try the HDMI cable with another device to rule out problems.
How Do I Connect My Owl Camera to My TV?
Think of connecting your camera to a TV like tuning into your favorite radio station; you need the right frequency. To connect your Night Owl camera, grab an HDMI cable and plug it into your DVR and TV. Make sure your TV's set to the correct input. Once that's done, you can enjoy live feeds, but don't forget to check your internet connection for remote viewing. It's all about freedom to watch your world unfold!
How Do I Connect My Night Owl Camera to My TV Without DVR?
To connect your Night Owl camera to your TV without a DVR, first, check if your camera has an HDMI output. If it does, simply plug an HDMI cable into the camera and then into an available HDMI port on your TV. Use your remote to select the correct HDMI input, and you should see your camera's feed. If not, consider using a compatible video converter to bridge the connection. Always consult your manual for specifics!
Why Is My Night Owl Not Connecting to My TV?
If your Night Owl isn't connecting to your TV, check a few things. First, verify the HDMI cable's snug and the right HDMI port's selected on your TV. Next, confirm the DVR's powered on and showing signs of life. If you still see no signal, try the HDMI cable with another device or restart both the DVR and TV. Sometimes, a simple reset can bring back your viewing freedom!