To factory reset your Ezviz camera, first, gather a small pointed object like a pin. Verify your camera is powered on, then locate the reset button usually found on the back or bottom. Press and hold this button for about 10 seconds until the LED blinks, indicating a reset. Wait for the camera to reboot, which may take a minute. After that, you'll need to reconnect it to your Wi-Fi network and set it up again via the Ezviz app. This process clears old settings, but there's more you can do to optimize your device and enhance its functionality.
Understanding Factory Reset
A factory reset is a process that restores your Ezviz camera to its original settings, effectively wiping any customized configurations or stored data. This means if you've made any adjustments to the camera's settings or saved any footage, all of that will be erased. It's like hitting a reboot button, giving you a fresh start, which can be liberating.
You might consider a factory reset if you're facing issues with your camera, such as connectivity problems or if you're planning to sell it or give it away. It's important to understand that this reset isn't just a simple toggle; it's a commitment to starting over. You'll lose all your personalized settings, including Wi-Fi connections, user accounts, and any custom notifications you set up.
The freedom of a factory reset also means you can regain control over your device. If you've felt constrained by previous configurations or settings, this process can open up new possibilities. You can set it up anew, tailored to your current preferences and needs. Whether you want to change your security protocols or simply start fresh, a factory reset can be the pathway to reclaiming that sense of autonomy with your camera.
In essence, understanding what a factory reset entails empowers you to make informed decisions about your device. You're not just erasing data; you're embracing a chance to redefine how you interact with your Ezviz camera.
Preparing for the Reset
Before you begin the factory reset process, it's important to prepare your Ezviz camera to confirm everything goes smoothly. First, make certain you've got all the necessary tools within reach. This typically includes a small, pointed object like a pin or paperclip, which you'll use to press the reset button. Having your user manual handy can also be helpful, as it provides specific guidance tailored to your camera model.
Next, check your camera's power source. Make sure it's plugged in or fully charged if it's battery-operated. A sudden power loss during the reset could lead to complications, which could keep you from achieving the freedom you want with your device.
Also, consider having a stable internet connection available. Once the reset is complete, you'll need to reconnect your camera to your Wi-Fi network. This will allow you to set it up fresh and make any adjustments you desire.
Lastly, it's wise to back up any important footage or settings you want to keep. A factory reset will erase all your custom settings and recordings, returning the camera to its original state. It's your chance to clear out the clutter, so take a moment to decide what you want to save.
Locate the Reset Button
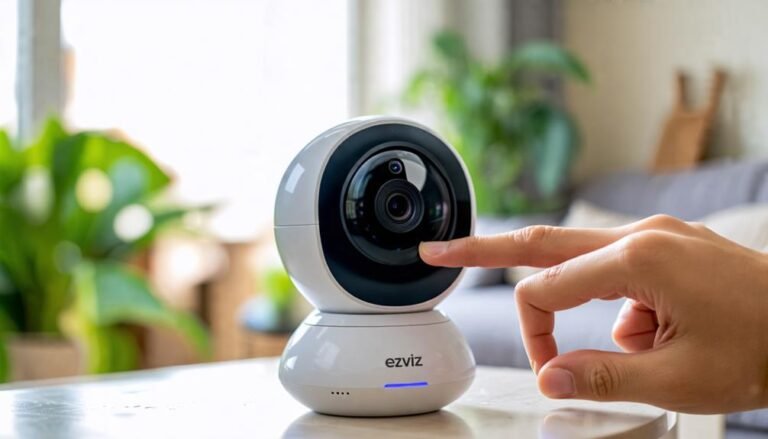
To successfully reset your Ezviz camera, you'll need to locate the reset button, which can usually be found on the back or bottom of the device. This button is often small and may be recessed, so you might need a pin or a paperclip to press it. Understanding its location is essential, as it's the first step toward reclaiming control over your camera settings.
Once you have your camera in hand, turn it around or flip it over to find the reset button. Look for a tiny hole or a labeled button; sometimes, the reset button will have a symbol resembling a circular arrow, indicating its purpose. If you're struggling to find it, don't hesitate to consult your camera's user manual. Most manuals include detailed diagrams showcasing the button's exact position.
Having the reset button in your sights is empowering. It means you're one step closer to restoring your camera to its original state, freeing you from any unwanted configurations or settings that may have crept in over time. This process not only helps you regain access to your camera but also allows you to start fresh and customize the settings to your preferences.
Once you've located the reset button, you'll be ready to move on to the next phase of resetting your Ezviz camera. Stay tuned, and you'll soon be back in control, enjoying the freedom that comes with a properly functioning device.
Performing the Reset
Press and hold the reset button you located earlier for about 10 seconds. You'll know you've done it right when the camera's LED indicator starts to blink. This blinking signifies that the camera is resetting to its factory settings. It's a simple yet vital step that guarantees your device is free from any previous configurations or settings that may have been causing issues.
Once you've held the button for the required time, release it and wait. The camera will go through its reboot process, which typically takes a minute or two. During this time, it's essential not to interrupt the power supply or remove the batteries. Let it do its thing; you want to confirm it's completely reset.
After the camera powers back on, it should be in its default state, ready for you to set it up anew. If the LED indicator is solid or switched off, that's a good sign that the reset is complete. Take a moment to confirm everything's back to square one before moving forward.
This process not only liberates your device from old settings but also gives you a fresh start, allowing you to configure it as per your preferences and needs. Remember, a factory reset can free you from glitches and misconfigurations, empowering you to reclaim control over your surveillance setup. Enjoy the sense of freedom that comes with a clean slate!
Setting Up Your Camera Again
Now that you've reset your Ezviz camera, it's time to set it up again. Start by connecting it to your Wi-Fi network, and then you can configure the camera settings to suit your needs. Getting these steps right will guarantee your camera functions properly and meets your expectations.
Connecting to Wi-Fi
After resetting your Ezviz camera, you'll need to reconnect it to your Wi-Fi network to get it up and running again. This process will enable you to regain control over your security setup, letting you monitor your space freely.
Here's a quick guide to help you through the Wi-Fi connection process:
| Step | Action | Notes |
|---|---|---|
| 1 | Open the Ezviz app | Download it if you haven't |
| 2 | Select "Add Device" | Confirm your camera's powered on |
| 3 | Connect to your Wi-Fi | Use 2.4GHz for better range |
| 4 | Enter your Wi-Fi password | Confirm it's correct |
| 5 | Confirm connection | Check for a successful link |
Once you've completed these steps, your camera will be reconnected to your Wi-Fi, allowing you to access live feeds and recordings. Remember, a strong Wi-Fi connection means freedom in monitoring your home or office, giving you peace of mind wherever you are. Enjoy the flexibility that comes with your newly connected Ezviz camera!
Configuring Camera Settings
Once your Ezviz camera is reconnected to Wi-Fi, you'll want to configure its settings to tailor it to your specific needs. Start by opening the Ezviz app on your smartphone. You'll be greeted with options that allow you to customize your camera's functionality.
First, adjust the resolution settings. Higher resolutions provide clearer images but may use more bandwidth. Choose a setting that balances quality and performance based on your internet speed. Next, enable motion detection. This feature can notify you when unexpected movement is detected, giving you peace of mind while ensuring your privacy isn't compromised.
Don't forget to set up your alert preferences. Whether you want push notifications or email alerts, you can decide how you'd like to be informed of any activity. Additionally, consider configuring the recording schedule. You might prefer your camera to record only during certain hours, allowing for more freedom during the day.
Lastly, explore other features like two-way audio or cloud storage options to enhance your experience. Once you've tailored the settings to your liking, you're all set to enjoy the full potential of your Ezviz camera!
Troubleshooting Common Issues
When dealing with an Ezviz camera, you might encounter a few common issues that can disrupt its functionality. Don't worry; you can troubleshoot these problems with some straightforward steps. Here are four common issues you might face and how to tackle them:
- Camera Not Connecting to Wi-Fi: Verify that your camera is within range of your router. Double-check the Wi-Fi password and make sure it's entered correctly in the app. Restarting both the camera and router can also help.
- Live Feed Not Displaying: If you're having trouble viewing the live feed, check your internet connection. A slow or unstable connection can cause disruptions. Try closing and reopening the app, or even reinstalling it if necessary.
- Motion Detection Alerts Not Working: Verify that motion detection settings are enabled in your app. Sometimes, you might need to adjust sensitivity levels to confirm the camera captures movement effectively.
- Camera Not Recording: If your camera isn't recording, first check your storage settings. Verify you have enough storage space on your SD card or cloud account. Also, confirm that the recording schedule is set correctly in the app.
Tips for Future Use
To keep your Ezviz camera running smoothly, make sure you're regularly updating the software. This helps enhance functionality and security. Also, don't forget to secure your network to protect your device from potential threats.
Regular Software Updates
Regular software updates are essential for keeping your Ezviz camera functioning at its best and securely. By guaranteeing your camera's firmware is up to date, you can enjoy improved performance, new features, and enhanced security. Here are some tips to keep in mind for future use:
- Set Reminders: Make it a habit to check for updates regularly, perhaps once a month. Setting a reminder on your phone can help you stay on track.
- Enable Automatic Updates: If your camera allows it, turn on automatic updates. This way, you won't have to worry about remembering to do it manually.
- Read Release Notes: When an update is available, take a moment to read the release notes. They often include valuable information about what's new and what issues have been fixed.
- Backup Your Settings: Before applying any updates, consider backing up your camera settings. This guarantees that you can restore them if anything goes awry during the update process.
Secure Your Network
Securing your network is essential for protecting your Ezviz camera from unauthorized access and potential breaches. First, verify your Wi-Fi is password-protected with a strong, unique password. Avoid using default passwords, as they're easily guessed. A mix of letters, numbers, and special characters can make your password much tougher to crack.
Next, consider enabling WPA3 encryption if your router supports it. This is the latest security protocol and offers better protection than older standards. Regularly check for firmware updates on your router, too; manufacturers often release patches to address vulnerabilities.
You might also want to create a separate network for your smart devices. This way, if one device gets compromised, your main network remains secure. Additionally, disabling features like WPS (Wi-Fi Protected Setup) can reduce the risk of unauthorized access.
Lastly, turn off remote access features if you don't need them. While convenient, they can expose your network to potential threats. By taking these steps, you'll enjoy the freedom of using your Ezviz camera without worrying about security breaches. Stay vigilant, and regularly assess your network's defenses!
Frequently Asked Questions
Will a Factory Reset Delete All Saved Footage?
If you're wondering whether a factory reset will wipe all saved footage, the answer is yes. When you reset a device, it typically returns to its original settings, erasing any stored data. So, if you've got important clips you want to keep, make sure to back them up first. It's all about maintaining your freedom to access what matters to you without losing those precious moments captured on camera.
Can I Reset My Camera Remotely?
You can't reset your camera remotely. Factory resets usually require physical access to the device. If you're looking to regain control or fix issues, you'll need to be there in person. It's important to keep that in mind when setting up your security system. You might want to think about other options, like adjusting settings or troubleshooting, which can often be done remotely without losing your footage or settings.
What if the Reset Button Is Stuck?
What if the reset button's stuck? It's like trying to open a door that refuses to budge. You'll want to check for debris or dirt that could be causing the jam. If it's still unyielding, a gentle push with a tool might help. Just remember, forcing it too hard can damage the camera. If all else fails, consider reaching out to customer support for assistance—you shouldn't have to struggle for freedom when fixing your device!
How Often Should I Perform a Factory Reset?
You shouldn't need to perform a factory reset too often; it's generally a last resort. If your device is acting up or you've changed settings that you can't revert, then it might be time. For regular maintenance, keep your firmware updated and check connections periodically. Trust your instincts—if things seem off, do a reset. Otherwise, enjoy the freedom of a smoothly running device without unnecessary interruptions!
Is Factory Resetting Safe for My Camera?
Factory resetting your camera is generally safe, but it's important to understand what it entails. You'll lose all your settings, including Wi-Fi configurations and saved footage. If you're seeking a fresh start or troubleshooting issues, it can be a great solution. Just make sure to back up anything important before proceeding. Remember, once it's reset, you'll need to set everything up again, so be ready for that.