To connect your Night Owl cameras, start by ensuring all wires are securely connected to the DVR. If you're using an older system, connect it to a TV or monitor for setup. For remote viewing, make sure your DVR is linked to the internet. Download the Night Owl Protect app on your mobile device, create an account, and enter your DVR's admin password. Adjust camera angles to maximize their performance, and check for any firmware updates regularly. Following these steps will help you set up your camera system effectively, and there's more to explore if you want to enhance your security setup further.
DVR Connectivity Requirements
When setting up your Night Owl camera system, ensuring proper DVR connectivity is vital for smooth operation. The basic operation of your cameras doesn't require an internet connection, as they can work solely through the DVR setup. This means you can enjoy peace of mind knowing your system remains functional even without being online. However, if you want the freedom to view your camera feeds remotely on your mobile devices, an internet connection becomes necessary.
For older Night Owl systems, you'll need a TV or monitor for the initial setup. This is where you'll connect everything and make sure your DVR is properly configured. Once that's done, newer systems offer the flexibility to set up using your mobile device, allowing you to disconnect the TV or monitor entirely. This change not only frees up space but also lets you manage your system directly from your smartphone with the Night Owl Protect App.
Ensure that all wires are properly connected to the DVR. This verification is essential for the connectivity and functionality of your camera system. A loose wire can lead to interruptions or even complete system failure. So, take a moment to double-check everything before moving on. By prioritizing DVR connectivity, you're setting the stage for a reliable security system that grants you both control and peace of mind, whether you're at home or on the go.
Camera Specifications and Placement
For a successful security setup, understanding your Night Owl cameras' specifications and proper placement is key. These cameras are designed for outdoor use, being weatherproof and resistant to moisture and debris. To get the most out of your system, pay attention to how you install them.
Here's a quick guide to help you with camera specifications and proper placement:
- Height Matters: Mount your cameras at least 7 feet above ground level. This height guarantees a clear field of view and minimizes tampering.
- Protect from Elements: Place your cameras under eaves or awnings. This simple step can extend their lifespan by shielding them from harsh weather conditions.
- Angle Downward: When positioning your cameras, angle them slightly downward. This enhances motion detection capabilities and helps capture clearer footage.
- Secure Alignment: Verify your cameras are properly mounted to avoid misalignment. This is vital for effective side-to-side movement detection by the infrared sensors.
Installation Guidelines for Cameras
Proper installation of your Night Owl cameras is vital for maximizing their effectiveness. To guarantee you get the most out of your camera installation, follow these guidelines for peak performance.
First, mount your cameras at least 7 feet above the ground to deter tampering and to capture a broad view of your surroundings. Consider angling the cameras slightly downward; this will improve side-to-side movement detection and enhance the effectiveness of the infrared sensors.
During the Startup Wizard, it's important to adjust the motion detection area. This step helps you capture relevant activity while minimizing false triggers. Finally, verify that your final camera location is securely mounted to maintain alignment after configuration.
To protect your cameras from moisture and debris, install them under eaves or awnings. This simple precaution can extend the life and functionality of your cameras.
Here's a quick overview of the installation steps:
| Step | Action | Purpose |
|---|---|---|
| Mounting Height | At least 7 feet above ground | Reduces tampering risk |
| Camera Angle | Slightly downward | Improves detection effectiveness |
| Motion Detection Setup | Adjust during Startup Wizard | Captures relevant activity |
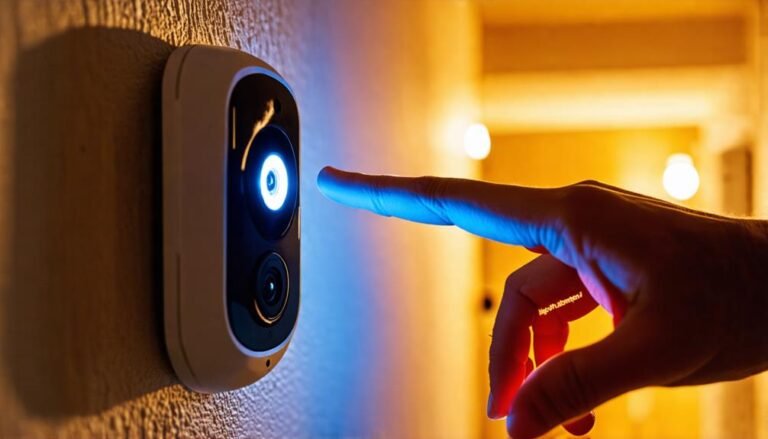
Accessing the Night Owl App
To get started with your Night Owl cameras, you'll need to access the Night Owl Protect app. This app is your gateway to managing and monitoring your cameras from anywhere, giving you the freedom to keep an eye on your property whenever you want. Here's how to get connected:
- Download the App: Go to the App Store (for iOS) or Google Play Store (for Android) and download the Owl Protect Mobile App. Install it on your device.
- Create or Log In: Open the app and either create a new account or log in with your existing credentials. Make sure to enter your phone number, username, or email, along with your password accurately.
- Check for Confirmation: If you run into any access issues, verify that you've received the necessary email confirmation for account setup. If needed, consider changing your password.
- Manage Access: Once you're logged in, you can manage user access and share devices with others. This feature allows for collaborative monitoring, enhancing your security experience.
Regular updates to the Night Owl Protect app improve functionality and security, so it's wise to check for updates periodically. By following these steps, you'll be well on your way to enjoying the full capabilities of your Night Owl cameras, allowing you the peace of mind you deserve. Happy monitoring!
Troubleshooting Connection Problems
If you're facing connection problems with your Night Owl cameras, start by verifying that all wires are securely connected to the DVR. Next, check your internet connection and guarantee your DVR is linked directly to the router with an Ethernet cable. Finally, don't forget to update the firmware regularly to prevent any software-related issues.
Verify Wire Connections
When troubleshooting connection problems with your Night Owl cameras, verifying wire connections is essential. A secure connection guarantees your cameras stay operational and provide the surveillance you need. Here are some steps to help you verify these connections:
- Check Camera Wires: Confirm all camera wires are securely connected to the DVR. Loose connections can lead to malfunctioning cameras.
- Inspect Power Supply: Verify that the power supply for each camera is properly connected and functional. Insufficient power can affect performance.
- Verify Video Cables: Make sure the video cables from the cameras are connected to the correct ports on the DVR. This prevents video loss and guarantees everything is connected as it should be.
- Look for Damage: Inspect for visible damage or wear on the wires. Damaged cables can result in connection issues that limit your camera's effectiveness.
Check Internet Connection
Once you've verified that your wire connections are secure, the next step is to check your internet connection. First, make sure your DVR is connected directly to the router using an Ethernet cable. A wireless setup might seem convenient, but it often leads to unreliable video streaming. Loose connections can disrupt your internet signal, so double-check everything.
Next, test your internet speed. Insufficient upload speeds can greatly affect your connection quality, making it tough to stream video smoothly. Confirm your internet meets the requirements for video streaming; otherwise, you might face buffering issues that can hinder your surveillance experience.
It's also smart to keep your Night Owl Protect app updated. Regular application updates help maintain peak functionality for remote access. If your DVR is connected properly but you're still having issues, consider checking for the latest firmware updates. Outdated software can lead to connectivity problems, so stay on top of those updates to verify everything runs smoothly.
Update Firmware Regularly
To maintain a reliable connection with your Night Owl cameras, updating the firmware regularly is essential. Outdated firmware can lead to frustrating connection issues, so taking the time to guarantee your system is current is vital. Here are some steps to help you out:
- Check for Updates: Regularly look for firmware updates to enhance security and functionality.
- Enable Automatic Updates: If your system allows it, turn on automatic updates to minimize vulnerabilities and save time.
- Manual Updates: If automatic updates fail, access your DVR's settings menu to verify and install any available updates manually.
- Consult the User Guide: Always refer to your user guide for detailed instructions on performing firmware updates to avoid potential mishaps.
Remote Access Setup
To set up remote access for your Night Owl cameras, you'll need to guarantee your DVR is connected to the internet and download the Night Owl Protect app on your mobile device. Once you've got the app, verify your internet connection and create an account to start monitoring your camera feeds. With everything in place, you can easily manage your security setup from anywhere.
Mobile App Configuration
Setting up remote access for your Night Owl cameras through the mobile app is a straightforward process that opens up a world of convenience. With the Night Owl Protect App, you can keep an eye on your property from anywhere. Here's how to get started with the CMS download and setup:
- Download the App: Find the Night Owl Protect App in the App Store or Google Play and install it on your device.
- Create an Account: Either create a new account or log in with your existing credentials to link your devices seamlessly.
- Enter Admin Password: During setup, you might need to enter your DVR's admin password to add and manage your cameras effectively.
- Enjoy Remote Access: After logging in, you can access live views, playback recordings, and receive notifications about system activity from wherever you are.
To guarantee peak performance, don't forget to regularly check for app updates. This keeps your Night Owl Protect App equipped with the latest features and security enhancements, giving you the freedom to monitor your space effortlessly.
Internet Connection Verification
Before you can enjoy remote access to your Night Owl cameras, it's essential to verify your internet connection. First, make sure your DVR is powered on and connected to your router or modem using an Ethernet cable. This step is important for getting the internet to view your camera feeds from anywhere.
Next, access the main menu on the DVR by pressing the Menu button on your remote. Navigate to the Network option, and within the Network Settings, select the Wired option. Here, confirm that both the Obtain IP Address and Obtain DNS settings are set to automatic. This configuration helps streamline your connectivity.
Now, it's time to conduct a network connection test. Select the Test option in the Network Settings. If everything's set up correctly, you should see a confirmation message indicating a successful connection.
Once you've confirmed that your DVR is connected to the internet, you're all set for remote access through the Night Owl Protect app or website. Enjoy the freedom of monitoring your property from anywhere!
Firmware Updates and Resources
Keeping your Night Owl cameras running smoothly requires staying up-to-date with firmware updates, which are designed to enhance performance and security. By regularly updating your firmware, you're not only boosting your system's efficiency but also protecting it from vulnerabilities. Automatic firmware updates are enabled by default, but it's wise to check for manual updates if you suspect they haven't occurred.
Here's how you can guarantee your firmware's up-to-date:
- Navigate to Network Settings: Access your DVR's menu.
- Select Firmware Updates: Find the option for firmware updates within the settings.
- Check for Updates: Follow the prompts to see if there's a newer firmware version available.
- Refer to Resources: For detailed instructions, consult the User Guide on the Night Owl website or within the Night Owl Protect app.
Frequently Asked Questions
How to Pair Night Owl Wireless Camera?
To pair your Night Owl wireless camera, first, make sure it's powered on and close to the DVR. Grab your remote, access the main menu, and look for "Camera" or "Device Settings." Select "Add Camera," and let the DVR search for nearby cameras. Once detected, follow the prompts to complete the pairing, entering any necessary codes. After that, adjust the camera's angle for ideal surveillance. You've got this!
Why Are My Night Owl Cameras Not Connecting?
It's frustrating when your Night Owl cameras won't connect, especially when you just want peace of mind. First, check if all the cables are securely connected to the DVR; loose ones can ruin your setup. Make certain the DVR's powered on and connected to the internet. Don't forget to verify your login credentials and check for firmware updates. Finally, adjust the camera settings to guarantee they're aligned and detecting motion properly.
How Do I Connect Night Owl DVR to Internet?
To connect your Night Owl DVR to the internet, you'll want to start by ensuring it's powered on and plugged into your router with an Ethernet cable. Use the DVR remote to press the Menu button, navigate to Network settings, and select Wired. Choose to automatically obtain an IP address and DNS settings. Finally, run the Test option to confirm your connection. If successful, you're all set to enjoy your surveillance system!
Will Night Owl Cameras Work Without Wifi?
Yes, Night Owl cameras can work without Wi-Fi. They connect directly to a DVR via wired connections, allowing you to monitor your space without needing an internet connection. However, if you want to access your camera feeds remotely or use the Night Owl Protect app, you'll need Wi-Fi. Make sure your cameras are properly installed and powered for best performance, especially for night vision capabilities, regardless of your internet status.