To fix your CCTV camera not working at night, start by checking the power supply and ensuring it’s stable. Inspect all cable connections for any damages and clean the camera lens for clearer night vision. Make sure the infrared LEDs are functioning properly and adjust the camera’s exposure and brightness settings. Place the camera at an ideal height between 8 to 10 feet and avoid any obstructions. Updating the firmware can also help resolve night vision issues. If problems persist, try testing with a different camera or consult the manufacturer for support. Let’s explore more to get your camera back to working perfectly at night.
Check Power Supply
The first thing you should do is confirm that your CCTV camera has a stable power supply. A consistent power source is vital for your camera to function properly, especially at night. If your power supply is unreliable, your camera might not capture those important nighttime moments.
Power fluctuations and electrical surges can cause intermittent power loss, which can make your camera go offline or, worse, damage it permanently. You don’t want to miss out on essential footage because of something as simple as an unstable power source. So, make sure your camera is connected to a reliable power outlet.
Using a surge protector can also be a smart move. Electrical surges, often caused by lightning or unstable power grids, can fry your equipment in an instant. A surge protector will shield your camera from these sudden spikes in electricity, ensuring it stays operational when you need it most.
Inspect Cable Connections
When inspecting cable connections, start by ensuring they’re firmly plugged into both the camera and the recorder. Loose connections can disrupt the power supply and affect the signal integrity. Make sure there are no visible damages or frays in the cables that could cause issues.
Check Power Supply
Ensuring your CCTV camera’s power supply is stable starts with inspecting cable connections for any signs of wear or damage. Power fluctuations can wreak havoc on your camera’s performance, especially at night. Check the power adapters to make sure they’re functioning correctly and delivering a consistent power flow to your device.
Take a look at the table below to understand the emotional impact of neglecting versus maintaining your CCTV power supply:
| Neglected Power Supply | Maintained Power Supply |
|---|---|
| Frustration from outages | Peace of mind |
| Increased vulnerability | Enhanced security |
| Unreliable footage | Clear night vision |
| Costly repairs | Long-term savings |
By ensuring your power connections are solid, you’re taking control of your security and gaining the freedom to feel safe in your own space. Inspect the power cables for any kinks, frays, or disconnections. Sometimes, it’s as simple as replacing a worn-out cable or tightening a loose connection.
Don’t overlook the power adapters; a faulty one can cause intermittent power loss. Swap it out with a reliable adapter and see if it makes a difference. Checking these elements can drastically improve your camera’s nighttime performance, making your home a fortress of security.
Verify Signal Integrity
For peak performance, make sure to inspect your CCTV camera’s cable connections regularly to verify signal integrity. Faulty or loose connections can lead to signal degradation, causing your camera to malfunction, especially at night when you need it most. Here’s how you can maintain your system and guarantee it’s always up to par:
- Check for Physical Damage: Inspect the entire length of the cable for any signs of wear and tear. Cuts or frays can lead to signal degradation.
- Secure Connections: Ensure all connectors are tightly fastened. Loose connections can introduce interference sources that disrupt the signal.
- Test for Interference: Surrounding electronic devices or high-voltage cables can cause interference. Keep your CCTV cables away from these types of equipment.
- Use Quality Cables: Invest in high-quality, shielded cables designed to minimize signal loss and interference. This is essential for maintaining a clear signal, especially during nighttime.
Clean Camera Lens
To improve your CCTV camera‘s night vision, start by cleaning the camera lens thoroughly. Over time, dirt and grime can accumulate on the lens, greatly impairing its performance. Regular lens cleaning is essential for maintaining clear footage, especially in low-light conditions. Grab a microfiber cloth, some lens cleaner, and gently wipe the surface. You’ll be amazed at how much a clean lens can enhance the camera’s clarity.
Dirt removal might seem like a vital task, but it’s important. Dust, smudges, and fingerprints can all obstruct the camera’s view, making night-time footage blurry or dark. Remember, freedom to roam and explore your surroundings safely starts with a well-maintained surveillance system. By keeping your CCTV camera lens clean, you’re ensuring it captures every detail, even in the dead of night.
Don’t underestimate the power of a spotless lens. Cleaning it regularly not only boosts night vision but also extends the life of your camera. If you want your security system to work at its best, make lens cleaning a habit. It’s a small step that offers big rewards, ensuring your night-time footage is always crisp and clear.
Assess Infrared LEDs
After confirming your camera lens is spotless, the next step is to evaluate the functionality of the infrared LEDs. These LEDs are essential for night vision, and if they’re not working properly, your camera’s performance in low-light conditions will be compromised. Here’s how you can check your infrared LEDs effectively:
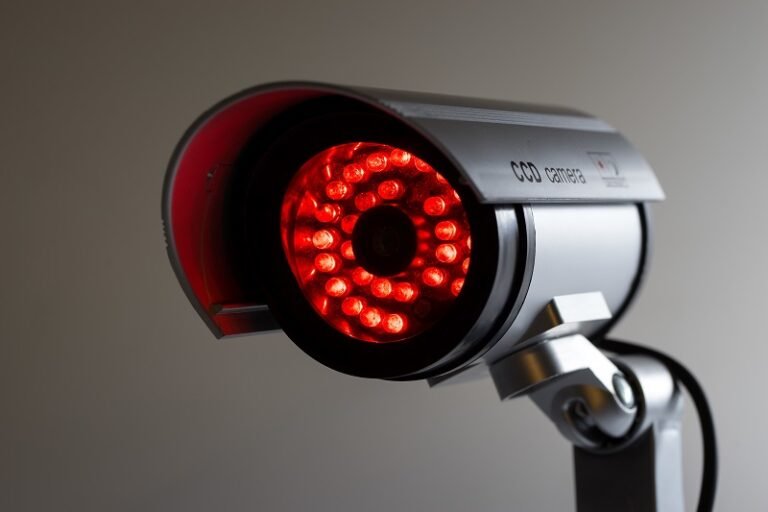
- Visual Inspection: Start by looking at the LEDs themselves. When it’s dark, they should emit a faint red glow. If they’re not glowing, they might be burnt out. LED lifespan varies, so they might need replacement.
- Infrared Range Test: Check the infrared range by placing an object at various distances from the camera at night. If the object isn’t visible or appears blurry at expected ranges, your LEDs may not be providing adequate illumination.
- Multimeter Check: Use a multimeter to check the voltage across the LEDs. A significant drop in voltage could indicate a problem.
- Environmental Factors: Ensure there are no obstructions or reflective surfaces near the camera that could interfere with the infrared light. Sometimes, the issue isn’t with the LEDs themselves but with how the light disperses.
These steps should help you identify any issues with your camera’s infrared LEDs and get your night vision back on track.
Adjust Camera Settings
Adjusting your camera settings can greatly enhance its night-time performance. When your CCTV isn’t capturing clear images at night, tweaking the exposure settings and brightness adjustment can make a significant difference. These settings allow you to control how much light the camera sensor absorbs, which is important in low-light conditions.
Start by accessing your camera’s settings menu. Look for options related to exposure settings. Increasing the exposure time lets more light hit the sensor, making dark scenes appear brighter. However, too much exposure can lead to blurry images if there’s any movement, so find a balance that works best for your environment.
Next, focus on brightness adjustment. Boosting the brightness can help make the details in darker areas more visible, but overdoing it can wash out the image. Adjust the brightness incrementally, checking the live feed to make sure you’re enhancing visibility without compromising the overall image quality.
Don’t forget to save your settings after making changes. By taking control of these adjustments, you’re not only improving your camera’s night vision but also making sure your security setup works effectively around the clock. With the right tweaks, your CCTV can perform efficiently even when the sun goes down.
Verify Camera Placement
To guarantee your CCTV camera works properly at night, you’ll need to check its placement. Make sure it’s mounted at a perfect height, free from obstructions, and adjusted to the right angle. These steps can greatly enhance the night-time performance of your camera.
Optimal Mounting Height
Guaranteeing your CCTV camera is mounted at the ideal height is crucial for capturing clear footage, especially during nighttime. You want to make sure the camera angle and mounting surface are optimized to get the best possible view. Here are some tips to help you achieve the perfect setup:
- Height Matters: Mount your camera between 8 to 10 feet off the ground. This height is high enough to avoid tampering but low enough to capture faces and details clearly.
- Optimal Camera Angle: Adjust the camera angle so it’s slightly downward. This minimizes glare from lights and improves the camera’s ability to capture critical details at night.
- Stable Mounting Surface: Ensure the mounting surface is sturdy and secure. A shaky or unstable mount can lead to blurry footage, especially in windy conditions.
- Test and Adjust: After mounting, test the camera’s nighttime performance. Walk through the camera’s field of view to see if it captures you clearly. Make adjustments as needed to ensure the best image quality.
Avoid Obstructions
Make sure nothing blocks your CCTV camera’s view to maintain clear and unobstructed footage at night. Freedom to move without worry requires vigilance, and that means ensuring your camera’s view isn’t compromised by tree branches or other obstacles. Tree branches can sway with the wind and obscure the camera lens, creating blind spots and making it harder to capture important details. Trim back any overgrown foliage that might interfere with your camera’s line of sight.
Another common issue is window glare. If your camera is positioned behind a window, light reflections can greatly reduce visibility, especially at night. You want to be free from the frustration of poor-quality footage, so be sure the camera is positioned to minimize or eliminate glare. Consider relocating the camera or using anti-glare film to maintain clarity.
Lastly, walk around your property to identify any potential obstructions. You might notice things like hanging decorations, outdoor furniture, or even seasonal items that could block the camera’s view. By taking the time to verify your camera placement, you’re ensuring that it captures essential details when you need them most, without any annoying obstructions.
Proper Angle Adjustment
After addressing obstructions, it’s vital to make sure your CCTV camera is angled correctly to capture the desired field of view. Proper camera positioning and angle calibration can make a significant difference in nighttime footage quality. Here’s how you can get it right:
- Elevation Check: Confirm your camera is mounted at an ideal height. Too high or too low can miss critical details. Aim for positioning it around 8-10 feet off the ground for a balanced perspective.
- Field of View: Angle your camera to cover the intended area without blind spots. A slight downward tilt can help in illuminating the ground, maximizing the reach of the infrared lights during nighttime.
- Avoid Direct Light: Position your camera away from direct light sources like street lamps or porch lights. Glare can cause overexposure and make it hard to see details at night.
- Test Angles: Once mounted, test different angles. Have someone walk through the area while you watch the feed. Adjust as needed to ensure no areas are left in the dark.
Update Firmware
Updating your CCTV camera’s firmware can often resolve night vision issues and improve overall performance. Firmware updates aren’t just about adding new features; they are vital for addressing security vulnerabilities and delivering performance enhancements. By keeping your firmware updated, you guarantee your camera operates smoothly and securely, minimizing the risk of intrusions and glitches.
First, check the manufacturer’s website or the camera’s settings menu for available firmware updates. Download the latest version and follow the provided instructions to install it. Remember, updating the firmware is a straightforward process, but it is important to follow the steps carefully to avoid any issues.
Don’t let outdated firmware hold your camera back. Embrace the freedom of knowing your security system is up-to-date and functioning at its best, even at night. An updated system not only enhances night vision but also ensures your camera is equipped to fend off potential security threats.
Stay proactive and make firmware updates a regular part of your maintenance routine. It’s a small task that can make a big difference in your camera’s performance and reliability, giving you peace of mind and the freedom to focus on what matters most.
Test With Different Camera
When firmware updates don’t resolve the issue, testing with a different camera can help identify if the problem lies with the original device. Swapping out your current camera for another one is a straightforward way to check for hardware issues without getting too technical. Plus, it can give you peace of mind knowing whether the problem is with the camera itself or something else.
Here’s a simple step-by-step guide to help you:
- Choose a Compatible Camera: Make sure the camera you’re testing with is compatible with your existing system. Camera compatibility is essential to make sure a seamless test.
- Test Different Models: If possible, use a couple of different models to see if the issue persists. This can help you pinpoint if it’s a specific model that’s causing the problem.
- Check Night Vision Features: Ensure the replacement camera has night vision capabilities. This is vital to identify whether the night vision function is faulty.
- Monitor Performance: After setting up the new camera, monitor its performance at night over a few days. This will give you a clear indication of where the issue lies.
Consult Manufacturer Support
Contacting the manufacturer’s support team can provide expert guidance and potential solutions for your CCTV camera’s night vision issues. When freedom and security are paramount, you can’t afford to have your surveillance system compromised. Manufacturer support teams are well-versed in the ins and outs of their products and can often diagnose problems you might overlook.
Your first step should be to gather all relevant information, including the camera model, purchase date, and any troubleshooting steps you’ve already taken. This will streamline the process when you reach out. If your camera is still under warranty, you might be eligible for a warranty claim. This could save you the cost of replacement parts or even a new camera.
Don’t forget to ask for any technical documentation that might help you better understand your device. Sometimes, a detailed manual or a troubleshooting guide can provide the insight you need to fix the issue yourself. Remember, the goal is to regain control over your security setup as quickly and efficiently as possible. So, don’t hesitate to leverage the expertise of the manufacturer’s support team to keep your night vision running smoothly.
Frequently Asked Questions
How Can I Improve the Night Vision Range of My CCTV Camera?
To improve your CCTV’s night vision range, consider adding infrared illuminators for better visibility. You can also upgrade the lens to capture more detail. You’ll gain the freedom to monitor your space effectively, even in the dark.
Are There Specific Weather Conditions That Affect Night Vision Performance?
Just like fog obscures a mountaintop, weather conditions can affect your CCTV’s night vision. Infrared interference and lens condensation during fog, rain, or snow can reduce clarity. Keep your camera dry and clean for freedom from visibility issues.
What Are the Best Types of CCTV Cameras for Low-Light Conditions?
For low-light conditions, you’ll want CCTV cameras with high infrared sensitivity and low light lenses. These attributes guarantee clear footage even in the dark, providing you with the freedom to monitor your property without worry.
Can External Lighting Improve the Effectiveness of My CCTV at Night?
Absolutely, external lighting can enhance your CCTV’s effectiveness at night. Adding ambient illumination or motion sensors guarantees clearer footage and reduces reliance on camera IR. You’ll have more freedom to monitor your property confidently.
How Do I Know if My Camera’s Night Vision Is Failing Due to Aging Components?
Imagine your camera’s night vision gradually dimming. This could be due to infrared degradation or the component lifespan ending. If you notice a decline in clarity, it’s time to check for aging components and consider replacements.


