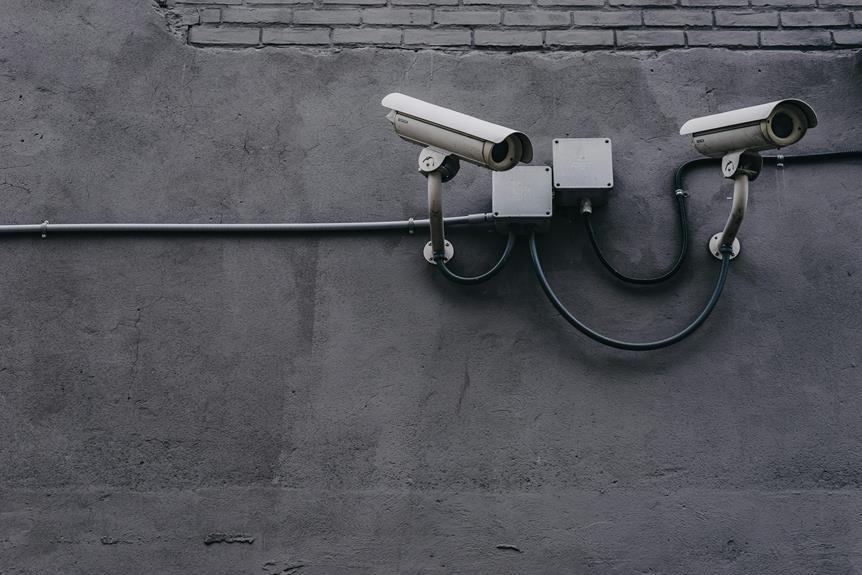
To fix a CCTV camera on your wall, start by gathering essential tools like a drill, stud finder, and screwdrivers. Choose a high-traffic zone and mark drill points accurately. Drill holes at the marked points, then mount the bracket using screws and wall anchors. Secure the camera to the bracket, making sure it’s stable and level. Connect the power, tidy up cables, and test the camera to verify it’s working correctly. Clean the lens and optimize settings for clear image quality. Follow these steps, and you’ll have your camera up in no time, with more tips just ahead.
1) Gather Your Tools
Before you get started, make sure you’ve gathered all the necessary tools for the job. You don’t want to interrupt your flow by hunting down a missing screwdriver halfway through. The key tool types you’ll need include a drill, various drill bits, screwdrivers, a stud finder, a level, and some screws or wall anchors.
A drill is essential for making holes in the wall, while the stud finder helps locate the best spots for secure mounting. Screwdrivers are a must for tightening screws, and the level ensures your CCTV camera isn’t crooked. Screws or wall anchors will secure the camera to the wall, providing stability.
Tool maintenance is important for a smooth process. Make sure your drill is fully charged or plugged in and that your bits aren’t worn out. Clean your tools before starting to avoid any hiccups. A well-maintained tool can make a world of difference, giving you the freedom to focus on the task rather than dealing with malfunctioning equipment.
2) Choose the Location
Now that you’ve gathered your tools, it’s time to choose the best location for mounting your CCTV camera. Freedom to monitor your space without worry hinges on picking the right spot. Start by considering the areas you want to cover. High-traffic zones like entrances, driveways, or backyards are prime candidates.
Don’t forget weather considerations. Make sure the spot you choose can withstand the elements. If your camera isn’t weatherproof, you might need to place it under an eave or other protective structure to shield it from rain, snow, and direct sunlight. This’ll extend the life of your equipment and ensure it performs optimally.
Next, think about the ideal height. Mounting your camera too low makes it accessible to tampering, while placing it too high might limit its view. Aim for an installation height of around 8 to 10 feet. This height is generally high enough to deter vandalism and low enough to capture clear images.
3) Mark the Drill Points
Carefully measure and mark the drill points to guarantee your camera is securely mounted and properly aligned. It’s all about precision and making sure you get it right the first time, so you’ve got the freedom to enjoy your security setup without constant adjustments. Start by using a measuring tape to determine the exact height and placement where your camera will be mounted. This ensures the best angle for ideal coverage.
Hold the camera bracket against the wall at the chosen spot. With your measuring tape, double-check that it’s level and in the desired position. Once you’re confident it’s perfect, mark the drill points through the bracket’s mounting holes with pencil marks. This step is important—those pencil marks will be your guide for the next steps, so make them clear and accurate.
Taking your time with this part saves you from potential headaches down the line. Misaligned drill points can throw off your entire setup, so don’t rush. With everything measured and marked, you’re all set for the next step in this straightforward process, feeling secure and ready to proceed.
4) Drill the Holes
With your drill in hand, align it with the pencil marks you made earlier. Make sure you’re wearing your safety gear, including goggles and gloves. Safety first, right? You don’t want any debris flying into your eyes or getting splinters.
Before you start drilling, make certain you’ve selected the correct drill bit for your wall type. Using the wrong bit can ruin your wall and waste your time. Hold the drill steady and apply gentle pressure. Here’s a quick reference table to guide you through the drilling technique:
| Wall Type | Drill Bit Type | Recommended Speed Setting |
|---|---|---|
| Drywall | Standard Twist Bit | Medium |
| Concrete | Masonry Bit | High |
| Brick | Masonry Bit | High |
| Wood | Spade Bit | Low |
| Tile | Carbide-Tipped Bit | Low |
While drilling, keep the drill perpendicular to the wall to avoid angled holes, which could complicate mounting. Don’t rush—let the drill do the work. If you encounter resistance, stop and check if you’re using the right bit.
Once you’ve drilled all the holes, clean up the dust and debris. You’re now ready for the next vital step. Always remember, preparation and precision lead to a secure installation.
5) Mount the Bracket
Having drilled the necessary holes, it’s time to secure the bracket to the wall. First, familiarize yourself with the different bracket types and mounting options. Depending on your choice, it could be a fixed bracket, which offers stability, or an adjustable one, giving you the freedom to change the camera angle later. Make sure your chosen bracket matches the mounting holes you’ve drilled.
Now, hold the bracket against the wall, aligning it with the holes. Insert the screws through the bracket and into the wall anchors. If you’re using a fixed bracket, make sure it’s perfectly level before tightening the screws. For an adjustable bracket, you might have a bit more flexibility. Use a screwdriver or a drill to secure the screws firmly. Don’t overtighten them; just make sure the bracket is snug and stable.
Double-check that the bracket is secure by giving it a gentle tug. It shouldn’t wobble or feel loose. This step is important to ensure the camera remains stable and captures clear footage. Congratulations, you’ve completed the bracket installation! Now, you’re one step closer to enjoying the peace of mind that comes with a well-secured CCTV system.
6) Attach the Camera
Now that the bracket is securely mounted, you can attach the camera to it. Carefully align the camera with the bracket and use the screws provided to fasten it in place. Make sure the camera is firmly attached to avoid any movement or vibrations that could affect the footage.
Next, let’s talk about cable management. You don’t want messy cables hanging everywhere; it disrupts the clean look and can be a tripping hazard. Use cable clips or ties to neatly secure the cables along the wall or ceiling. If you’re routing cables through a wall, ensure all holes are properly sealed to maintain the integrity of your home’s insulation and weather protection.
Speaking of weather protection, if your camera is installed outdoors, confirm it’s built to withstand the elements. Check that your camera is weatherproof and can handle rain, snow, and extreme temperatures. Additionally, you might want to consider a protective housing that offers extra shielding against harsh weather conditions.
7) Connect and Test
Now that your camera is mounted, it’s time to connect the wiring and make sure the power setup is correct. Once everything is connected, check the image quality to confirm that the camera is capturing clear footage. This step is essential for the overall effectiveness of your CCTV system.
Wiring and Power Setup
To guarantee your CCTV camera is operational, you’ll need to properly connect the wiring and set up the power supply. Start by consulting the wiring diagram included with your camera. This diagram will guide you on how to connect the power supply and other components.
Once you’ve identified the connections, use the appropriate cables to link your camera to the power source. Here’s a quick reference table to help you keep track of the essential steps:
| Step | Description | Tools Needed |
|---|---|---|
| 1 | Identify power supply connections | Wiring diagram, multimeter |
| 2 | Connect cables to power source | Screwdriver, electrical tape |
| 3 | Test connections for functionality | Multimeter, patience |
After you’ve connected the power supply, plug in the camera and turn it on. If everything is wired correctly, the camera should power up. Use a multimeter to check the voltage and ensure it’s within the required range. Don’t forget to secure any loose cables with electrical tape to prevent accidents.
Image Quality Check
Once your camera is powered up, it’s important to check the image quality to make sure it meets your surveillance needs. Start by connecting the camera to your monitoring system or computer. You’ll want to guarantee every detail is crystal clear for maximum security.
First, perform a lens cleaning. Dust or smudges can greatly degrade image quality. Use a microfiber cloth to gently wipe the lens, ensuring it’s spotless. Next, delve into the resolution settings. Adjust these settings to their highest possible level for the clearest image. Higher resolution means more detailed footage, which can be vital in identifying faces or license plates.
Now, check the camera’s field of view. Position it to capture the most critical areas. Move around the space to ensure there are no blind spots. Finally, test the camera in various lighting conditions. Ensure it performs well in both daylight and low-light scenarios.
Here’s a quick checklist to keep your image quality top-notch:
- Sparkling Clean Lens: Make sure no dust or smudges.
- Optimal Resolution Settings: Always aim for the highest resolution.
- Perfect Field of View: Cover all crucial areas.
- Effective Lighting: Test in different lighting conditions.
Frequently Asked Questions
How Do I Ensure My CCTV Camera Is Weatherproof?
Oh, you really expect your CCTV to survive a downpour? Make sure it’s in a weatherproof enclosure and don’t forget to seal those gaps. Freedom’s great, but your camera’s not built for extreme weather adventures!
What Should I Do if My Camera Loses Power Frequently?
If your camera loses power frequently, check the power cables for damage and make sure they’re properly connected. Power surges can also be an issue, so consider using a surge protector to safeguard your freedom of surveillance.
Are There Legal Considerations for Installing CCTV Cameras?
Finding your way through the legal maze is essential—consider property rights and privacy laws before installing CCTV cameras. You don’t want to step on anyone’s toes while protecting your castle. Make sure you’ve got the freedom to secure your home.
How Can I Prevent My Camera From Being Hacked?
To safeguard your camera from being hacked, prioritize network security and password management. Use strong, unique passwords and change them regularly. Guarantee your network’s security by using encryption and keeping your firmware updated.
What Is the Best Way to Maintain and Clean My CCTV Camera?
To maintain your CCTV camera, regularly clean the lens with a microfiber cloth for clear footage. For dust removal, use compressed air. Routine checks guarantee your camera’s working efficiently, giving you peace of mind and freedom.


