Having power issues with your Swann camera? First, verify the power adapter's output is 12V and matches the camera's amperage requirement (2A to 4A). Check the power connections for any damage and make sure they're secure. Use a multimeter to test the power output. Try a spare, known-good power supply to isolate the problem. If the camera isn't booting, look for a faulty connection, damaged adapter, or try a reset. Ensuring all cables and connectors are firm helps prevent intermittent failures. Keep exploring for more detailed steps and troubleshooting tips.
Identifying Power Supply Issues
When identifying power supply issues, it is crucial to first check that the power supply output rating matches the camera's requirements. Before diving into other troubleshooting steps, make sure the power adapter you're using delivers the correct voltage and amperage specified for your Swann camera. This prevents potential damage and avoids unnecessary confusion.
Next, closely inspect the power supply connection. Loose or damaged components can disrupt the power flow, causing erratic camera behavior. Look for frayed wires, bent pins, or any visible damage to the power adapter or its cable. If you spot any issues, addressing them might resolve the problem immediately.
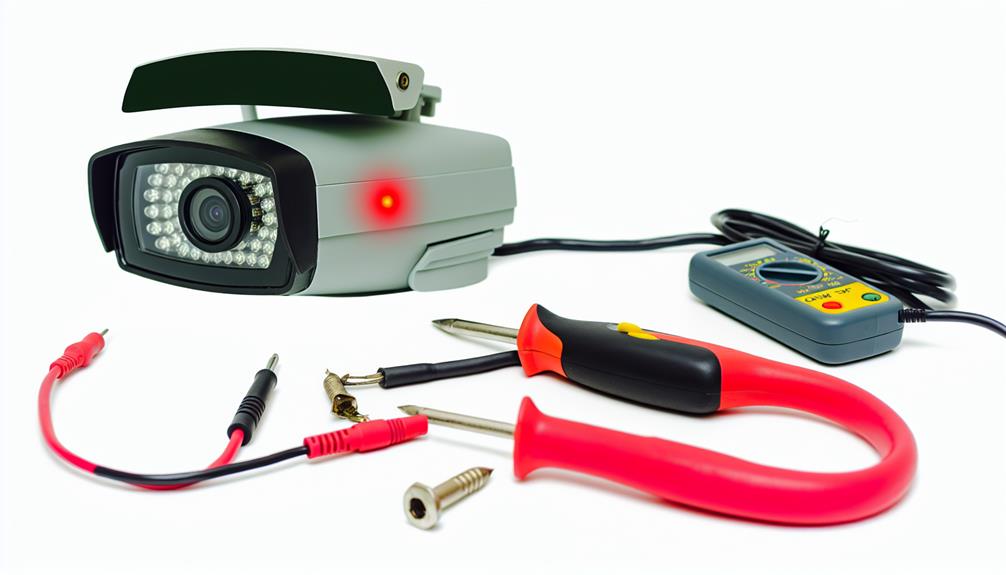
Using a multimeter, test the power supply to verify its voltage and current output. This step helps you confirm that the power adapter is functioning as expected. If the readings don't align with the camera's specifications, it's a clear indicator that the power adapter might be faulty.
To further isolate the problem, consider using a spare power supply. If the camera works with an alternative power adapter, then the original one is likely defective. Remember to consult the camera's manual for recommended power supply specifications to ensure accurate troubleshooting.
Checking Power Adapter Ratings
Start by verifying the power adapter's output voltage is precisely 12V, as Swann cameras usually require this specification. Incorrect voltage can lead to significant damage to your camera's internals. Additionally, the amperage rating should align with the camera's power requirements, typically ranging between 2A and 4A. If the adapter provides insufficient amperage, the camera won't function properly, and excess amperage could potentially overheat or damage the unit.
Here's a quick checklist to guide you:
- Voltage Verification: Confirm that the power adapter outputs precisely 12V.
- Amperage Alignment: Verify that the adapter's amperage rating matches the camera's requirements, usually between 2A and 4A.
- Test Spare Adapters: Use spare adapters with identical output ratings to troubleshoot power supply issues.
Ensuring Secure Connections
Ensuring securely connected power plugs is critical to preventing intermittent power failures in your Swann camera. Loose connections can disrupt the power supply, leading to potential malfunctions. Start by firmly inserting the power plug into the camera's power port. A loose fit can cause power interruptions, so make sure the connection is snug and stable.
Next, verify that you're using the correct power adapter. The adapter should match the camera's required output voltage. Using an incompatible adapter can lead to insufficient power, causing the camera to operate inconsistently or not at all.
If you suspect a connection issue, try swapping out the USB cable. Faulty cables can often be the culprit behind power problems. Test the suspected cable with other devices to see if they experience similar issues. This helps determine whether the problem lies with the cable or the camera itself.
Testing Power Adapters
After securing all connections, the next step is to verify the functionality of your power adapters to confirm they are supplying the correct voltage and amperage to your Swann camera. Checking that your power adapters are working correctly is essential for seamless operation of your Swann NVR system.
To test the power adapters, follow these steps:
- Measure Output Voltage and Amperage: Use a multimeter to check the output voltage and amperage of the power adapter. It must match the specifications mentioned in your Swann camera manual. Incorrect values can cause underperformance or damage.
- Test on a Compatible Device: Connect the power adapter to another device with similar power requirements to see if it functions properly. This helps determine if the adapter is faulty or if the issue lies with the camera.
- Check for Overheating: While testing, monitor the adapter for any signs of overheating. Lower amperage adapters can overheat and potentially harm both the adapter and the connected device.
Having spare, tested adapters on hand can prevent downtime and maintain continuous monitoring. Always use adapters that meet or exceed the required specifications to uphold the integrity and longevity of your Swann NVR system.
Troubleshooting Camera Power
When troubleshooting camera power issues, have you verified that the power supply connection to the wall socket or power strip is secure and providing adequate power? Securing a stable power connection is essential to avoid intermittent power failures. Next, confirm that each camera is properly connected to the recorder's signal inputs for both power and video transmission.
To systematically identify the problem, test different cameras on all available ports. This can help you determine if an issue lies with a specific port or camera. Additionally, make sure you're using only one splitter per power supply to prevent overloading and guarantee proper power distribution.
Here's a quick reference table to guide you through the troubleshooting process:
| Step | Action |
|---|---|
| 1. | Verify power supply connection |
| 2. | Check camera connections to recorder |
| 3. | Test cameras on different ports |
| 4. | Use only one splitter per power supply |
| 5. | Ensure all connections are secure and seated |
Addressing Boot Failures
Identifying boot failures in Swann cameras often starts with checking if the LED indicator remains off, suggesting a lack of power or a deeper issue within the boot process. When your camera doesn't power up, it's important to follow a structured troubleshooting approach to pinpoint the problem accurately.
First, make sure that the power supply is functioning correctly. If the camera has a power button, press it to see if the LED indicator responds. No response might indicate a boot failure. Here's a detailed process:
- Verify Power Source: Confirm that the outlet and power adapter provide adequate power. Swap adapters if necessary to rule out a faulty adapter.
- Inspect Power Connection: Examine the power cord for any visible damage. Sometimes, a loose connection or frayed wire can cause boot failures.
- Reset the Camera: Some Swann cameras come with a reset button. Holding this button for a specified time can sometimes resolve boot issues by restoring factory settings.
Evaluating Potential Defects
To effectively evaluate potential defects in your Swann camera's power supply, start by meticulously checking for any loose connections, faulty adapters, or damaged cables that could be disrupting the power flow. Verify every plug is securely connected and inspect cables for any visible fraying or cuts. If you find any damage, replace the component immediately.
Next, verify the output rating of your power adapter. This value, typically found on the adapter's label, should match your camera's power requirements. An incorrect output rating can lead to insufficient power supply, causing the camera to malfunction.
Test different power sources to rule out a defective outlet. Plug the camera into a different socket or use an alternative adapter with the correct output rating. If the camera powers up, the issue likely lies with the original power source or adapter.
Examining the power supply unit for signs of physical damage is essential. Look for burn marks, unusual odors, or any other indications of wear. These symptoms can signal internal issues that might not be immediately visible.
Seeking Professional Help
Consulting a professional technician becomes necessary if DIY troubleshooting steps fail to resolve power supply issues with your Swann camera. When you're at this point, seeking assistance from a qualified technician or a dedicated service center is the next logical step. Here's why:
- Expert Diagnosis: Professional technicians have the expertise to accurately diagnose the root cause of power failures in your Swann camera. They can pinpoint issues that might not be evident during a DIY inspection.
- Specialized Solutions: Professionals are equipped with the right tools and knowledge to provide expert solutions. They can effectively address complex power supply problems that you might struggle with on your own.
- Time and Effort Saving: By turning to a professional, you save valuable time and effort. Instead of spending hours troubleshooting, a technician can quickly and efficiently fix the issue, allowing you to return to your regular activities.
Ensure the technician you consult has experience specifically with Swann camera systems. Their specialized knowledge will be essential in resolving your power supply issues efficiently. Seeking professional help can ultimately provide peace of mind and restore your Swann camera's functionality without unnecessary hassle.
Frequently Asked Questions
Why Is My Swann Camera Not Powering Up?
Just like Sherlock solving a mystery, start your troubleshooting steps by checking the power supply connection and ensuring it's secure. Verify the cable's in the correct port, test the power supply, and inspect splitters.
How Do I Fix My Swann Security Camera?
To fix your Swann security camera, check for a power outage, make sure all connections are tight, and test different cameras on all ports. Verify power indicators and consider a defective main unit if issues persist.
Where Is the Reset Button on Swann?
The reset button's location on Swann cameras is typically near the power port or on the camera body. You'll find a small, recessed button that you can press with a paperclip to restore default settings.
What Voltage Is the Swann Camera Power Supply?
The Swann camera power supply's voltage requirements are 12 volts. You need to confirm you're using a 12V power supply to avoid damaging your cameras and to maintain their proper functioning. Always verify the correct voltage output.


