To install your Dahua IP camera, start by gathering your tools, including a screwdriver and an Ethernet cable. Choose a location with a clear view and little obstruction, ideally high up for better security. Next, connect the power supply to the camera and mount it securely. For network connection, either plug in an Ethernet cable or set up Wi-Fi by entering your network password. Once connected, access the camera's interface through its IP address to configure settings like user accounts and notifications. With each step, you'll fine-tune it for peak performance and security, and there's even more to discover!
Gather Necessary Tools
Before diving into the installation process, you'll want to gather all the necessary tools to make the job easier. Having everything on hand not only saves time but also keeps the flow of your installation smooth. You're aiming for freedom in your setup, so let's make certain you're well-prepped.
First off, you'll need a screwdriver set—both Phillips and flathead types are important. This will allow you to secure the camera and any mounting brackets. A drill with the appropriate drill bits is also essential, especially if you're working with tough materials like concrete. Depending on your setup, you might also want to grab a level to make certain your camera's mounted straight.
Don't forget about network cables; a Cat5e or Cat6 cable is ideal for connecting your IP camera to your router. If you're planning to go wireless, make certain you have a good Wi-Fi connection and any necessary adapters. You might also consider a power drill, if your camera requires a power source, along with extension cords if the outlet is far away.
Lastly, wireless cameras often come with installation guides, so having a pair of scissors to cut through packaging makes sense. If you're feeling particularly adventurous, a cable management kit can help keep everything tidy, giving you that clean, unobtrusive look. With these tools ready to go, you'll be well on your way to setting up your Dahua IP camera and enjoying the freedom of enhanced security.
Choose Camera Location
When selecting the location for your Dahua IP camera, it's important to evaluate both visibility and coverage. You want to make certain the camera can capture clear images without obstructions. Think about the areas you want to monitor—entry points, driveways, or backyards are usually ideal spots. The more angles you cover, the better the security you'll have.
Consider mounting your camera higher up, as this can deter potential intruders while also expanding your field of view. However, make sure it's still accessible for maintenance and adjustments. Avoid placing it too close to trees or other objects that could block the view or trigger false alarms due to moving branches.
Lighting is another significant factor. Cameras perform best in well-lit areas, so if you've got a dark corner, you might want to install additional lighting or choose a camera with night vision capabilities.
Also, think about your privacy. While you want to monitor your property effectively, be mindful not to invade your neighbors' privacy or point the camera directly into their windows. It's all about striking the right balance.
Connect Power Supply
To get your Dahua IP camera up and running, connecting the power supply is essential. This step guarantees that your camera gets the juice it needs to operate effectively. You'll want to make certain you've got everything ready before you start.
First, gather your materials. Here's a quick checklist to guide you through connecting the power supply:
- Power Adapter: Confirm you have the correct power adapter for your camera model.
- Power Cable: Look for a reliable power cable that fits snugly into the adapter and the camera.
- Surge Protector: Consider using one to protect your camera from voltage spikes.
- Extension Cord: If your camera is far from the outlet, an extension cord can be handy.
- Mounting Bracket (if needed): Some setups require a bracket to secure the power cable.
Once you have everything, it's time to connect. Start by plugging the power adapter into a wall outlet or surge protector. Next, connect the power cable to the adapter and then to your camera. Make sure all connections are firm and secure. If your camera has a power indicator light, check to see if it lights up, signaling that power is flowing.
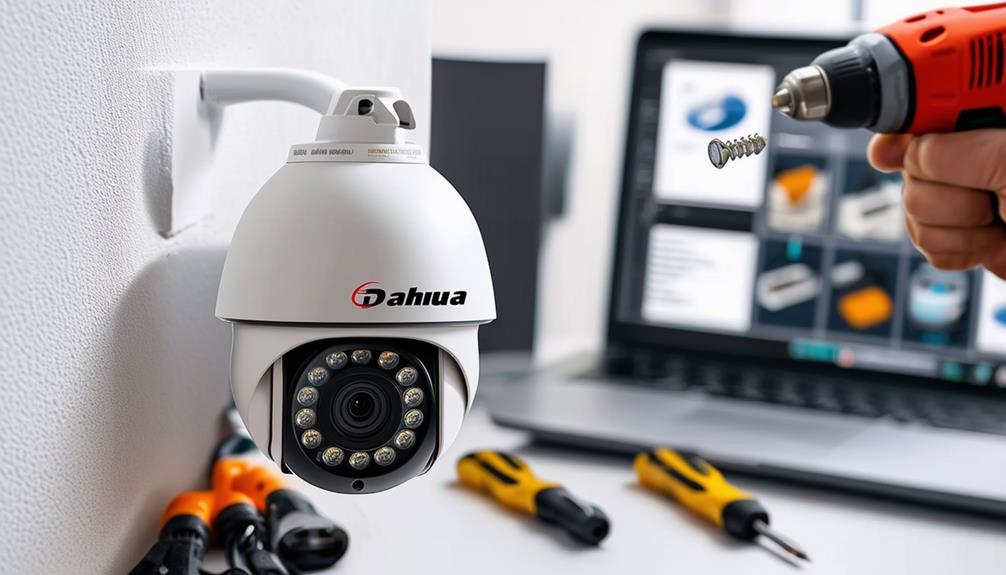
Mount the Camera
Mounting your Dahua IP camera securely is essential for prime performance and coverage. Before you begin, choose a location that provides a clear view of the area you want to monitor while considering potential obstructions like trees or buildings. Verify the spot is within reach of your power supply and conforms to your safety standards.
Start by marking the mounting holes on the wall or ceiling. Use a level to make sure your camera is straight, which helps avoid any awkward angles that could compromise image quality. Once you've marked the holes, drill them according to the size specified in the installation manual. If you're mounting on a hard surface like brick or concrete, use appropriate anchors to guarantee a secure hold.
Next, attach the camera's mounting bracket to the surface using screws. Tighten them firmly, but don't overtighten, as this may damage the bracket. Once the bracket is secure, you can attach the camera itself. Most Dahua cameras come with a quick-release feature, making this step easier. Adjust the camera's angle for peak coverage, taking a moment to double-check the view before finalizing the installation.
Connect to Network
Now that your camera is mounted, it's time to connect it to your network. You can choose between a wired connection setup or configuring it for a wireless network, depending on your needs. Don't forget to assign an IP address to guarantee your camera communicates effectively with your network.
Wired Connection Setup
Setting up a wired connection for your Dahua IP camera is an essential step to guarantee stable and reliable performance. A wired connection not only enhances security but also eliminates the frustrations that come with wireless interference. Here's how to do it right:
- Choose the right Ethernet cable: Use a CAT5e or CAT6 cable for peak performance.
- Connect to your router or switch: Plug one end of the Ethernet cable into the camera and the other into your network device.
- Power up the camera: Verify your camera is receiving power, either via PoE (Power over Ethernet) or a power adapter.
- Check the camera's IP address: Use your network's management software to find the IP address assigned to your camera.
- Configure camera settings: Access the camera's web interface through a browser using its IP address and set it up according to your preferences.
Wireless Network Configuration
Establishing a wireless connection for your Dahua IP camera is essential for flexibility in camera placement and ease of installation. To get started, make sure your camera is powered on and within range of your Wi-Fi network. You'll need access to your network settings, either through the camera's app or web interface.
First, connect to your camera using a temporary wired connection if necessary. Navigate to the wireless settings section. Here, you'll see a list of available networks. Select your Wi-Fi network and enter the password when prompted. Make sure to double-check for typos, as any mistake can prevent the camera from connecting.
Once you've entered the password, save the settings and disconnect the wired connection if applicable. Your camera will reboot to establish the wireless connection. After a few moments, you can reconnect to your Wi-Fi and check if your camera is online.
IP Address Assignment
After configuring your wireless settings, the next step involves assigning an IP address to your Dahua IP camera to secure it connects seamlessly to your network. This process is essential because an IP address allows your camera to communicate with other devices securely. Here's how to do it:
- Access the camera's web interface: Use a web browser and enter the camera's default IP address.
- Log in with default credentials: Typically, the username is "admin" and the password is "admin" or blank. Change these for security.
- Navigate to the network settings: Look for an option labeled "Network" or "IP Configuration."
- Assign a static IP address: Choose an address that fits within your network range, making sure it doesn't conflict with other devices.
- Save and reboot: Apply your changes and restart the camera to make sure the new settings take effect.
Once you've assigned the IP address, your Dahua IP camera will be ready to join your network. Enjoy the freedom of monitoring your space with confidence, knowing your camera is set up properly!
Configure Camera Settings
Now that your Dahua IP camera is connected to the network, it's time to configure the camera settings. You'll start by accessing the camera interface, where you can adjust various video parameters to suit your needs. Getting these settings right will guarantee you capture the best possible footage.
Accessing Camera Interface
To effectively configure your Dahua IP camera settings, you'll first need to access its user interface through a web browser or dedicated software. Simply enter the camera's IP address in your browser's address bar, and you'll be prompted to log in. Use the admin credentials you set up during installation.
Once you're logged in, you'll find a range of settings at your disposal. Here are a few key areas you might want to explore:
- Network Settings: Adjust IP address, subnet mask, and gateway to guarantee connectivity.
- User Management: Create additional user accounts with varying access levels for better security.
- Time Settings: Set the correct time zone and synchronize with an NTP server.
- Notification Settings: Enable alerts for motion detection or system malfunctions.
- Firmware Update: Check for and install the latest firmware to keep your camera secure and functional.
Adjusting Video Parameters
When it comes to optimizing the image quality of your Dahua IP camera, adjusting the video parameters is essential. You wanna make sure that your footage is clear and meets your needs, whether you're monitoring your home or a business. Start by accessing the camera's settings through the web interface. This is where you'll find options to tweak various parameters.
First, adjust the resolution. Higher resolutions provide more detail, but they also require more bandwidth. Then, look at the frame rate. A higher frame rate results in smoother video, but again, it uses more data. You'll need to find a balance that suits your bandwidth limitations.
Next, consider the brightness and contrast settings. If your footage looks too dark or washed out, fine-tune these settings to enhance clarity. Don't forget about color settings—adjust saturation for true-to-life colors.
Lastly, explore features like WDR (Wide Dynamic Range), which can help in environments with varying light conditions. Once you've made your adjustments, save the settings and test your camera's performance. Enjoy the freedom of having a customized view that meets your specific requirements!
Test Camera Functionality
Testing the camera functionality is an essential step in verifying your Dahua IP camera is set up correctly. Once you've connected the camera and adjusted the video parameters, it's time to check if everything's working as it should. You want to make certain you have full control over your surveillance system, allowing you the freedom to monitor your space effectively.
Here's what to focus on during your tests:
- Image Quality: Verify the video feed is clear and sharp. Look for any blurriness or distortion.
- Live View: Access the live view through the app or web interface to confirm you can see the camera's feed in real-time.
- Motion Detection: If your camera has motion detection, test it by moving in front of the lens to see if it triggers alerts correctly.
- Night Vision: Check if the night vision feature works properly by testing the camera in low-light conditions.
- Audio Functionality: If your camera has two-way audio, test the microphone and speaker to verify clear communication.
After running these tests, you'll have a better understanding of your camera's capabilities. If you notice any issues, don't hesitate to troubleshoot or consult the manual. Remember, the goal is to feel secure and in control of your environment. Once you've confirmed everything's functioning smoothly, you can rest easy knowing your Dahua IP camera is ready to serve you.
Monitor and Maintain
Monitoring and maintaining your Dahua IP camera is vital for guaranteeing its longevity and effectiveness. To keep your camera functioning smoothly, start by regularly checking the video feed. Verify the image quality meets your expectations and that there are no obstructions blocking the lens. Dust and debris can accumulate over time, so a quick wipe with a soft cloth can make a big difference.
Next, don't forget to monitor the camera's firmware. Dahua often releases updates that enhance security and functionality. Setting up automatic updates can save you the hassle of manually checking for them, but it's still wise to periodically verify that you're running the latest version. If you notice any glitches or bugs, troubleshooting quickly can help prevent bigger issues down the line.
Another key aspect is checking your storage solution. Whether you're using an SD card or cloud storage, confirm there's enough space for recordings. Regularly reviewing and deleting old footage can help maintain peak performance.
Lastly, keep an eye on the network connection. A stable connection is essential for uninterrupted video streaming. If you experience connectivity issues, consider repositioning your router or camera to strengthen the signal.
Frequently Asked Questions
What Is the Warranty Period for Dahua IP Cameras?
When it comes to warranty periods for Dahua IP cameras, you'll typically find that they offer a standard warranty of three years. This covers manufacturing defects and issues that arise under normal use. It's important to keep your purchase receipt, as that'll help with any warranty claims. Make sure you read the specific terms and conditions, since they can vary by product model and region, offering you peace of mind with your investment.
Can I Use Dahua Cameras With Third-Party Software?
Absolutely, you can release the full potential of your Dahua cameras with third-party software! It's like giving your surveillance a new pair of wings. Many users find that integrating these cameras with various systems offers flexibility and enhances functionality, allowing you to customize your setup. Just make sure the software you choose supports the specific features of your Dahua camera, and you're good to go. Enjoy the freedom to monitor your space your way!
How Do I Reset a Dahua IP Camera to Factory Settings?
To reset your Dahua IP camera to factory settings, find the reset button, usually located on the camera's body. Press and hold it for about 10 seconds until you see the indicator light flash. Once it's reset, the camera will revert to its original settings, so you'll need to reconfigure it. Don't forget to back up any important settings or footage before you reset, just to be safe!
Are Dahua IP Cameras Weatherproof for Outdoor Use?
Dahua IP cameras are designed to withstand various weather conditions, with many models boasting an IP66 rating, meaning they're dust-tight and can handle heavy rain. In fact, studies show that surveillance systems can reduce crime rates by over 50%! When you're looking for outdoor security, you want equipment that can endure the elements while keeping your property safe. So, rest assured, Dahua's got you covered for outdoor use without compromising quality.
What Should I Do if the Camera Is Not Detecting Motion?
If your camera's not detecting motion, start by checking the motion detection settings in the app or software. Make sure they're enabled and adjusted properly. You might also want to verify that the camera's view isn't obstructed and that it's positioned correctly. Sometimes, changing the sensitivity can help. Finally, confirm the firmware is up to date; you don't want outdated software messing with your security. If all else fails, consider resetting the camera.