To fix an infrared issue on your security camera, start by checking the power supply. Make sure the cables and power adapter are in good condition and compatible. Next, inspect the infrared LEDs for physical damage or corrosion and clean if necessary. Clean the camera lens with a microfiber cloth and appropriate solution to guarantee clear footage. Update the camera’s firmware to the latest version. Adjust and fine-tune the camera’s night vision settings for best performance. Finally, test the camera in different environments to identify any specific issues. For more detailed steps and fixes, you may find additional insights helpful.
Check Power Supply
Before diving into complex solutions, make sure your security camera‘s power supply is functioning properly. Freedom means having a secure home without unnecessary hassles, and that starts with ensuring all basics are in check.
First, examine the power cables connected to your security camera. Look for any visible wear and tear—frayed wires, bent connectors, or anything that might disrupt the flow of electricity. Even a minor issue with the power cables can cause your camera’s infrared function to fail, leaving you in the dark.
Next, focus on the power adapters. These little devices are often overlooked but play an important role in keeping your camera running smoothly. Make sure the power adapter is the correct one for your camera model. Using an incompatible adapter can lead to insufficient power supply, causing the infrared feature to malfunction. If you have multiple cameras, double-check that each power adapter is connected to the right camera.
Lastly, try plugging your camera into a different outlet. Sometimes, a faulty outlet can be the culprit. By ensuring your power supply is rock-solid, you pave the way for a more reliable and effective security system.
Inspect Infrared LEDs
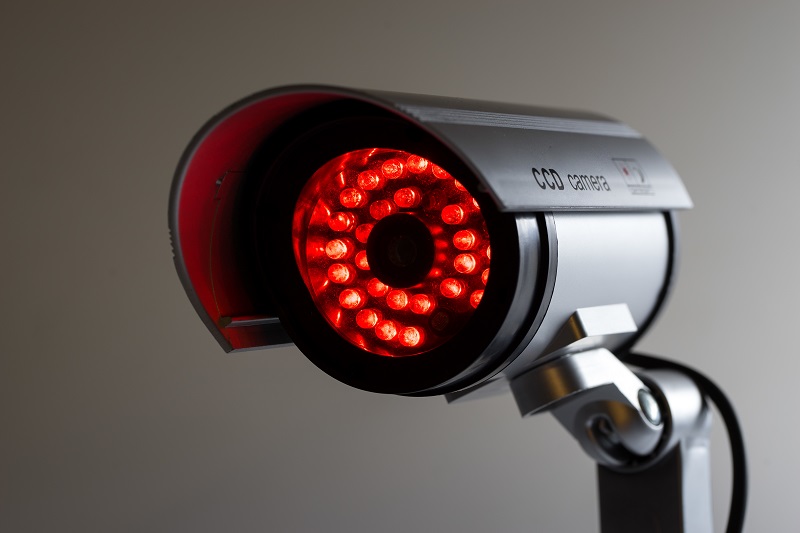
Start by closely examining the infrared LEDs on your security camera for any signs of damage or malfunction. Infrared LEDs are essential for night vision, so making sure they’re in good working order is vital. You want the freedom to monitor your property day and night, and this step is key.
Begin with an LED inspection to see if any of the LEDs are visibly broken or dim. If they’re not lighting up as they should, it could be a sign of underlying issues. Here’s how to proceed:
- Check for Physical Damage: Look for cracks, breaks, or dislodged LEDs. These can disrupt the infrared alignment and impair performance.
- Test Each LED: If possible, test each LED individually with a multimeter to confirm they’re receiving power. A non-functioning LED could indicate a circuit issue.
- Inspect for Corrosion: Moisture can corrode connections, especially in outdoor cameras. Clean any rust or buildup you find.
- Verify Alignment: Ensure the infrared alignment is correct. Misaligned LEDs won’t properly illuminate the area, affecting night vision quality.
Clean the Camera Lens
Ensuring your camera’s lens is clean is vital for maintaining clear and effective surveillance footage. A dirty lens can severely impact the quality of your recordings, especially at night when infrared is essential. Begin by gathering your lens cleaning supplies: a microfiber cloth, lens cleaning solution, and a blower for dust removal.
First, use the blower to remove any loose dust or debris. This prevents scratching when you wipe the lens. Next, apply a small amount of lens cleaning solution to the microfiber cloth. Gently wipe the lens in a circular motion, making sure you cover the entire surface. Avoid using paper towels or other abrasive materials as they can damage the lens.
Here’s a quick reference table to guide you:
| Step | Description |
|---|---|
| Gather Supplies | Microfiber cloth, lens cleaning solution, blower |
| Dust Removal | Use blower to remove loose dust and debris |
| Apply Solution | Put a small amount on the microfiber cloth |
| Wipe Lens | Wipe gently in circular motions |
| Final Check | Inspect for remaining smudges or dirt |
Taking these steps ensures your infrared functionality isn’t compromised by a dirty lens. It’s a simple yet effective way to keep your security camera operating at its best.
Update Firmware
Updating your camera’s firmware can often resolve infrared issues. First, check the current firmware version through your camera’s settings. If it’s outdated, download and install the latest update from the manufacturer’s website.
Check Firmware Version
Verifying and updating the firmware version of your security camera is crucial to address any infrared issues that may be present. Checking and updating the firmware can help resolve various technical glitches, including problems with the infrared functionality. Here’s a quick guide on how to check your firmware version and what steps to take:
- Access Camera Settings: Log in to your camera’s control panel, typically accessible via a web browser or a dedicated app. Locate the settings or configuration section.
- Locate Firmware Information: Within the settings menu, find the details related to firmware. This information is usually located under a tab labeled ‘System’ or ‘About.’
- Verify Firmware Compatibility: Ensure that the current firmware version is compatible with your camera model. Manufacturers often provide a list of compatible versions on their websites.
- Consider Version Rollback: If you have experienced infrared issues following a recent update, you may need to revert to a previous firmware version that was functioning correctly.
Install Latest Update
To install the latest update, download the newest firmware version from the manufacturer’s website and follow their provided instructions. This step is important because outdated firmware can lead to various problems, including your infrared not working correctly. Firmware updates often include fixes for bugs and compatibility issues that may be plaguing your security camera.
Before you proceed, double-check that the firmware you’re downloading is the right one for your specific camera model. Using the wrong firmware can cause more problems than it solves. If you’re unsure, don’t hesitate to contact manufacturer support for guidance. They can help make sure you get the correct update and avoid potential compatibility issues.
Once you have the correct firmware, follow the manufacturer’s guidelines to install it. This usually involves connecting the camera to your computer and running the update file. Make sure to back up any important data and settings before you start, just in case something goes wrong.
Updating your firmware can breathe new life into your security camera, resolving nagging issues and improving overall performance. Taking this step can restore your infrared functionality, giving you peace of mind and the freedom to rely on your security system once again.
Adjust Camera Settings
Next, you’ll want to double-check your camera settings to make sure everything’s configured correctly. Make sure night vision mode is activated and then adjust the infrared sensitivity to enhance performance in low-light conditions. These steps can often resolve issues with the infrared function not working properly.
Night Vision Mode Activation
Activating night vision mode in your camera settings is crucial for proper infrared functionality. When you’re troubleshooting why your infrared isn’t working, the first step is making certain that the night vision mode is activated. This mode uses infrared activation to illuminate the area, providing clear footage even in total darkness. Here’s a straightforward guide to get you started:
- Access the Camera Settings: Navigate to your camera’s settings menu. This is usually found within the device’s app or web interface. Look for a section labeled ‘Night Vision’ or ‘IR Settings.’
- Night Vision Calibration: Calibrate the night vision mode by adjusting the settings to match the specific lighting conditions of your environment. This step ensures that the infrared lights activate correctly and provide excellent visibility.
- Enable Infrared Activation: Make sure the infrared feature is turned on. Some cameras have a manual switch, while others allow you to toggle this setting within the software.
- Test in Low Light Conditions: After making these adjustments, test your camera in low light conditions to make sure that night vision mode kicks in as expected. If it doesn’t, revisiting your settings might be necessary.
Adjust Infrared Sensitivity
Fine-tuning the infrared sensitivity on your security camera can greatly enhance its performance in varying lighting conditions. When you adjust the sensor sensitivity, you’re basically tweaking how your camera reacts to different levels of infrared light. This can make a significant difference in capturing clear images, especially in low-light or nighttime scenarios.
Start by accessing your camera’s settings menu. Look for options related to infrared or night vision. You might find a slider or a set of predefined levels for sensor adjustment. Increasing the sensitivity will make the camera more responsive to minor changes in light, which is great for capturing details but may also lead to more false alarms due to light interference. Reducing sensitivity can help minimize these false alarms but might result in missing some important details.
Keep in mind, the goal is to strike a balance. You want your camera to be sensitive enough to pick up important activity without being triggered by every passing car or streetlight. Experiment with different settings during various times of the day to see what works best for your specific environment. Adjusting infrared sensitivity gives you the freedom to customize your security to fit your unique needs.
Test in Different Environments
Have you considered testing your security camera’s infrared function in various lighting conditions to pinpoint the issue? Sometimes, the root cause of your infrared problems is environmental interference. Different settings can affect how your camera’s infrared works, and testing in diverse environments can help you find the culprit.
To get started, follow these steps:
- Test in complete darkness: Turn off all lights to see if your camera’s infrared function activates correctly. This helps determine if the problem is with the camera’s sensitivity to lighting conditions.
- Test in low-light environments: Try areas with dim lighting to check if the infrared kicks in as it should. Sometimes, partial lighting can interfere with the infrared function, causing it to malfunction.
- Test in outdoor settings: If your camera is intended for outdoor use, test it in various outdoor conditions—overcast, sunny, or during twilight hours. Environmental interference like streetlights or nearby reflective surfaces can impact performance.
- Test in mixed-light environments: Place your camera in a setting with both natural and artificial light. This helps you see how well the infrared adapts to changing lighting conditions, revealing issues with sensitivity adjustments.
Frequently Asked Questions
Can Weather Conditions Affect the Infrared Functionality of Security Cameras?
Yes, weather conditions can affect your infrared functionality. Temperature impact and high humidity levels might interfere with your camera’s performance. For those who desire freedom, ensuring your setup is weather-resistant can make a big difference.
How Do I Know if My Camera Needs a Professional Repair?
If your camera’s acting up like a stubborn mule, it’s time to check warranty options. If costs are high and you’re craving freedom from hassle, a professional repair might be the best route.
Are There Specific Brands Known for Better Infrared Performance?
When you’re exploring brand comparisons for security cameras, you’ll find that brands like Hikvision and Dahua are often praised for their infrared reliability. Don’t limit yourself; research and choose what fits your freedom and needs best.
Is It Possible to Upgrade the Infrared Capabilities of an Existing Camera?
Imagine upgrading your camera’s infrared capabilities like adding turbo to a car. Yes, infrared upgrades are possible! You can enhance your camera with external IR illuminators or better IR LEDs, giving you more freedom in low-light conditions.
What Are Common Signs That My Infrared Sensor Is Failing?
You might notice poor night vision, flickering images, or complete darkness. These are common signs of infrared sensor issues. Check sensor alignment and update firmware to see if that resolves the problem and restores your freedom.


