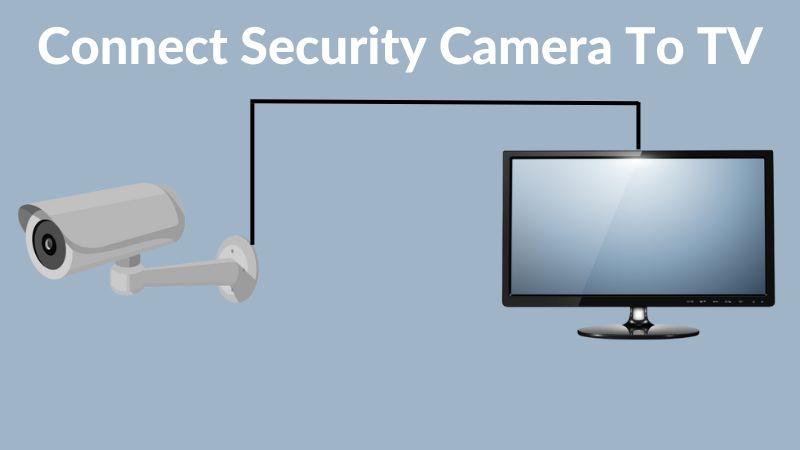
To connect your CCTV camera to a TV without a DVR, you’ll need a compatible video cable and a power adapter. First, identify your camera’s output type (BNC, RCA, or HDMI). Use a BNC-to-RCA adapter if needed, or directly plug in an RCA or HDMI cable. Connect the cable to your TV’s input port. Next, power your camera using the correct adapter, ensuring it’s turned on. Switch your TV to the corresponding input channel to view the live feed. Check the image quality. Stay tuned to learn about optimizing your setup for better performance.
Required Equipment
To connect a CCTV camera to a TV without a DVR, you’ll need a few essential pieces of equipment. First, you need a CCTV camera that can output video directly. Next, you’ll require a power adapter to power the camera. The camera should come with one, but if not, make sure you get one that’s compatible.
You’ll also need a video cable, like a BNC to RCA connector, to link your camera to the TV. This cable will transmit the video signal from the camera to the TV. Depending on your camera and TV, you might need an adapter to match the connectors. For most setups, an RCA cable works perfectly, but check your specific devices to be sure.
Lastly, you’ll need a TV with the correct input ports. Most modern TVs have multiple input options, so finding a compatible one should be straightforward. If your TV doesn’t have the right input, you might need an adapter, like an RCA to HDMI converter. With this equipment, you’re all set to connect your CCTV camera directly to your TV, giving you more control and flexibility in monitoring your space.
Understanding Camera Outputs
Your CCTV camera‘s output determines how you connect it to your TV for a seamless viewing experience. It’s important to understand the type of output your camera provides, as this will guide you on the best method to link it to your television. Most CCTV cameras offer a few common output types: analog, HDMI, and IP.
If your camera uses an analog output, it typically has a BNC connector. This output is straightforward and widely used in older models. Analog signals can be easily converted to a format your TV can handle. If your CCTV camera has an HDMI output, you’re in luck. HDMI provides high-definition video and audio through a single cable, making it a breeze to connect directly to modern TVs.
For IP cameras, which use Ethernet cables, things get a bit more tech-savvy. These cameras stream video over a network, and you’ll need a method to decode this signal for your TV. Understanding these output types empowers you to make the right choices and ensures your setup process is smooth and hassle-free. So, grasping your camera’s output is your first step towards gaining the freedom and control over your surveillance system.
Choosing the Right Cable
Now that you understand your camera’s output, it’s time to pick the right cable to connect it to your TV. First, identify whether your CCTV camera uses a BNC, RCA, or HDMI output. Most older cameras use BNC, while newer models might feature RCA or HDMI. Pick the cable that matches your camera’s output type.
For BNC outputs, you’ll need a BNC-to-RCA adapter or a BNC cable with an RCA end. This allows you to connect directly to your TV’s composite video input. If your camera uses RCA, simply get an RCA-to-RCA cable. Make sure the length matches the distance between your camera and TV.
For HDMI outputs, simply grab an HDMI cable. This is the easiest option as it transmits both video and audio, providing a higher quality picture.
When choosing your cable, consider the quality and durability. A well-shielded cable prevents signal interference, ensuring a clearer image. If you value flexibility, opt for cables that are easy to route through tight spaces. By selecting the right cable, you’ll achieve a seamless connection, giving you the freedom to monitor your space directly on your TV.
Connecting the Cable
Begin by plugging one end of the chosen cable into your CCTV camera’s output port. This is typically an RCA or BNC connector, depending on your camera’s model. Confirm the connection is snug to avoid any signal loss. Next, take the other end of the cable and connect it to the corresponding input port on your TV. If your TV has multiple input options, use the one that matches your cable type; for instance, use the AV input if you’re dealing with RCA cables.
Once the cable is securely connected to both the camera and the TV, switch your TV to the correct input source. Grab your TV remote and navigate to the input or source menu. Select the input channel that matches the port you used for the connection. You should see a live feed from your CCTV camera on the screen. Adjust the camera’s position as needed to get the desired view.
You’re now set up! This method gives you a direct, real-time view without the need for a DVR, offering you more freedom and simplicity in monitoring your space. Enjoy the sense of control that comes with a straightforward setup.
Powering the Camera
To power the camera, connect the included power adapter to the camera’s power input socket. Once the adapter is securely attached, plug the other end into an electrical outlet. Make sure the outlet you choose is easily accessible and not overloaded with other devices. This step is essential for ensuring your camera gets the consistent power it needs to function effectively.
You’ll notice an indicator light on the camera, signaling that it’s powered up. This light is your assurance that the camera is ready to start capturing footage. If the light doesn’t come on, double-check the connections and try a different outlet if necessary. Sometimes, a simple switch of outlets can solve the issue.
Don’t let complicated setups hold you back. Powering your CCTV camera is straightforward and can be done in a matter of minutes. With the camera now powered, you’re one step closer to having a secure and surveilled environment without the hassle of a DVR. Embrace the simplicity and freedom that comes with this setup, knowing you’re in control of your security system.
Switching TV Input
With your camera powered up, the next step is to switch your TV input to the correct source to view the live feed. Grab your TV remote and look for the ‘Input’ or ‘Source’ button. This button allows you to cycle through the various input options your TV offers. Depending on your TV model, you might see choices like HDMI1, HDMI2, AV1, AV2, or Component.
Press the “Input” button repeatedly until you find the input source that corresponds to the port where you connected your camera’s cables. If you’re using an HDMI connection, select the HDMI input. If it’s an AV connection, choose the AV input. Your TV will then switch to that source, displaying whatever is connected to that input.
Don’t be surprised if you see a blue or black screen initially—this means your TV is on the right input, but the camera feed hasn’t kicked in yet. Give it a moment, and soon you should see the live video feed from your CCTV camera. If the screen stays blank, double-check your connections and make sure everything is securely plugged in. This step is vital for gaining uninterrupted access to your surveillance footage.
Adjusting Camera Settings
Once your TV displays the camera feed, it’s time to fine-tune the camera settings to guarantee the best video quality. Start by accessing the camera’s menu, which is typically done through a small button on the camera itself or a remote control. Adjusting the following settings will help you maximize the image clarity and overall performance:
- Resolution: Confirm the resolution is set to the highest possible option. Higher resolution means clearer and more detailed images.
- Brightness and Contrast: Tweak these settings to find the perfect balance. Too much brightness can wash out the image, while too little can make it hard to see details.
- Focus: Manually adjust the focus to get a sharp image. This might require physically rotating the lens on the camera.
- Field of View: If your camera has a zoom feature, adjust it to cover the desired area without sacrificing image quality.
These adjustments will make sure your camera captures the best possible footage. Remember, you’re in control, and tweaking these settings lets you tailor the video feed to your exact needs. Make sure to save your settings before exiting the menu.
Testing the Connection
Before finalizing your setup, verify the connection to confirm everything is functioning correctly. Start by powering on both your TV and the CCTV camera. Make sure your TV is set to the correct input channel, whether it’s HDMI, VGA, or AV, depending on your connection type. You should see the live feed from your camera on the screen.
Walk around in front of the camera to check if the image quality meets your expectations. Confirm the picture is clear and there’s no lag. Adjust the camera angle if needed to capture the desired area. Test the night vision feature if your camera has one—dim the lights or wait until it’s dark to verify it works effectively.
Listen for any audio if your camera supports sound. Make sure there’s no static or interference. Check all cables and connectors to make sure they’re securely in place.
Lastly, take a moment to navigate through any on-screen menus or settings using your TV remote or the camera’s app if applicable. This will ensure you have full control over your setup. Once satisfied, you’re ready to enjoy a reliable, direct CCTV-to-TV connection without the need for a DVR.
Troubleshooting Tips
If you encounter any issues with your CCTV-to-TV connection, start by checking all cables and connections for any loose or faulty components. Often, the simplest solutions solve the most frustrating problems. Verify that your power supply is stable and that the camera and TV are both receiving sufficient power.
Here are some essential troubleshooting steps:
- Check the Input Source: Make sure your TV is set to the correct input source corresponding to where the CCTV camera is connected. Switch through the inputs if necessary.
- Inspect the Cables: Look for any visible damage to the cables. A damaged cable can disrupt the signal. Replace any worn-out cables with new ones.
- Test with Another Device: Connect another device, like a DVD player or another camera, to the same input on the TV. This will help you determine if the issue lies with the camera or the TV input.
- Adjust Camera Settings: Some cameras have settings that need tweaking. Consult your camera’s manual to make any necessary adjustments, such as resolution or output format.
Enhancing Your Setup
To get the most out of your CCTV-to-TV connection, consider upgrading your cables and adding a signal booster for a clearer, more reliable picture. High-quality cables can make a significant difference, reducing interference and signal loss. Signal boosters, on the other hand, amplify the video feed, ensuring your footage remains crisp even over longer distances.
Here’s a quick comparison to help you decide:
| Option | Benefits |
|---|---|
| Upgraded Cables | Reduced interference, better clarity |
| Signal Booster | Amplified signal, stable video quality |
| Wireless Adapter | Flexible setup, no physical limitations |
| Power Over Ethernet (PoE) | Simplified wiring, reliable power supply |
Consider using a wireless adapter if you prefer more freedom in your setup. Wireless adapters eliminate the need for physical cables, giving you the flexibility to place your CCTV camera anywhere within range of your home network.
If you want to streamline your setup further, think about Power Over Ethernet (PoE). PoE simplifies the wiring process by combining power and data transmission into a single cable, reducing the clutter and making your installation cleaner and more efficient.
Frequently Asked Questions
Can I Connect Multiple CCTV Cameras to a Single TV Without a Dvr?
Yes, you can connect multiple CCTV cameras to a single TV without a DVR. Use a video multiplexer or switcher. This lets you freely switch between camera feeds, giving you control without extra equipment.
What Are the Advantages and Disadvantages of Not Using a Dvr?
Without a DVR, you’ve got the freedom of real-time monitoring and lower costs. But you’ll miss out on recording footage for later use, limiting your ability to review past events. Choose based on your needs.
How Do I Secure the Video Feed From Unauthorized Access?
To keep nosy neighbors at bay, secure your video feed by enabling encryption on your camera. Change default passwords, update firmware regularly, and consider using a secure network. You’re in control of your privacy.
Is There a Significant Difference in Video Quality Without a Dvr?
Yes, you’ll notice a difference. Without a DVR, you can’t access advanced features like resolution enhancement or video compression. Your direct feed may look less polished, but it gives you freedom from extra equipment.
Can I Record Footage Directly Onto a USB Drive Connected to My Tv?
You can’t record footage directly onto a USB drive connected to your TV. Most TVs don’t support this function. Instead, you can use a USB-enabled DVR or a computer to handle the recording tasks efficiently.


