Crimping an Ethernet cable is easy if you follow these steps. First, gather tools like a crimping tool, wire stripper, and cable tester. Cut and prepare the cable. Carefully strip the outer jacket without damaging the wires. Untwist and straighten the wire pairs, then arrange them by the color code (T568A or T568B). Trim the wires evenly and insert them into the RJ45 connector. Double-check the alignment, then use the crimping tool to secure the connector. Finally, test the cable to make sure it's working properly. Stick around to discover further tips for perfect Ethernet cable creation.
Gather Your Tools
To start, you'll need to gather a few essential tools. Making sure you've got the right equipment will make your task smoother and more efficient. The main tools you'll need include a crimping tool, a wire stripper, and an Ethernet cable tester. Each of these plays a critical role in the process.
Freedom in your workspace starts with good tool maintenance. Keeping your crimping tool and wire stripper clean and in good condition guarantees they perform well every time. A well-maintained tool means fewer mistakes and a smoother workflow, giving you more control over your project.
Don't underestimate the importance of proper tool storage, either. By organizing your tools in a dedicated storage space, you'll always know where they are when you need them. This saves you time and lets you focus on the job at hand without unnecessary interruptions.
Having quality tools that are well-maintained and properly stored means you're always prepared. This readiness allows you to tackle your Ethernet cable crimping project with confidence and ease. So, take a moment to confirm your tools are in top shape and stored where you can easily find them.
Prepare the Cable
First, make sure you've gathered all necessary tools, including a wire stripper and a crimping tool. Next, carefully strip about an inch of the cable jacket without damaging the internal wires. This will expose the twisted pairs, readying them for the next steps.
Gather Necessary Tools
Before you begin crimping, make sure you have all the necessary tools and materials. Investing a little time in gathering the right equipment upfront will save you from frustration later and guarantee a smooth, efficient process.
Here's what you'll need:
- Wire cutters: Essential for trimming the Ethernet cable to the desired length. Make sure they're sharp and well-maintained to get a clean cut.
- Crimping tool: This specialized tool will secure the connectors onto the cable. Regular tool maintenance is vital here; you don't want a rusty or malfunctioning crimper.
- RJ45 connectors: These connectors are what you'll attach to the ends of the Ethernet cable. Having a few extras is always a good idea.
- Cable tester: This will help you verify that your crimped cable works correctly. It's better to catch any issues now than troubleshoot them later.
Taking care of tool maintenance is essential. Sharp wire cutters ensure you won't fray the cable, and a well-maintained crimping tool provides a secure connection. Remember, the quality of your tools directly impacts the quality of your work. Now that you've gathered everything, you're ready to move forward and strip the cable jacket.
Strip Cable Jacket
Begin by carefully removing about two inches of the outer jacket from the end of the Ethernet cable. You can use a cable stripper or a sharp utility knife for this task. Make sure you're applying just enough pressure to cut through the jacket without nicking the inner wires. Safety precautions are essential here; always cut away from your body, and keep your fingers clear of the blade.
A common mistake is cutting too deeply, which can damage the inner wires and compromise the integrity of your connection. Another frequent error is removing too little of the jacket, making it difficult to work with the individual wires and preventing a proper crimp.
Once the jacket is stripped, you'll see multiple twisted pairs of wires inside. Gently fan them out and inspect each one for any nicks or cuts. If you find any damaged wires, it's best to start over with a new section of cable. Freedom in DIY projects comes from doing it right the first time, ensuring you avoid unnecessary frustration later on. Remember, a bit of patience and precision now saves a lot of hassle down the road.
Strip the Outer Jacket
Stripping the outer jacket of the Ethernet cable requires a careful approach to avoid damaging the inner wires. Make sure you're using the right stripping tools to handle various jacket materials. A simple mistake can lead to exposed or broken wires, causing your cable to malfunction. Here's how you can do it right:
- Choose the right tool: Use a cable stripper designed for Ethernet cables. It's specifically built to handle the jacket materials without cutting too deep.
- Measure and mark: Determine how much of the outer jacket you need to strip. Typically, you'll want about 1-2 inches (2.5-5 cm) exposed.
- Apply gentle pressure: Place the cable in the stripper and rotate it around the jacket. Apply just enough pressure to cut through the jacket but not the wires.
- Remove the jacket: Once you've made the cut, gently slide the jacket off. If the jacket doesn't come off easily, repeat the process with a little more pressure.
Untwist the Pairs
Now that you've stripped the outer jacket, it's time to untwist the pairs. Carefully separate each of the twisted wires while making sure to maintain the pair order. This step is essential for ensuring proper connectivity in your Ethernet cable.
Separate Twisted Wires
Gently untwist each pair of wires, separating them so you can arrange them in the correct order. This process is important for making sure that the color coding is accurate when you're ready to crimp. You'll want to carefully manage the wire separation to maintain the integrity of each pair.
As you work through this step, keep in mind that the wires are delicate. Too much force can damage them, leading to connectivity issues down the line. Here's a quick guide to help you along the way:
- Untwist with Care: Gently untwist each pair using your fingers. Avoid using tools that could nick or cut the wires.
- Straighten the Wires: Once untwisted, straighten each wire to make the next steps easier. You can use your thumb and index finger to smooth them out.
- Follow the Color Code: Pay close attention to the color coding. The standard order is important for proper connectivity.
- Keep Track of Pairs: Ensure that you're keeping track of which wires were paired together. This is important for maintaining the correct sequence.
Maintain Pair Order
To maintain the pair order, make sure you don't mix up the wires as you untwist them. This step is essential for ensuring that your Ethernet cable functions correctly. Start by carefully separating the twisted pairs, but keep an eye on the color coding. Each pair has a specific color sequence that you need to follow.
Here's a quick reference to help you keep track of the wire sequence:
| Pair Number | Color Combination |
|---|---|
| Pair 1 | White-Orange / Orange |
| Pair 2 | White-Green / Green |
| Pair 3 | White-Blue / Blue |
| Pair 4 | White-Brown / Brown |
By following the color coding, you'll avoid the common pitfalls that lead to connectivity issues. Untwist each pair no more than half an inch to keep the signal integrity strong. Don't let the wires get tangled; it's all about maintaining that perfect order.
Once you've untwisted the pairs and lined them up according to the wire sequence, you're ready for the next step. Remember, attention to detail in maintaining pair order will give you the freedom from constant troubleshooting and unreliable connections. So, take your time and get it right!
Arrange the Wires
Carefully arrange the wires according to the T568A or T568B wiring standard. This step is essential for guaranteeing a properly functioning Ethernet cable. You'll need to follow the correct color coding to get the wire arrangement just right. Hold the cable firmly and spread the wires out in the order specified by your chosen standard.
Here's what you need to do:
- Follow the standard: T568A or T568B, but be consistent throughout your project.
- Straighten the wires: Make sure each wire is straight and untangled before you proceed.
- Check the color order: Ensure the colors are in the exact sequence as the standard.
- Flatten the wires: Once arranged, flatten them so they lie parallel and snugly next to each other.
This part might feel a bit meticulous, but it's all about precision. The freedom to create a reliable Ethernet cable lies in your ability to stick to these steps. By carefully arranging the wires, you're setting yourself up for success. Ignore this, and you might face connectivity issues later on. So, take your time with the color coding and wire arrangement, and you'll be one step closer to a perfectly crimped Ethernet cable.
Trim the Wires
Now it's time to trim the wires to guarantee a proper fit. You'll need to straighten and align the wires, measure the length of the cable jacket, and cut any excess wire. This step is essential for a secure and reliable connection.
Straighten and Align Wires
Make sure each wire is straightened and aligned before trimming them to the same length. This step is important because it guarantees a clean and efficient connection in your Ethernet cable. When wires are twisted or misaligned, it can lead to connectivity issues, which nobody wants. Plus, dealing with a bunch of misaligned wires can test anyone's attention span.
To get those wires straight and aligned, follow these steps:
- Untwist the pairs: Gently untwist each pair of wires, keeping an eye on the wire color to avoid mixing them up.
- Straighten the wires: Use your fingers to smooth out any kinks or bends in the wires. You want them as straight as possible.
- Align the wires: Line up all the wires side by side in the correct order, ensuring they're all the same length.
- Trim the wires: Use a wire cutter to trim the ends of the wires evenly, making sure they're all the same length.
Measure Cable Jacket Length
Once the wires are straightened and aligned, the next step is to measure the correct length of the cable jacket that needs to be trimmed. This part's essential for guaranteeing your Ethernet cable fits perfectly into the connector without any hassle.
First, grab your measuring tool. You don't need anything fancy—just something to mark the jacket length accurately. Typically, you'll want to expose about an inch of the internal wires. This cable measurement is vital; too much or too little jacket length can lead to a faulty connection. Hold the cable steady and make your mark.
Next, take your wire stripper and carefully trim the cable jacket up to the marked point. Be gentle; you don't want to nick the internal wires. A clean cut ensures all eight wires are intact and ready for the next step.
Freedom lies in the details, and getting this jacket length right gives you the liberty to move forward confidently. Double-check your work. Ensure you've trimmed just enough for a snug fit into the connector. By mastering this step, you're one step closer to a reliable, custom Ethernet cable that suits your needs perfectly.
Cut Excess Wire Length
Carefully trim the excess length of each wire to guarantee they fit perfectly into the Ethernet connector. This step is important for maintaining proper wire management and securing a reliable connection. You're here because you value the freedom to create your own network setup, so precision is key.
Before you grab your wire cutters, it's crucial to measure the correct length. Each wire should be trimmed to about half an inch (12mm) from where the cable jacket ends. This length ensures that the wires will fully insert into the connector, making solid contact with the metal pins.
Here's how to do it efficiently:
- Lay out the wires: Fan them out and make sure they're lying flat and parallel to each other.
- Use a ruler: Measure the correct length from the cable jacket to the tip of the wires.
- Cut straight: Use a wire cutter to trim the ends evenly. A clean cut makes it easier to insert the wires into the connector.
- Double-check: Make sure each wire is of uniform length to avoid connection issues.
Insert Wires Into RJ45
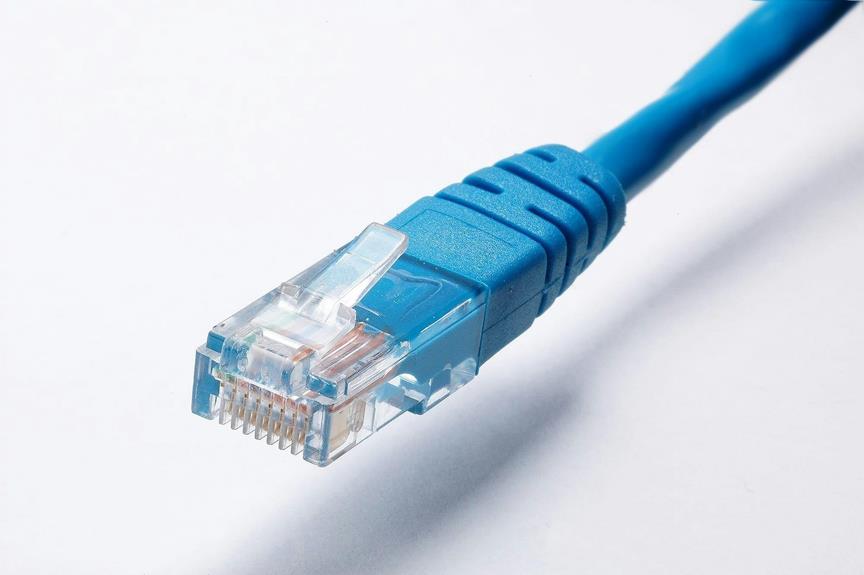
With the wires properly aligned, slide them into the RJ45 connector, making sure each wire enters its designated slot. Pay close attention to the color coding, as it's vital for proper connectivity. The standard color coding follows a specific sequence: orange-white, orange, green-white, blue, blue-white, green, brown-white, and brown. This sequence guarantees that data transmission is seamless and error-free.
Now, during wire insertion, gently push the wires into the connector until they reach the end. You'll feel a slight resistance as they settle into place. Don't force them, but make sure they're fully seated. The clear plastic of the RJ45 connector should allow you to see if each wire has reached the end. This visibility is important to ensure a proper connection.
Inspect the Alignment
Before crimping, double-check that each wire is correctly aligned and fully seated in the RJ45 connector. You've come this far, so let's make sure everything's perfect. Trust me, a little patience now can save you from headaches later. Take a close look to verify the color codes follow the T568A or T568B standard, depending on your needs.
Here are some key points to guarantee perfect pin alignment:
- Uniform Lengths: Check that all wires are cut to the same length. Uneven wires can cause poor connectivity.
- Color Codes: Verify the order of the color codes. They should match the standard you're using, ensuring a proper connection.
- Seating: Ensure each wire is fully seated at the end of the connector. The copper should be visible at the very tip of each pin slot.
- Pin Alignment: Confirm that each wire sits in the correct pin slot. Misalignment can lead to a non-functional cable.
When you inspect the alignment, you're ensuring that your Ethernet cable will work seamlessly. This step embodies the freedom of knowing your DIY skills can create reliable, high-quality connections.
Crimp the Connector
Now that everything's aligned perfectly, grab your crimping tool and firmly squeeze it to secure the RJ45 connector onto the cable. This is where the magic happens, transforming a bunch of loose wires into a reliable connection that can set your devices free.
Different connector types might call for slightly varied crimping techniques, but the principle remains the same: you're guaranteeing a solid, stable connection. Place the RJ45 connector into the crimping tool's slot designed for it. Make sure it's snug; any wobble can lead to an unreliable connection.
With the connector in place, apply steady pressure on the crimping tool's handles. You don't need to be Hercules, but you do need a firm, even squeeze. This action forces the metal pins inside the connector to pierce the wire insulation, making contact with the copper strands inside.
Release the crimping tool and give the connector a gentle tug to confirm it's securely attached. If it feels loose, you might need another squeeze. By mastering these crimping techniques, you'll be able to create Ethernet cables that liberate you from the constraints of pre-made lengths, giving you the freedom to tailor your network exactly as you need.
Test the Cable
It's important to test the cable to make sure your newly crimped connection is both stable and functional. Testing confirms that the signal integrity remains intact and your network speed is at its best. You don't want any surprises when you plug it in. Here's how to test your Ethernet cable effectively:
- Use a Cable Tester: This handy device checks each wire inside the cable to confirm they're all connected correctly. It's a quick way to guarantee signal integrity.
- Check Network Speed: Plug your cable into a device and run a speed test. Compare the results to your expected network speed to see if the cable is performing as it should.
- Inspect for Physical Damage: Sometimes, even a perfectly crimped cable can have hidden damage. Look for any kinks or cuts that might affect performance.
- Test with Different Devices: Make sure your cable works across multiple devices. This helps rule out any device-specific issues and confirms the cable's versatility.
Frequently Asked Questions
How Do I Choose the Right Type of Ethernet Cable for My Needs?
When it comes to choosing your Ethernet cable, don't put the cart before the horse. First, determine your bandwidth requirements. Then, consider cable shielding for interference protection. This way, you'll guarantee seamless connectivity and freedom from network issues.
What Is the Difference Between Cat5e, Cat6, and Cat7 Cables?
Cat5e, Cat6, and Cat7 cables differ in cable shielding and frequency rating. Cat5e offers basic shielding and supports up to 100 MHz. Cat6 provides better shielding and 250 MHz. Cat7 excels with advanced shielding and 600 MHz.
Can I Reuse an RJ45 Connector if I Make a Mistake?
If you make a mistake, it's generally not a good idea to reuse an RJ45 connector. Connector durability suffers after crimping, making recycling connectors unreliable. For best performance, use a fresh connector each time.
What Are Some Common Troubleshooting Tips if My Cable Doesn't Work?
Ever felt trapped by a non-working cable? Start by testing continuity with a tester. Your freedom lies in confirming connections. Validate each wire's correct alignment. Discover the thrill of solving it yourself!
How Long Can an Ethernet Cable Be Before Signal Degradation Occurs?
You're wondering about cable length and signal loss? For best performance, keep your Ethernet cable under 100 meters. Beyond that, you're likely to experience signal degradation, reducing your internet freedom and efficiency. So, keep it short!


