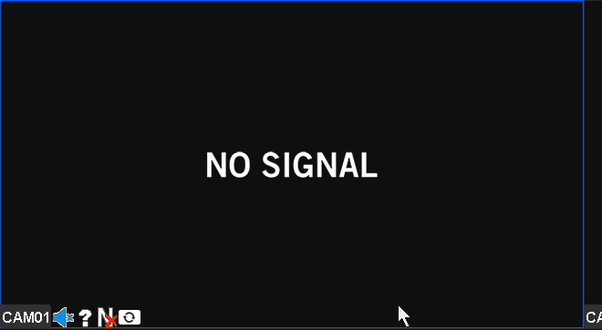
First, verify that your Hikvision DVR has a proper power connection and the power supply is functioning. Use a multimeter to check voltage, and consider a battery backup for power stability. Next, inspect all cable connections for security and quality; replace any damaged ones. Check your camera settings to confirm resolution and video format compatibility. Update your DVR firmware from the official website using a USB drive. Finally, reset the DVR to factory settings through the System Maintenance menu. After a reboot, set up your DVR anew. Follow these steps to troubleshoot effectively and discover more helpful tips.
Check Power Supply
First, confirm that your Hikvision DVR is receiving power properly by checking the connections and verifying that the power supply is functioning. You want to be free from unnecessary restrictions, so make sure your DVR isn’t held back by something as simple as a faulty power supply. Verify that the power adapter is correctly plugged in and the outlet is working. If you’ve got a multimeter, use it to check the voltage output from the adapter; it should match the DVR’s requirements.
Don’t overlook the importance of a stable power source. Voltage fluctuations can cause your DVR to malfunction or even fail to power up. If you live in an area prone to power instability, consider using a battery backup or an uninterruptible power supply (UPS). These devices can shield your DVR from sudden drops or spikes in voltage, ensuring it runs smoothly and without interruption.
Inspect Cable Connections
Double-check that all video cables are securely connected to both the DVR and the cameras. It’s easy to overlook a loose connection, but this simple check can save you a lot of hassle. Begin by examining the cable quality. Frayed or damaged cables can disrupt the video signal, so replace any that look worn out. High-quality cables guarantee a reliable connection, giving you the freedom to focus on what matters instead of troubleshooting.
Next, consider the connector types. Different cameras and DVRs may use various connectors like BNC, RCA, or HDMI. Verify that you’re using the right connector for your devices. An incorrect or mismatched connector type could be the culprit behind the no video problem. Ensure they’re firmly attached and free from dust or debris, which could interfere with the signal.
After you’ve checked the connections at the DVR, move to each camera and inspect those connections as well. Sometimes, the issue might lie with a single camera, not the entire system. By meticulously checking each cable and connection, you can pinpoint and resolve the problem, liberating yourself from the frustration of a non-functional surveillance system.
Verify Camera Settings
Explore the camera settings to make sure each device is configured correctly and compatible with your DVR system. This step is essential, as even a minor misconfiguration can result in no video being displayed. Here’s how to verify your camera settings:
- Check Camera Resolution: Make sure that the camera resolution is set to a level that your DVR system supports. If your DVR can only handle 720p, but your camera is set to 1080p, you’ll run into issues. Adjust the resolution settings on your camera to match your DVR’s capabilities.
- Verify Video Format: Cameras can output video in various formats like NTSC or PAL. Confirm that the video format on your camera matches the format your DVR supports. An incompatibility here can prevent the video from displaying correctly.
- Adjust Frame Rate: Sometimes, the problem lies in the frame rate settings. Ensure that the frame rate of your camera aligns with what your DVR can process. A mismatch can cause the video to not show up at all.
- Enable Video Output: Some cameras have settings to enable or disable video output. Double-check that the video output is enabled on each camera.
Update Firmware
Verifying the firmware on your Hikvision DVR can often resolve video display issues and improve overall system performance. Before diving into the update procedure, you need to conduct a compatibility check. Make sure the new firmware version is compatible with your specific DVR model. Downloading the wrong firmware can cause more problems than it solves, so double-check your model number against the firmware version you’re downloading.
Once you’ve confirmed compatibility, proceed with the update procedure. First, download the correct firmware from the official Hikvision website. Save the file onto a USB drive. Insert the USB drive into your DVR. Navigate to the system settings menu on your DVR interface, and find the firmware update option. Select the USB drive as the update source and follow the on-screen instructions to install the new firmware.
During the update, don’t power off the DVR or disconnect the USB drive; doing so can corrupt the firmware and render your system inoperable. After the update completes, your DVR will typically reboot automatically. Check your video feeds to see if the issue is resolved. If all goes well, your system should now be running smoother and more efficiently.
Reset to Factory Settings
Resetting your Hikvision DVR to factory settings can often resolve persistent video issues and restore peak functionality. Sometimes, a factory reset is the best way to clear out any configuration issues that might be blocking your video feed. Plus, it’s a great way to start fresh if you’ve forgotten your password or need to perform a password reset.
Here’s a simple guide to reset your Hikvision DVR:
- Access the DVR Menu: First, you’ll need to access the main menu by logging into your DVR. If you’ve forgotten your password, you might need to perform a password reset before proceeding.
- Navigate to System Maintenance: Once you’re in the menu, find the ‘System Maintenance’ option. This is usually under the ‘Configuration’ or ‘System’ tab, depending on your DVR model.
- Select Factory Reset: Within the System Maintenance menu, you should see an option for ‘Factory Reset’. Click on it and confirm your selection.
- Reboot the DVR: After the factory reset process is complete, the DVR will automatically reboot. Once it’s back up, you can start setting it up again from scratch.
Frequently Asked Questions
How Can I Tell if My Hikvision DVR Is Malfunctioning?
Did you know that 60% of DVR issues are due to power supply failures? Check your Hikvision DVR by ensuring the power supply’s stable and firmware updates are current. Freedom lies in troubleshooting, not being tied down by tech issues.
Are There Specific Environmental Factors That Could Affect My Dvr’s Performance?
Yes, power fluctuations and temperature variations can impact your DVR’s performance. Maintain stable power and proper ventilation to avoid issues. Don’t let these factors restrict your freedom to monitor and secure your environment effectively.
Can Network Issues Cause the DVR to Display ‘No Video’?
Absolutely, network issues can turn your DVR world upside down! Imagine the frustration of network latency or IP conflicts causing ‘no video’ errors. You’ve got the power to troubleshoot and reclaim your freedom from tech woes!
What Roles Do Different Ports Play in the Dvr’s Video Functionality?
You’re curious about port types and port configuration, right? Different ports on your DVR handle video input, output, and network connectivity. Proper configuration guarantees seamless video functionality, giving you the freedom to monitor without interruptions.
How Can I Check if My Hard Drive Is Affecting Video Playback?
Isn’t it coincidental that your video playback issues might be tied to disk health? You can check for errors and make sure you’ve got enough storage capacity. Sometimes, freedom from tech problems is just a check away!


