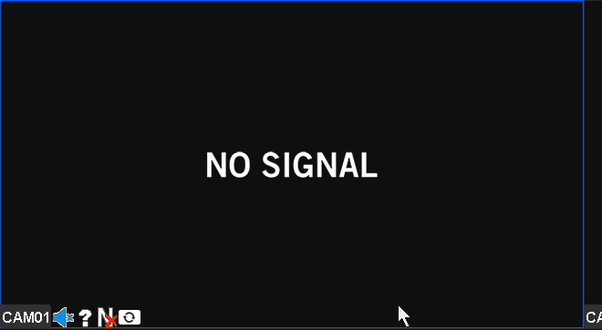
Don’t panic if your CCTV camera suddenly loses its video signal. First, check the 電源 and make sure the adapter is securely connected. Next, inspect all ケーブル接続 and give them a gentle tug to confirm they’re secure. Verify your monitor’s connections, settings, and try testing with another device. Swap out the problematic camera with a working one to see if the issue persists. Assess DVR/NVR settings and confirm network stability. Also, check the camera’s settings and consider a ファームウェアアップデート. Finally, look for any electronic interference. Keep going for more detailed steps and solutions.
電源を確認する
Before delving into complex solutions, first make sure your 防犯カメラの 電源 is properly connected and functioning. It’s easy to overlook, but power issues are a common cause of no video signals. If your camera isn’t receiving consistent power, it can’t perform as expected. Start by checking if the 電源アダプター is securely connected to both the camera and the power outlet.
Power fluctuations can wreak havoc on your CCTV system. These sudden changes in voltage can cause your camera to turn off unexpectedly or fail to transmit video. To combat this, consider using a サージプロテクター. It’s a small investment that can save you from a lot of headaches.
Another useful tip is to employ a バッテリーバックアップ. In the event of a power outage, a battery backup will keep your CCTV system running smoothly. This not only guarantees continuous surveillance but also protects your equipment from potential damage caused by power spikes when electricity is restored.
ケーブル接続の検査
When your 防犯カメラ shows no ビデオ信号, inspecting the cable connections is essential. Make sure all connections are secure and not loose. Additionally, check the cables for any visible damage that could be disrupting the signal.
Secure Loose Connections
Start by checking all the ケーブル接続 to make sure they’re firmly plugged in. Connection stability is key when it comes to your CCTV camera’s performance. 緩い接続 can easily disrupt the ビデオ信号, causing unnecessary headaches. Carefully inspect each connector and guarantee they’re securely attached. You don’t want to waste time chasing down other issues when it could be as simple as a loose plug.
While you’re at it, give each cable a gentle tug. If you notice any movement, it’s a sign that the connector isn’t secure enough. Tighten them up to enhance the stability of your connection. This simple step can often resolve the no video signal issue instantly.
Don’t hesitate to use cable clips or ties to keep everything in place, especially if your setup involves multiple cables. Keeping the cables organized not only helps in securing connectors but also makes future troubleshooting easier. Remember, a stable connection means uninterrupted surveillance, giving you the freedom to focus on what matters most.
Check for Damage
Regularly inspecting your cable connections for any signs of wear and tear can prevent potential video signal issues. Keeping an eye out for physical damage that might be affecting your CCTV system is crucial. Start by examining the cables themselves. Look for any visible cuts, frays, or kinks. These can disrupt the signal and cause your camera feed to go dark.
Also, consider the environmental factors. Extreme temperatures, moisture, and even pests can deteriorate your cables over time. For instance, cables exposed to direct sunlight might become brittle and crack, while those in damp areas can corrode.
Here’s a quick reference table to help you identify potential issues:
| Inspection Point | Potential Issue | 解決 |
|---|---|---|
| Cable surface | Cuts, frays, kinks | Replace damaged sections |
| Connectors | Corrosion, looseness | Clean or tighten connections |
| Environmental exposure | Sunlight, moisture | Use protective coverings |
| Nearby activities | Rodent damage | Implement pest control measures |
Don’t let physical damage or environmental factors compromise your surveillance system. Regular inspection and maintenance can save you from unexpected downtimes. Keeping your cable connections robust, and your CCTV will perform reliably, granting you peace and freedom.
モニターの機能を確認する
Next, you’ll want to make sure the monitor itself is working properly. Start by checking all the monitor connections to confirm they’re secure. If that doesn’t solve the issue, try testing the monitor with another device to rule out any problems.
Check Monitor Connections
Before investigating the issue lies with the camera, confirm all monitor connections are secure and the monitor itself is functioning correctly. Start by checking the monitor ports. Make sure the cables are firmly plugged into the appropriate ports on both the monitor and the CCTV system. Sometimes, a 緩い接続 can be the simple culprit behind the no video signal problem.
Next, explore the monitor settings. Confirm the monitor is set to the correct input source that matches where your CCTV system is connected. For instance, if your CCTV is connected via HDMI, the monitor should be set to the corresponding HDMI input. Adjusting these settings might immediately resolve the issue.
Don’t forget to inspect the 電源. A monitor that’s not receiving power won’t display anything, no matter how well everything else is connected. Make sure the power cable is properly connected and that the monitor is turned on.
Lastly, try adjusting the brightness and contrast settings on your monitor. Sometimes the screen might be on, but the settings are too dim to see anything. By carefully verifying these elements, you can rule out monitor-related problems and focus on other potential issues if necessary.
Test With Another Device
To confirm the monitor isn’t the issue, connect another device like a laptop to see if it displays properly. This step is important to rule out the possibility that your monitor itself is the culprit. Grab an HDMI or VGA cable, depending on your monitor’s input, and hook up your laptop. If your laptop screen mirrors onto the monitor without a hitch, you can be pretty confident the monitor’s good to go.
Now, let’s talk device compatibility. Make sure the laptop and monitor are using compatible ports and cables. If the laptop shows up perfectly on the monitor, you know the problem isn’t with the display. This kind of signal testing gives you peace of mind and narrows down the list of potential issues.
If the monitor doesn’t show your laptop’s display, then you’ve identified a potential fault with the monitor itself. Maybe it’s time for a new cable, or perhaps the monitor needs replacing. Either way, this simple test helps you avoid unnecessary headaches. No more guessing games; you’ve taken a straightforward step to make sure your equipment is working harmoniously.
Test With Another Camera
Have you considered swapping out the problematic camera with a working one to see if the issue persists? This simple step can help you pinpoint whether the problem lies with the camera itself or somewhere else in the system. First, make sure the replacement camera is compatible with your current setup. Camera compatibility is essential; otherwise, you might face the same no video signal issue due to mismatched technology or power requirements.
Next, place the working camera in the exact location of the problematic one. This alternative placement can help identify if the issue is with the camera’s location or the camera itself. If the working camera shows a video signal in the same spot, then your original camera might be faulty. On the other hand, if the replacement camera also fails to show a signal, the issue might be with the cables or the power supply.
Assess DVR/NVR Settings
Checking the DVR/NVR settings is vital to make sure your system is configured correctly and receiving the video signal as expected. Delve into the recording settings first. Confirm that each camera channel is set to record and that there aren’t any schedule conflicts. Sometimes, a simple misconfiguration can cause your cameras to appear inactive.
Next, don’t overlook the network configuration. If your DVR/NVR is connected to a network, verify that your device has a stable network connection. This is essential if you’re using IP cameras. Check the IP addresses and make sure they don’t conflict with other devices on the network. An IP conflict can disrupt the signal and leave you scratching your head.
Also, verify that your firmware is up-to-date. Manufacturers often release updates to enhance performance and fix bugs, which can resolve video signal issues.
Lastly, check the video output settings. Make sure that the resolution and video format match those supported by your monitor and cameras. A mismatch here can result in no video signal being displayed.
カメラ設定を確認する
Your camera’s settings could be the culprit behind the no video signal issue, so let’s explore the essential configurations. First, delve into the camera’s menu and check the brightness settings. Sometimes, the brightness may be set too low or too high, causing the video signal to disappear. Adjust brightness gradually to see if the image starts to appear on your monitor.
次に、 解像度設定. Cameras often come with multiple resolution options, and if the resolution is set higher than what your monitor or DVR/NVR can handle, it might lead to a no video signal. Change resolution to a lower setting and check if the signal returns.
Also, confirm the video format settings. Mismatches between the camera’s format and the DVR/NVR can easily cause signal issues. Verify your camera’s video format (NTSC or PAL) aligns with your recording device’s settings.
Lastly, make sure any advanced settings like shutter speed or contrast aren’t set to extreme values that could affect the video feed. Sometimes, a simple reset to デフォルト設定 can resolve hidden issues.
ファームウェアの更新
Updating the firmware is an essential step to guarantee that your CCTV camera operates smoothly and resolves the no video signal issue. Outdated firmware can lead to compatibility issues and firmware bugs that disrupt the camera’s functionality. By updating, you’re not only resolving existing problems but also enhancing the system with the latest improvements from the manufacturer.
First, visit the manufacturer’s website and find the latest firmware for your camera model. Download the update file and follow the instructions provided. Usually, this involves connecting your camera to a computer or uploading the firmware via the camera’s settings menu.
プロセスをガイドする簡単なチェックリストを以下に示します。
| ステップ | 説明 |
|---|---|
| 1 | Visit the manufacturer’s website. |
| 2 | Locate the latest firmware update for your camera model. |
| 3 | Download the firmware file. |
| 4 | Follow the update instructions (usually connecting to a computer or via settings menu). |
| 5 | Restart your camera to apply the update. |
Updating the firmware might seem like a hassle, but it can free you from persistent issues caused by outdated software. Eliminating these compatibility issues and firmware bugs will make sure that your CCTV system remains reliable and efficient.
干渉を確認する
After updating the firmware, another potential cause of no video signal is interference from nearby electronic devices. Signal interference can come from a variety of sources like microwaves, Wi-Fi routers, or even cordless phones. These devices emit electromagnetic waves that can disrupt your CCTV camera’s signal, leading to a frustrating lack of video.
First, consider the placement of your camera and other electronic devices. If they’re too close together, you might experience electromagnetic disruption. Try moving your camera or the interfering devices to different locations. Sometimes, a simple change in positioning can make all the difference.
Also, check the cables and connectors. Poor-quality cables or loose connections can worsen signal interference. Make sure that all connections are tight and that you’re using shielded cables designed to minimize electromagnetic disruption.
If you’ve got 複数のカメラ, consider if the interference is affecting just one or all of them. This can help you pinpoint whether the issue is localized or more widespread.
Consult Manufacturer Support
When all トラブルシューティングの手順 fail, it’s a good idea to consult your CCTV camera’s メーカーサポート for expert assistance. Sometimes, the problem might be more complex than a simple connection issue または interference, and that’s where the experts come in handy. They’re equipped with the knowledge to diagnose issues that aren’t immediately obvious.
First, check if your camera is still under warranty coverage. If it is, you might be eligible for free repairs or even a replacement. Having this information ready can save you a lot of time and money. Look for the warranty details in your purchase documentation or on the manufacturer’s website.
Next, note down the サポート時間 of the manufacturer. Most companies have specific times when their support teams are available. Knowing this can help you plan your call or email so you can get assistance without unnecessary delays.
Don’t hesitate to ask detailed questions and provide as much information as possible about the issue. The more they know, the quicker they can help you. Taking this step might feel like giving up some control, but it actually empowers you to get your system back up and running swiftly.
よくある質問
How Can Weather Conditions Affect CCTV Camera Video Signals?
Weather interference can cause signal degradation in your CCTV cameras. Rain, snow, and extreme temperatures might disrupt the video feed. You’d want to guarantee your system is weatherproof to maintain your freedom from constant troubleshooting.
Do Certain Camera Brands Have More Video Signal Issues Than Others?
Yes, certain camera brands do have more video signal issues. When choosing a brand, consider reliability and the quality of their technical support. You want freedom from constant troubleshooting, so pick a brand that’s dependable.
Can a Power Surge Cause a No Video Signal Issue?
Absolutely, a power surge can cause a no video signal issue. When doing video troubleshooting, check if your CCTV camera experienced a power surge. It might have damaged components, affecting the signal. Stay proactive and free from worries!
Are Wireless CCTV Cameras More Prone to Signal Loss Than Wired Ones?
Like waves crashing against a shore, wireless CCTV cameras can be more prone to signal loss due to signal interference and network congestion. If you value freedom from wires, just be prepared for occasional disruptions.
What Are the Signs of a Failing Camera Sensor?
You’ll notice signs of a failing camera sensor through image distortion and sensor overheating. If the footage looks warped or the camera feels unusually hot, it’s time to contemplate a replacement for maintaining your freedom of security.