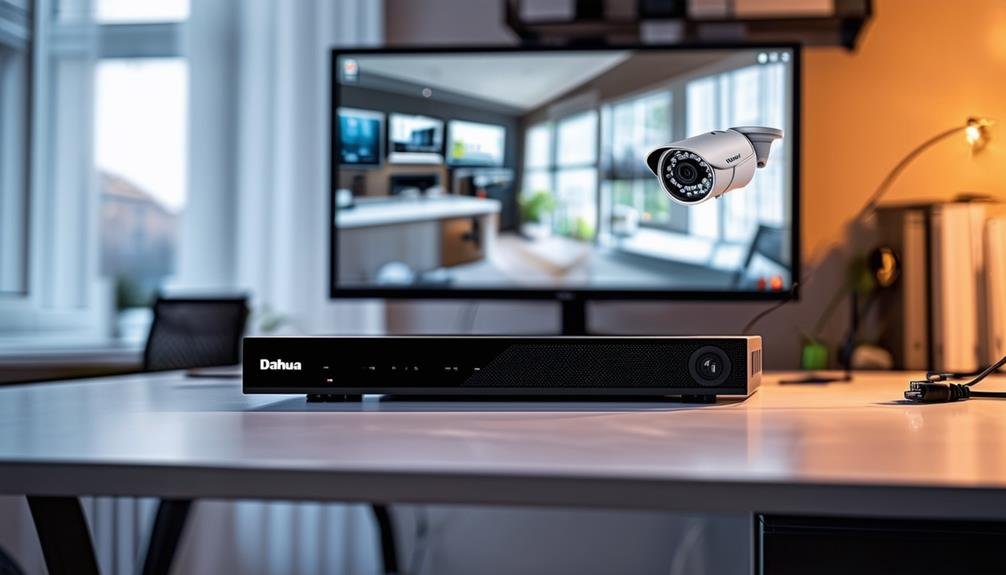
To set up your Dahua NVR, start by unboxing and organizing your components. Connect the NVR to a power source and monitor via HDMI or VGA. Confirm it’s linked to your network using an Ethernet cable or Wi-Fi. Power on the NVR and follow the on-screen prompts to configure the language, date, time, and a strong password. Adjust camera settings and recording options based on your needs, and don’t forget to check remote access features and firmware updates. These essential steps set the stage for effective monitoring, and there’s plenty more to explore to enhance your setup.
Unboxing Your Dahua NVR
Have you ever enthusiastically anticipated the arrival of a new device? You order it, track the shipping, and can’t wait to unbox it. When your Dahua NVR finally arrives, that excitement turns into action. Grab a knife or scissors, and carefully slice through the packaging tape—this moment is yours.
As you lift the box lid, you’ll find the NVR nestled securely, along with all the accessories. Take a second to appreciate the sleek design of the device. It’s not just a piece of tech; it’s a gateway to a more secure and liberated environment. You’ll also find a power supply, a user manual, and various cables. Each item plays a role in your journey to setting up a robust surveillance system.
Next, pull everything out gently. Lay the components on a clean, flat surface. Keep your workspace organized; this’ll make the setup easier. You might want to take a moment to read through the user manual, but don’t worry, it’s straightforward and easy to follow.
Connecting Power and Network
Now that you’ve unboxed your Dahua NVR, it’s time to connect the power and network. You’ll need to hook up the power supply and set up your network cable for proper functionality. Once that’s done, you can configure the IP settings to get everything running smoothly.
Power Supply Connection
Connecting the power supply to your Dahua NVR is an essential step in guaranteeing your surveillance system operates smoothly. Start by locating the power adapter that came with your NVR. Plug one end into a power outlet, and connect the other end to the NVR’s power input. Make certain the connection is secure; a loose connection can lead to power issues and disrupt your surveillance.
Once connected, check the power indicator on the NVR. It should light up, confirming that your device is receiving power. If it doesn’t, double-check your connections or try a different outlet. Remember, a reliable power source is fundamental for uninterrupted operation, so avoid using power strips if possible.
Next, verify that the environment around your NVR is free from obstructions and dust. This helps maintain efficient airflow and prevents overheating.
With the power supply connected and verified, you’re set for the next steps in your setup. Enjoy the freedom of knowing your surveillance system is ready to monitor your space effectively. You’ve taken a significant step towards securing your environment!
Network Cable Setup
Once your Dahua NVR is powered up, the next step is to set up the network connection. This is vital for remote access and seamless video streaming. You’ll need to connect both the power and network cables for ideal functionality. Here’s how you can do it:
- Connect the Power Cable: First, plug the power adapter into a wall outlet, then connect the other end to the NVR. Make sure it’s secure to avoid any interruptions.
- Connect the Network Cable: Take an Ethernet cable and plug one end into the NVR’s LAN port. The other end should go into your router or switch. This establishes the connection you need for internet access.
- Verify Connections: Check that both the power and network cables are firmly connected. Look for indicator lights on the NVR to confirm that it’s receiving power and connected to the network.
Getting these connections right is essential for your freedom to monitor your property effectively. Once you’ve done this, you’re one step closer to enjoying the benefits of your Dahua NVR setup!
Configuring IP Settings
Establishing a reliable network connection is essential for the ideal performance of your Dahua NVR. To get started, connect the power supply to your NVR and plug it into a wall outlet. Next, take your Ethernet cable and connect one end to the NVR’s LAN port and the other end to your router or switch. This wired connection guarantees stability and speed, giving you the freedom to monitor your space without interruptions.
Once everything’s powered on, you’ll need to configure the IP settings. Access the NVR’s interface using a monitor connected to it. Navigate to the network settings menu. Here, you can choose between DHCP or Static IP. If you want a dynamic IP address, select DHCP; this lets your router automatically assign an address. If you prefer a static IP for more control, manually enter an IP address that’s within the same range as your router’s IP, along with the subnet mask and gateway information.
After saving your settings, restart the NVR to apply changes. Your Dahua NVR should now be connected, ready to offer you the freedom to monitor your property effortlessly.
Initial Setup Process
Setting up your Dahua NVR can be an exciting yet straightforward process that lays the foundation for a reliable surveillance system. To get started, you’ll want to make certain you have everything ready to go. Here’s a quick guide to help you through the initial setup process:
- Connect Your NVR: Plug in your NVR to a power source and connect it to your monitor using an HDMI or VGA cable. This allows you to see what you’re doing during the setup.
- Network Connection: Make sure your NVR is connected to your network, either via Ethernet or Wi-Fi. A stable connection is vital for effective surveillance. If you’re using a wired connection, simply plug the Ethernet cable into the NVR and your router. For Wi-Fi, navigate to the network settings on the NVR interface to input your Wi-Fi credentials.
- Initial Configuration: Once everything’s connected, power on your NVR. Follow the on-screen prompts to set up the system language, date, time, and password. It’s important to choose a strong password to keep your surveillance system secure.
Configuring Camera Settings
Now that your NVR is set up, it’s time to configure your camera settings for best performance. You’ll want to adjust the resolution and frame rate to suit your needs and set up motion detection alerts for enhanced security. Let’s go through these important configurations step by step.
Adjusting Resolution and Frame Rate
When it comes to configuring your Dahua NVR’s camera settings, adjusting the resolution and frame rate is essential for achieving the best video quality. You’ve got the power to tailor your surveillance experience to meet your needs. Here’s how you can do it:
- Resolution: Choose a resolution that suits your environment. Higher resolutions like 4MP or 8MP provide more detail, but they also require more storage. If you want a balance, consider 1080p.
- Frame Rate: Adjust the frame rate based on the level of motion in your scene. For static areas, 15-20 FPS might suffice, while fast-moving scenes might need 30 FPS or higher to capture all the action.
- Bitrate: Find the right bitrate that complements your resolution and frame rate. A higher bitrate will yield better quality but will occupy more space on your storage.
Setting Motion Detection Alerts
If you want to enhance your surveillance system’s efficiency, configuring motion detection alerts is a crucial step. This feature lets you receive real-time notifications whenever movement is detected, ensuring you stay in the know about any activity around your property.
To set this up, log into your Dahua NVR and navigate to the camera settings. Look for the “Motion Detection” option, and enable it. You’ll see a grid overlay on your camera’s live view—this allows you to select specific areas for detection. Adjust the sensitivity level; too high, and you might get false alarms from passing cars or trees swaying in the wind.
Next, you’ll want to configure the alert settings. Decide how you want to be notified—through email, smartphone app, or both. Also, set time schedules for when you want the alerts active; you may not need them during the day if you’re home.
Setting Up Recording Options
To guarantee your Dahua NVR captures footage effectively, it’s vital to configure the recording options properly. You want to make certain that you’re recording what matters most, without feeling tied down by unnecessary settings. Here’s how to set it up for ideal freedom in your surveillance.
- Choose the Recording Mode: Decide whether you want to record continuously, on a schedule, or based on motion detection. Each mode has its benefits, but selecting the right one gives you control over what gets recorded and when.
- Set Resolution and Frame Rate: Adjust the resolution and frame rate to match your needs. Higher resolutions provide more detail, but they also consume more storage. Strike a balance that suits your surveillance goals while keeping storage considerations in mind.
- Configure Storage Options: Make sure your storage setup aligns with your recording preferences. You can use external hard drives or NAS for additional space. It’s a good idea to set up automatic overwriting to guarantee you never run out of storage, giving you peace of mind.
Remote Access Configuration
Setting up remote access on your Dahua NVR allows you to monitor your surveillance footage from anywhere, providing peace of mind while you’re away. To get started, you’ll need to configure the network settings on your NVR. Confirm you have a stable internet connection and note the IP address assigned to your device.
Next, enable the P2P feature in your NVR settings. This will generate a unique QR code to facilitate easy access via the Dahua app on your smartphone or tablet. Just scan the code, and you’re ready to go!
Here’s a quick reference table for the key steps in remote access configuration:
| Step | Action | Notes |
|---|---|---|
| 1. Network Settings | Access the settings menu | Check IP address |
| 2. Enable P2P | Turn on P2P feature | Generate QR code |
| 3. Download App | Install the Dahua app | Available on Android/iOS |
| 4. Scan QR Code | Use your device to scan | Connect to the NVR remotely |
| 5. Test Connection | Verify access via app | Confirm you’re connected to Wi-Fi |
Once everything is set up, you can easily access your camera feeds from anywhere in the world. This freedom not only enhances your security but also allows you to keep an eye on things when it matters most. Enjoy the convenience and control that remote access provides!
Updating Firmware
After configuring remote access on your Dahua NVR, keeping your device up to date is important for ideal performance and security. Regular firmware updates not only enhance functionality but also fix any vulnerabilities that could compromise your system. Here’s how to update the firmware effectively:
- Check for Updates: Start by visiting the Dahua website or using the Dahua Smart PSS software. Look for the latest firmware version available for your specific NVR model. It’s vital to guarantee you’re downloading the right files to avoid any issues.
- Download the Firmware: Once you find the appropriate update, download the firmware file to your computer. Make sure to read any release notes or instructions provided, as they’ll give you insight into new features or important changes.
- Upload the Firmware: Log into your NVR’s web interface. Navigate to the firmware update section, typically found under system settings. Select the downloaded file and click on the update button. The NVR will reboot once the update is complete, and you should see a confirmation message.
Troubleshooting Common Issues
Sometimes, users encounter issues with their Dahua NVR that can disrupt functionality or lead to confusion. If you’re facing problems, don’t worry—you’re not alone. Here are some common issues and how to tackle them.
First, if your NVR isn’t powering on, check the power supply and connections. Verify the outlet is working and that all cables are securely connected. A loose connection can easily cause a power failure.
If you can’t access the NVR remotely, verify your network settings. Make sure your NVR is correctly connected to your router and that your firewall isn’t blocking the necessary ports. You may need to check your IP settings or even reset your router.
Another frequent issue is video loss from cameras. Check the camera connections and verify they’re powered on. If the cameras are online but not displaying video, try rebooting the NVR. Sometimes, a simple restart can resolve temporary glitches.
If you find that your NVR isn’t recording, check your storage settings. Verify that the hard drive is properly installed and formatted. If the drive is full, you’ll need to delete older footage or adjust your recording schedule.
Lastly, if you’re experiencing a lag in video playback, consider reducing the number of cameras or lowering the resolution settings. This can help free up processing power.
Frequently Asked Questions
Can I Use Third-Party Cameras With My Dahua NVR?
Imagine trying to fit a square peg in a round hole; it’s frustrating, right? When it comes to using third-party cameras with your Dahua NVR, it can be hit or miss. While some brands may integrate smoothly, others might not work well at all. It’s often best to stick with Dahua cameras for ideal compatibility. If you crave freedom in your setup, just make sure the cameras support the ONVIF standard for better chances of success.
How Many Cameras Can I Connect to One Dahua NVR?
You can connect a varying number of cameras to a Dahua NVR, depending on the model you’ve got. Most Dahua NVRs support anywhere from 4 to 64 channels. It’s essential to check your specific NVR’s specifications to know the exact limit. Keep in mind that the more cameras you add, the more bandwidth and storage you’ll need, so plan accordingly to guarantee you maintain quality and performance without any hiccups.
Is There a Mobile App for Dahua NVR Monitoring?
Imagine sipping your morning coffee, effortlessly monitoring your home security from your smartphone. Yes, there’s a mobile app for Dahua NVR monitoring! With just a few taps, you can view live feeds, receive alerts, and manage your cameras from anywhere. It’s like having a watchful eye on your property, granting you the freedom to roam without worry. So, download the app, and stay connected to your world anytime, anywhere.
What Internet Speed Is Required for Remote Access?
For smooth remote access to your NVR, you’ll need a minimum internet speed of 1.5 Mbps for both upload and download. However, if you want a better experience, aim for 3–5 Mbps or higher. This’ll guarantee you get clear video feeds without lag. Remember, the more cameras you have, the more bandwidth you’ll need. So, keep an eye on your connection speed to maintain that freedom of monitoring wherever you are!
How Do I Reset My Dahua NVR to Factory Settings?
If you ever find yourself needing to reset your Dahua NVR to factory settings, it’s a simple process. First, guarantee the device is powered on. Then, locate the reset button, usually found on the back. Press and hold it for about ten seconds until you see the indicator lights flash. This’ll erase all settings, giving you a fresh start. Remember, freedom in your setup means knowing how to reset when necessary!


