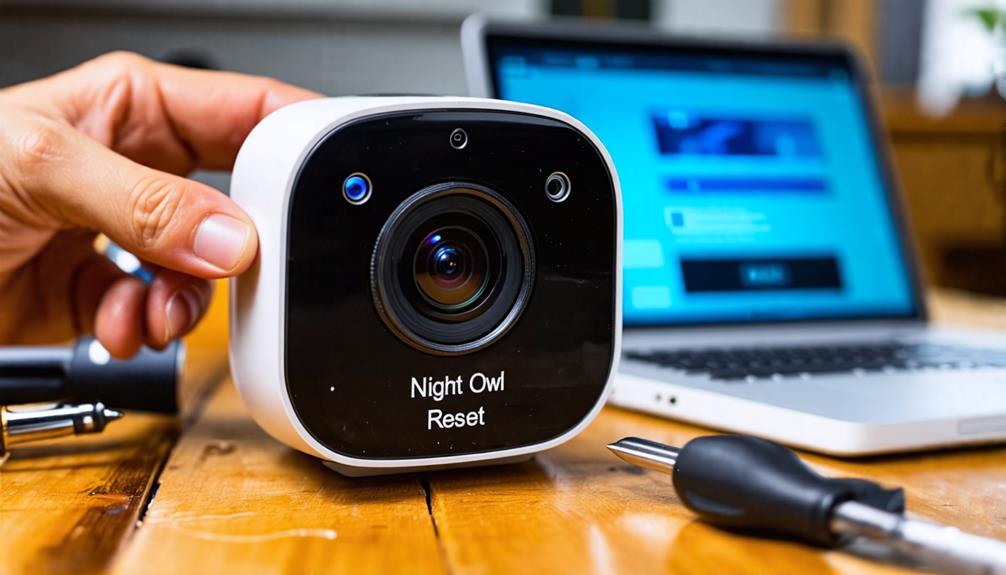
To reset your Night Owl camera, start by ensuring it's powered on. Locate the reset button, usually at the back or bottom, and press it with a pin or paperclip. Hold the button for about 10 seconds until the LED flashes, indicating the reset is in progress. This will revert the camera to factory settings, so back up any important footage before you begin. Once done, reconfigure your camera using the Night Owl app. If you want to optimize your setup or troubleshoot common issues, there's plenty more to explore.
Understanding the Reset Process
Have you ever wondered how to effectively reset your Night Owl camera? Understanding the reset process is key to ensuring your device operates smoothly and meets your security needs. To start, locate the reset button, which is typically found on the back or bottom of your camera. Make sure your camera is powered on and connected to a power source before you begin the reset. Press and hold the reset button for about 10 seconds until you see the LED indicator flash. This flashing light signals that the reset process is in motion.
Once you release the reset button, your Night Owl camera will revert to factory settings. Keep in mind that this means all your custom configurations, including Wi-Fi settings, will be erased. So, it's crucial to know that a reset is most beneficial when you're facing connectivity or performance issues. After the reset, you'll need to reconnect your camera to your Night Owl system. This process may require you to reinstall the camera using the Night Owl Protect app or software.
Preparing Your Night Owl Camera
Before diving into the reset process, what steps should you take to prepare your Night Owl camera? The goal is to make certain you're ready to restore factory settings without losing any important data. Here's what you need to do:
- Confirm the camera's powered on and connected to a stable power source.
- Back up any vital video footage or configurations, as the reset will erase everything.
- Locate the reset button, typically found on the back or bottom of your camera; you might need a pin or paperclip to press it.
- Consult your user manual for specific instructions regarding the reset process and the exact location of the reset button.
Taking these steps not only protects your valuable footage but also guarantees a smooth shift when you're ready to reconnect your camera. After you reset the camera, you'll need to reconfigure your settings through the Night Owl application or web interface. This means you'll have to set up your password and other configurations from scratch, so having a clear plan in mind will save you time.
Accessing the Main Menu
To access the Main Menu on your Night Owl camera, make sure your DVR is powered on and connected to a monitor. You can navigate the menu options using the DVR remote control or a connected mouse. Once you're in, you'll find various sections that make it easy to adjust settings and features.
Power On DVR
When you're ready to power on your Night Owl DVR, make certain it's plugged into a direct wall outlet and that the power switch is in the "On" position. This simple step is essential for guaranteeing your device is active and ready for use. Once powered on, connect the DVR to a monitor or TV using an appropriate HDMI cable. This will allow you to view the display and interact with the system interface seamlessly.
Now, grab your DVR remote or connect a mouse to navigate through the main menu. Here are some key points to keep in mind:
- Verify you have the correct admin credentials to access all features.
- Familiarize yourself with the organized sections: Live View, Playback, and Settings.
- Use the settings adjustments to customize your experience.
- Connecting your device properly maximizes its potential.
Navigate Menu Options
Accessing the main menu on your Night Owl DVR is a straightforward process that sets the stage for managing your camera settings. To get started, power on your Night Owl camera and make certain it's connected to a monitor. Using the DVR remote or a connected mouse, right-click on the screen to bring up the menu options. This is where you'll begin to navigate through the main menu.
Once you're in the main menu, you'll see various icons corresponding to different settings, playback, and configuration options. If you're looking to reset your camera or adjust its settings, be certain to access the "Settings" or "Maintain" tab. Just remember to have your admin credentials handy, as some changes might require elevated permissions.
Here's a quick reference table to help you visualize the options you'll encounter:
| Menu Option | Action |
|---|---|
| Settings | Access and alter settings |
| Playback | Review recorded footage |
| Configuration | Adjust camera configurations |
| Reset | Restore factory settings |
| Maintenance | System upkeep and checks |
With these steps, you're empowered to take control of your Night Owl system!
Navigating to Default Settings
Finding your way to the default settings on your Night Owl camera is straightforward. Start by powering on your device and ensuring it's connected to a monitor, giving you visual access to the menu. Use the DVR remote or a connected mouse to navigate to the main menu. Here, you'll find various sections that make it easy to locate what you need.
Next, look for the settings section, often represented by a gear icon. This is where you can explore options related to system configuration. Within this section, search for the default configuration option to reset your camera settings. You'll encounter categories like System Info, Network Settings, and Display Settings—all essential for restoring your camera's functionality.
Before you proceed, consider these points:
- Resetting will erase all custom settings.
- You'll lose any saved recordings.
- Factory defaults will restore original configurations.
- This process can solve various operational issues.
Once you've reviewed your options, you'll need to confirm the reset action when prompted. Keep in mind, this step is important, as it will revert your Night Owl camera to its factory defaults, liberating it from previous configurations. By doing this, you're not just resetting; you're reclaiming control over your system, ready to tailor it to your current needs. Just follow these steps, and you'll be on your way to a fresh start with your Night Owl camera.
Confirming the Factory Reset
Confirming the factory reset of your Night Owl camera is an important step in restoring it to its original settings. To begin, access the main menu and navigate to the settings section where you'll find the option for default configuration. This is where you take control and initiate the reset process.
Once you select the default configuration, a confirmation prompt will appear on your screen. You'll need to click 'Yes' to confirm your choice. Remember, this action will erase all your custom settings and recordings, fundamentally wiping the slate clean and returning the camera to its factory defaults. It's a liberating moment to reclaim your device's original functionality.
After you confirm the reset, the camera will automatically reboot. This reboot is essential as it prepares the system for the next steps. Once the reset is complete, you'll have a clean slate to work with, allowing you to reconfigure your camera settings without any remnants of previous configurations.
During this initial setup process, don't forget to create a new password. This is crucial for securing your camera and ensuring that you have the freedom to control your surveillance without outside interference. The factory reset is your opportunity to set things right, so embrace the process and enjoy the newfound freedom of a freshly configured Night Owl camera at your disposal.
Troubleshooting Common Issues
Experiencing issues with your Night Owl camera can be frustrating, but most problems have straightforward solutions. Before diving into a factory reset, take a moment to troubleshoot the common issues you might be facing.
- Check the LED status: Verify your camera's powered up and the outlet is functioning.
- Inspect connections: Look at the HDMI cable and nearby devices that might interfere with connectivity.
- Review motion detection settings: Make certain sensitivity is set correctly and nothing obstructs the detection area.
- Verify storage capacity: Playback issues often stem from insufficient storage; check your settings accordingly.
If you find yourself dealing with video loss or connectivity issues, start by checking the LED status. If everything looks good there, inspect the HDMI connection. For motion detection problems, confirming your settings can save you a headache. If playback issues persist, it's time to review your storage capacity.
Should these steps not resolve your issues, consider accessing the main menu to find the reset option. A factory reset might be necessary if problems continue. This process will restore your camera to its default settings, but be sure to reset the password afterward. Don't forget to confirm the action when prompted; your freedom to monitor your surroundings depends on it! By tackling these common issues, you can regain control of your security system and enjoy peace of mind.
Post-Reset Setup Steps
After resetting your Night Owl camera, you'll want to start the setup process by reconnecting it to power. You can use the Night Owl Protect app or the DVR/NVR interface to add the camera back into your system. From there, follow the on-screen prompts to configure all necessary settings for peak performance.
Device Configuration Procedures
Once you've completed the factory reset on your Night Owl camera, the next steps are essential for getting everything set up correctly. First, reconnect your camera to the power supply and let it boot up completely. You'll want to verify it's ready to communicate with your mobile device.
Next, use the Night Owl Protect app to add the camera back to your system. Select "Add Device," and follow the on-screen prompts to scan the QR code or enter the UID. Make sure your camera is on the same Wi-Fi network as your mobile device for seamless configuration.
After connecting, take a moment to adjust your camera settings. Here are some important configurations to take into account:
- Motion detection zones: Define areas of interest for alerts.
- Sensitivity settings: Choose how responsive your camera should be.
- Notification preferences: Decide how you want to receive alerts.
- Firmware updates: Check for the latest updates in the app settings.
These steps will verify your Night Owl camera operates at its best, giving you the freedom to monitor your space securely.
Mobile App Integration Steps
Integrating your Night Owl camera with the mobile app is a straightforward process that sets the foundation for effective monitoring. To kick things off, download and install the Night Owl Protect app from the App Store or Google Play Store. Once it's ready, open the app and either create a new account or log in to your existing one.
Next, tap the "Add Device" option in the app. You have two choices here: you can scan the QR code displayed on your camera or enter the UID manually to establish a successful connection. Just make sure your smartphone is connected to the same Wi-Fi network that you plan to use for your camera during this setup process—this is essential for ideal connectivity.
After adding your camera, it's time to customize settings according to your security needs. This is where you can adjust motion detection sensitivity and set up notifications that keep you informed about any activity. With these steps completed, you'll be well on your way to enjoying the freedom and peace of mind that comes with effective home monitoring.
Restoring Recordings and Settings
When it comes to restoring recordings and settings on your Night Owl camera, the process is straightforward. If you've performed a factory reset, you'll need to reconfigure your settings. Start by accessing the device's main menu and maneuvering to the playback section to view any saved footage. If you've lost recordings, remember that keeping regular backups on an external hard drive or cloud service is vital for preventing data loss in the future.
To successfully restore your settings after a reset, use the Night Owl Protect App or the device's web interface. Make certain to enter the correct network settings to guarantee seamless operation. Keep an eye on the following aspects:
- Verify all motion detection settings are reconfigured.
- Check your recording schedules to confirm they're set correctly.
- Regularly back up important footage to avoid emergencies.
- Familiarize yourself with the playback options available for reviewing recordings.
After restoring your settings, take a moment to verify everything is functioning as intended. The freedom to monitor your space effectively relies on these configurations. By staying proactive about backups and reconfiguring your camera properly, you can enjoy peace of mind knowing your Night Owl camera is ready to capture what matters most. Don't forget, maintaining control over your recordings and settings guarantees that you're always prepared, no matter what surprises life throws your way.
Contacting Technical Support
Sometimes, you might run into issues that require assistance beyond what you can solve on your own. When that happens, reaching out to Night Owl Technical Support can be a game-changer. Whether you're dealing with password resets, network connectivity problems, or need general troubleshooting assistance, their customer support team is equipped to help you navigate your concerns.
To streamline the process, it's a good idea to have your device model and serial number ready before you contact support. This information guarantees that the representatives can provide tailored assistance for your specific situation. You can connect with them via live chat on the product support page or by phone, depending on your preference.
For immediate help, don't forget about the help button within the app. It's designed for quick access to technical support and can be a lifesaver when you need real-time assistance. If your issue is more complex, be prepared to give a detailed description of your problem and mention any troubleshooting steps you've already attempted. This way, Night Owl Technical can better understand your situation and work towards a resolution more efficiently.
Frequently Asked Questions
How to Factory Reset Night Owl Camera System?
To factory reset your Night Owl camera system, first, find the reset button on the back or bottom of the camera. Make sure it's powered on and connected to your network. Press and hold the reset button for about 10 seconds until the LED blinks, signaling the reset. Afterward, you'll need to set it up again using the Night Owl Protect App, as all previous settings will be erased. Enjoy the freedom of a fresh start!
How Do I Get My Night Owl Camera Back Online?
Isn't it ironic how technology can feel so liberating yet leave you frustrated? To get your camera back online, start by checking its power connection and ensuring the LED's happy. Then, make sure your Ethernet cable's snug in both the camera and router. A quick restart of both devices can work wonders. If it's still offline, explore the Night Owl Protect App to check settings. Freedom from frustration is just a few steps away!
Why Are My Night Owl Cameras Not Working?
If your Night Owl cameras aren't working, it could be due to several issues. First, check the power supply; a faulty adapter or poor connection might be the culprit. Next, verify the HDMI cable's secure. Look for the LED status indicators to confirm power. If the network's misconfigured, it could cause connectivity problems. Finally, make sure you've updated the firmware to the latest version to avoid bugs. You've got this!
How Do I Reset My Night Owl Without a Password?
Ever wonder if you can regain control of your device? You can! To reset your Night Owl without a password, find the reset button, usually on the back or bottom. Press it for about 10 seconds while the camera's on until the LED blinks. This'll wipe your previous settings, giving you a clean slate. After that, set it up again using the Night Owl Protect app. You deserve the freedom to access your camera!


