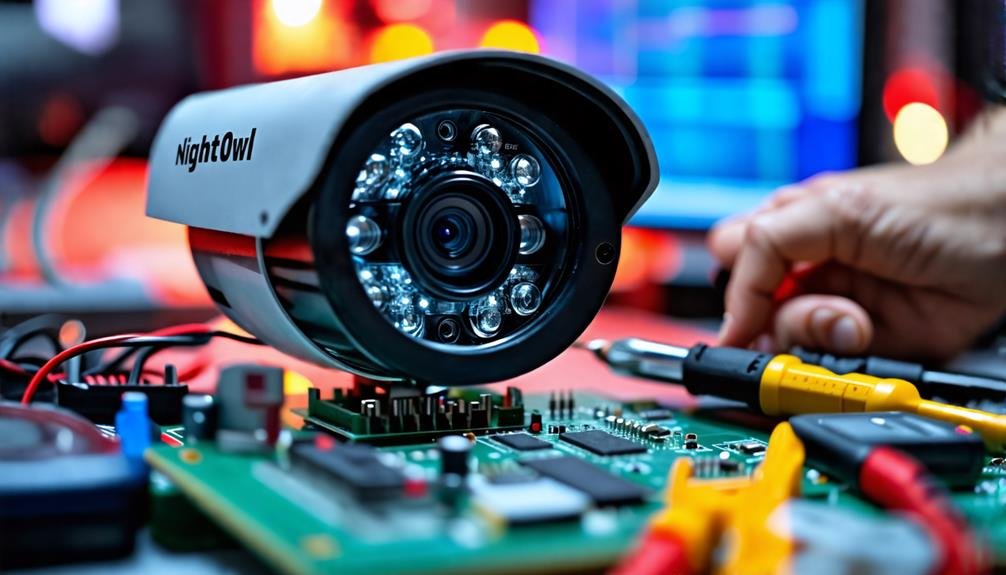
Fixing your Night Owl camera is simple if you know what to check. Start by making sure all cables and connections are secure. If there's no video signal, inspect the HDMI port and power supply. For image quality issues, clean the lens and adjust brightness and contrast settings. If motion detection isn't working, verify it's enabled and check the camera's angle. Finally, confirm your camera is within Wi-Fi range for connectivity problems. If problems persist, consulting support or exploring more detailed guides might help you find the perfect solution to your camera issues.
Initial Setup and Configuration
To successfully set up your Night Owl camera system, start by verifying all hardware components, including the cameras and power supplies, are properly connected. This step is essential; without the right power and connections, your cameras won't function, leaving you without the freedom to monitor your surroundings. Once everything's connected, install the Night Owl Protect CMS software on your device. This software is your gateway to configuring your camera settings and optimizing your surveillance experience.
Next, explore the configuration options within the CMS. Adjust the camera resolution settings to fit your specific needs. Higher resolution means better clarity, but it can also consume more bandwidth, so choose wisely based on your internet capabilities. Don't forget to set up motion detection parameters; this allows you to receive alerts tailored to your surveillance requirements. Position your cameras effectively to guarantee they capture the areas you want to monitor the most.
Common Issues and Solutions
Sometimes, you might run into issues like no video signal, unclear images, or motion detection failures with your Night Owl camera. Don't worry, these problems are common and often have straightforward solutions. Let's go through some quick fixes to get your camera back on track.
No Video Signal
Experiencing a no video signal issue with your Night Owl camera can be frustrating, but it's often a straightforward problem to fix. Start by checking a few key connections to verify everything's properly connected.
- HDMI Port: Inspect the HDMI port on your TV or monitor. Make sure it's receiving the video signal correctly. Sometimes, switching to a different input port can resolve the issue.
- Power the Camera: Confirm that the camera's power adapter is plugged in and that the outlet is functional. A power-related issue can often lead to a no video signal.
- Camera Cable: For wired BNC cameras, bypass any splitters and connect the camera directly to the power adapter. This helps verify all connections are solid and stable.
Lastly, double-check that all video/power cables are securely connected to both the camera and the recorder. If you're still facing issues, test the camera with another display to identify if the problem lies with a specific channel. With these steps, you'll be well on your way to enjoying the freedom of reliable surveillance with your Night Owl cameras.
Image Quality Problems
After addressing the no video signal issue, you might encounter problems with image quality that can affect your surveillance experience. Blurry images are often the result of a dirty lens or misalignment. Start by cleaning the lens and checking for any obstructions that might be in the way.
If your footage appears too bright or too dark, adjust the brightness and contrast settings in the Image Settings menu. This can make a considerable difference in clarity. For nighttime footage, verify your Night Vision LEDs are functioning properly and free from dirt or obstructions. If you notice bright spots or glare, reposition your camera to avoid direct reflections from windows or glass surfaces.
Another crucial step is to keep your camera's firmware up to date. Upgrading it can enhance image clarity and resolve any software glitches that may be affecting your system. By taking these actions, you can greatly improve your camera's image quality and guarantee your surveillance system operates effectively. Enjoy your newfound freedom with clearer images, knowing you're taking charge of your security!
Motion Detection Failures
Motion detection failures can be frustrating, especially when you rely on your Night Owl camera for security. To guarantee that your system is functioning at its best, consider these common issues and solutions:
- Sensitivity Settings: Make sure that the sensitivity settings for motion detection are properly adjusted. Low sensitivity may prevent the camera from triggering alerts for movement in its viewing area.
- Camera Positioning: Position your cameras at least 7 feet high and angle them slightly downward. This enhances PIR detection and minimizes false alarms caused by heat sources or moving objects outside the detection zone.
- Obstructions: Regularly check for obstructions in the camera's field of view, such as branches or furniture. These can block movement and prevent the camera from detecting motion effectively.
Additionally, verify that the motion detection feature is enabled in the system settings, and don't forget to update the camera firmware to the latest version. These updates often include improvements to motion detection algorithms and performance. With these adjustments, you can regain confidence in your Night Owl camera's ability to keep your space secure.
Image Quality Adjustments
To enhance the image quality of your Night Owl camera, it is crucial to adjust the brightness and contrast settings based on your environment. Don't forget to clean the lens regularly, as dirt and smudges can lead to blurry footage. Also, optimizing the camera angle can help eliminate glare and improve your overall viewing experience.
Adjust Brightness and Contrast
Adjusting brightness and contrast can make a significant difference in the quality of your Night Owl camera footage. To enhance visibility and clarity, you'll want to access the Image Settings menu through the Night Owl Protect CMS software. Here's a quick guide to help you with those adjustments:
- Experiment with Brightness: Try increasing or decreasing the brightness settings based on your lighting conditions. This will help improve image quality and clarity, especially in low-light areas.
- Adjust Contrast: Boosting the contrast can enhance the distinction between light and dark areas, eliminating flat or washed-out images. This can make a world of difference in your footage.
- Check Camera Placement: Regularly evaluate your camera's placement and angle. Improper positioning can necessitate further adjustments to brightness and contrast, affecting overall image quality.
Consider using a sunshade if available, as it helps reduce glare from direct light sources, allowing for better adjustments. With these simple steps, you can guarantee your Night Owl camera captures the best possible footage, giving you the freedom to monitor your surroundings effectively.
Lens Cleaning Techniques
Keeping your Night Owl camera lens clean is crucial for maintaining peak image quality. Regularly inspect your camera lens for dirt, dust, or smudges, as even minor obstructions can greatly impair your captures. To clean the lens, use a microfiber cloth. This gentle material avoids scratches that can happen with abrasive fabrics.
For tougher grime, apply a small amount of lens cleaning solution to the cloth, not directly onto the lens. This helps remove stubborn marks while preventing moisture damage. Before you start cleaning, make certain to power off your camera. This precaution avoids any potential electrical issues or unintentional lens movements that could occur during the process.
After you've cleaned the lens, it's important to check your camera settings. Adjusting the brightness and contrast may be necessary to optimize clarity, especially after revitalizing the lens condition. By maintaining a clean lens, you'll guarantee that your Night Owl camera consistently delivers high-quality images, allowing you the freedom to capture moments without compromise. So, take a moment to care for your lens—it's worth the effort for those stunning shots!
Camera Angle Optimization
Finding the right camera angle can make a significant difference in the quality of your Night Owl camera's footage. Proper camera angle enhancement not only improves image quality but also maximizes your night vision capabilities. Here are some key tips to take into account:
- Height and Angle: Position your camera at least 7 feet high and angle it slightly downward. This setup increases the field of view while reducing obstructions.
- Avoid Glare: Steer clear of pointing your camera toward bright light sources. Adjust the angle to minimize glare that can degrade image clarity, especially at night.
- Reflective Surfaces: If your camera is near reflective surfaces like windows, reposition it. This helps reduce infrared reflection, improving night vision performance.
Additionally, don't forget to clean your camera lens regularly to maintain clear visibility. You can also adjust the image settings menu to fine-tune brightness and contrast based on your environment. With these adjustments, you'll guarantee that your Night Owl camera captures the best possible footage, day or night. Embrace the freedom of ideal surveillance!
Power Supply Troubleshooting
When your Night Owl camera isn't functioning, power supply issues are often the first thing to investigate. Start by confirming that your camera is properly connected to a functional power supply. Check both the power adapter and the outlet for any faults. If you're not seeing any LED indicators lit on the camera, it's a sign that something might be off.
To troubleshoot effectively, bypass any power splitters and connect the camera directly to the power adapter. This simple step can help you rule out issues caused by faulty connections. If the LED indicators light up, your camera's getting power, but if they don't, you may need to inspect or replace the power cords.
If you're using IP cameras, it's also essential to verify a strong Wi-Fi signal. Make sure your camera's within range of the router to maintain both power and connectivity. Weak signals can lead to video signal loss, leaving your surveillance efforts compromised.
Regularly inspecting and maintaining your power cords and connections can prevent future disruptions in your camera's functionality. By being proactive, you'll save yourself from more significant headaches down the road. Keep these steps in mind, and you'll be well on your way to fixing any power supply issues that could be causing your Night Owl camera to falter.
Network Connectivity Problems
At times, network connectivity problems can be a frustrating barrier to your Night Owl camera's performance. If you're experiencing issues, don't worry—there are several steps you can take to restore your connection. Here's a quick checklist to help you troubleshoot:
- Check Your Wi-Fi Signal: Verify your Night Owl camera is within the range of your Wi-Fi signal. A weak signal can lead to persistent connectivity issues.
- Review Network Settings: Double-check that your camera's network settings are correct. This includes confirming the SSID and password for your Wi-Fi network. Any typo could prevent your camera from connecting.
- Restart Devices: Sometimes, all it takes is a simple restart. Power cycle your wireless router and the Night Owl camera to refresh the network connection. This step can resolve temporary glitches.
You should also verify that your router's firmware is up to date. Outdated firmware can cause compatibility issues with connected devices. If you have multiple cameras, check for IP address conflicts by reviewing the connected devices list on your router. Conflicts can prevent your Night Owl camera from maintaining a stable connection.
Night Vision Functionality
If your Night Owl camera's connectivity issues are resolved, but you're still having trouble with night vision, it's important to check several key components. First, verify that the night vision LED is activated and functioning properly. This LED is vital for capturing clear images in low-light conditions, so if it's not working, your night vision may be compromised.
Next, take a look at the IR Cut Filter. If this component isn't operational, it can prevent the camera from switching to night vision mode effectively. You'll want to test the camera with a known working cable to rule out any power delivery or connectivity issues affecting night vision performance. Sometimes, a faulty cable can be the culprit behind poor night vision.
If you're still having issues, consider powering the camera with a separate power adapter to make sure it receives adequate power for its night vision functionality. Additionally, if your Wi-Fi signal strength is weak, installing a Wi-Fi Extender Antenna can enhance connectivity. A poor signal can hinder the camera's ability to utilize its night vision features effectively.
App and Software Issues
While troubleshooting your Night Owl camera, it's important to address any app and software issues that might hinder its performance. A few key areas to focus on can help restore functionality and guarantee a smooth user experience.
- Network Connection: Make sure your camera is powered on and connected to the same network as your mobile device. A stable network connection is vital for the Night Owl Protect app to display your device properly.
- Software Updates: If you're using MacOS Monterey 12.3.1 and facing compatibility issues with the Night Owl Protect CMS, check for available software updates. This can resolve conflicts and improve overall performance.
- Permissions and Firmware: Confirm all necessary permissions for the Night Owl Protect app are granted, including location and network access. Additionally, verify that the firmware version for your Night Owl X/X HD series is up-to-date. If things still aren't working, a device reset can often restore connectivity.
If the Night Owl Connect app is malfunctioning, consider reinstalling the app or clearing its cache. These actions can enhance performance and rectify any lingering issues. By addressing these app and software challenges, you can enjoy the freedom of a well-functioning camera system, empowering you to monitor your space without hassle.
Seeking Expert Assistance
When troubleshooting your Night Owl camera proves challenging, reaching out for expert assistance can be a wise decision. If those initial steps don't resolve the issue, reconnecting with a Night Owl technician can provide ongoing support and guidance. Document the specific problems you're facing and any troubleshooting attempts you've made. This information can be invaluable for the support team, enabling them to offer more effective assistance tailored to your unique camera setup.
Don't hesitate to utilize the Night Owl customer support hotline or email. They're equipped to deliver personalized help that addresses your specific concerns, whether it's related to your recorder or camera setup. Additionally, the Night Owl official website is a treasure trove of updated troubleshooting articles and guides that might just have the answers you need.
Engaging with online forums or community groups can also be incredibly beneficial. You can share your experiences and solutions, gaining insights from other users who might have faced similar issues. This collaborative spirit can enhance your troubleshooting experience, providing tips and tricks that you might not find elsewhere.
Frequently Asked Questions
Why Is My Night Owl Camera Not Working?
If your Night Owl camera isn't working, it could be due to several reasons. First, make certain it's getting power and that all connections are secure. A loose cable might be the culprit. Try restarting the camera to clear any glitches. Don't forget to check the lens for dirt that could be blocking the view. Finally, verify your network settings are correct; that can really impact its performance and accessibility.
How Do You Reset the Night Owl Camera?
To reset your Night Owl camera, find the reset button, usually located on the back or bottom. Press and hold it for about 10 seconds until the LED indicator flashes. Before doing this, make sure to remove the camera from the Night Owl Protect app to avoid connectivity issues. Remember, resetting will erase all custom settings, so you'll need to reconfigure it afterward. Check your user manual for specific instructions tailored to your model.
Why Is My Night Camera Not Working?
Imagine you're checking your night camera for an essential moment, but it's not working. Don't worry; it happens. Start by ensuring the power supply is solid—if the adapter's unplugged, you're out of luck. Then, check your cables; loose ones can ruin your night vision. Finally, inspect the lens for dirt. With these steps, you'll regain control and capture the freedom of your space after dark.
Why Is My Night Owl Camera Not Picking up Motion?
If your camera's not picking up motion, it could be due to a few reasons. First, check if motion detection's enabled in the settings. You might need to adjust the sensitivity too; low settings can miss smaller movements. Make sure there aren't any obstructions blocking the view and that it's positioned at least 7 feet high, angled downwards. Finally, avoid placing it near heat sources that could interfere with its sensors.


